Tutorial 001: MKR
*coughcough* I've actually been thinking of making a tutorial, but don't know which icon to tut XDD Please do not attempt to throw any objects of substantial mass at me and if you do not understand, just ask! :D
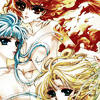
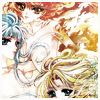
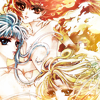
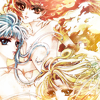
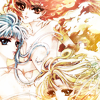
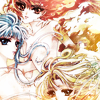
Oh well, for this tutorial we will be making the old!icon below:
from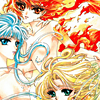
to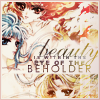
While I use CS2, it should work for older versions of Photoshop as well as PSP. :D
So let's get started, shall we ?
step one:

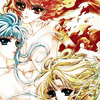
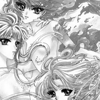
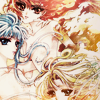
I started with this image (taken from Aethereality, cropped the three girls out and resized the image to 100x100 pixels.
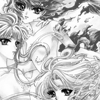
So you'll get something like this:
After this, you can do what ever routine you have for sprucing up your icons. I didn't have to fix my base up that much since it was already pretty okay, but I used the Unsharp Mask (Filter >> Sharpen >> Unsharp Mask) and set the amount to about 35% for good measure.
step two:
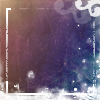
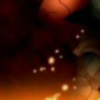
Create a new layer, and fill it with #000000 (namely, black). Set it to Hue at 100%. Alternatively, you can choose to make a new adjustment layer (Layer >> New Adjustment Layer >> Gradient Map) and choose a black and white gradient, then check the Reverse checkbox if needed.
step three:
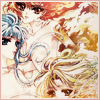
Duplicate your background layer 3 times, then drag all three copies on top of the Hue layer/Adjustment layer. So that means that your black layer will be in between the Background layer and the 3 copies. Set the first copy to Soft Light at 100%, the second copy to Multiply at around 36%, and the third copy to Color Burn at 38%. You should get something similar to the image above.
step four:
(this step is optional, skip to step five if you want to)
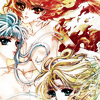
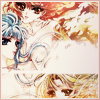
I found the area between Hikaru and Umi a little too dark, so I made a new layer, grabbed my 9px round brush and colored that part in #ffdbcf. Then I set it to Soft Light at 100%.
step five:
Then I got this texture by cdg and set it to soft light at 100%
>>
And this sparkly light texture from colorfilter,Screen at 100%.

>>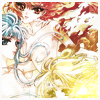
The light texture was covering a good part of Fuu's face, so I moved the whole texture above her head.
And this texture by drave, set to Screen at 100%
>>
step six:
Then I applied this brush by gender, set to Soft Light at 56%
>>
I know this is getting unusually long, and you might be like "wtf, I can't see anything", do not despair. We're going for subtlety here! XD
step seven:
>>
I duplicated the Background layer once, dragged all the way to the top of my layers. And this time, I just Unsaturated (Shift+Ctrl+U) the image. I set the duplicated layer to Soft Light at 67%
step eight:

>>
A new layer, flood fill it with #001055, set it to Soft Light at 32%. :D
step nine:
>>
Almost done! This gradient by adoralyna, then set it to Multiply at 19%. Our first major color change! XD
step ten:
>>
Create a new layer on top of everything, select the whole canvas (Ctrl+A) then go to Edit >> Stroke. Create a 2 px border around in #fafafa. Then Stroke that layer again, this time change the settings to 1 px and the color to #e8bebe. Drag this layer in between the multiply-ish gradient layer and the blue layer.
step eleven:
Time for text! :DD
>>
Create a new layer below the multiply-ish gradient layer, then use any random Photoshop brush (preferably, a small one) then make a little scribbly thingy to where you want your text to be. Gaussian Blur this layer by 2-3 px. If you want, you can always change the opacities of both the scribble and text to suit your taste.
Then the text!
beauty
font: Allegro
size: 30pt
kerning: 0
is within the (in CAPS)
font: Arial Black
size: 5pt
kerning: 200
eye of the (in CAPS)
font: Arial Black
size: 6pt
kerning: 200
beholder (in CAPS)
font: Century Gothic
size: 9pt
kerning: 400
*all the text is below the gradient layer, but above the scribble
step twelve:
You're done! But please, do not copy word for word the tutorial. It is meant as a guide as to how I made the icon. Now didn't your mother tell you that it's not nice to be a copycat. Shame on you... >DD
*dies*
Oh well, for this tutorial we will be making the old!icon below:
from
to
While I use CS2, it should work for older versions of Photoshop as well as PSP. :D
So let's get started, shall we ?
step one:

I started with this image (taken from Aethereality, cropped the three girls out and resized the image to 100x100 pixels.
So you'll get something like this:
After this, you can do what ever routine you have for sprucing up your icons. I didn't have to fix my base up that much since it was already pretty okay, but I used the Unsharp Mask (Filter >> Sharpen >> Unsharp Mask) and set the amount to about 35% for good measure.
step two:
Create a new layer, and fill it with #000000 (namely, black). Set it to Hue at 100%. Alternatively, you can choose to make a new adjustment layer (Layer >> New Adjustment Layer >> Gradient Map) and choose a black and white gradient, then check the Reverse checkbox if needed.
step three:
Duplicate your background layer 3 times, then drag all three copies on top of the Hue layer/Adjustment layer. So that means that your black layer will be in between the Background layer and the 3 copies. Set the first copy to Soft Light at 100%, the second copy to Multiply at around 36%, and the third copy to Color Burn at 38%. You should get something similar to the image above.
step four:
(this step is optional, skip to step five if you want to)
I found the area between Hikaru and Umi a little too dark, so I made a new layer, grabbed my 9px round brush and colored that part in #ffdbcf. Then I set it to Soft Light at 100%.
step five:
Then I got this texture by cdg and set it to soft light at 100%
>>
And this sparkly light texture from colorfilter,Screen at 100%.
>>
The light texture was covering a good part of Fuu's face, so I moved the whole texture above her head.
And this texture by drave, set to Screen at 100%
>>
step six:
Then I applied this brush by gender, set to Soft Light at 56%
>>
I know this is getting unusually long, and you might be like "wtf, I can't see anything", do not despair. We're going for subtlety here! XD
step seven:
>>
I duplicated the Background layer once, dragged all the way to the top of my layers. And this time, I just Unsaturated (Shift+Ctrl+U) the image. I set the duplicated layer to Soft Light at 67%
step eight:
>>
A new layer, flood fill it with #001055, set it to Soft Light at 32%. :D
step nine:
>>
Almost done! This gradient by adoralyna, then set it to Multiply at 19%. Our first major color change! XD
step ten:
>>
Create a new layer on top of everything, select the whole canvas (Ctrl+A) then go to Edit >> Stroke. Create a 2 px border around in #fafafa. Then Stroke that layer again, this time change the settings to 1 px and the color to #e8bebe. Drag this layer in between the multiply-ish gradient layer and the blue layer.
step eleven:
Time for text! :DD
>>
Create a new layer below the multiply-ish gradient layer, then use any random Photoshop brush (preferably, a small one) then make a little scribbly thingy to where you want your text to be. Gaussian Blur this layer by 2-3 px. If you want, you can always change the opacities of both the scribble and text to suit your taste.
Then the text!
beauty
font: Allegro
size: 30pt
kerning: 0
is within the (in CAPS)
font: Arial Black
size: 5pt
kerning: 200
eye of the (in CAPS)
font: Arial Black
size: 6pt
kerning: 200
beholder (in CAPS)
font: Century Gothic
size: 9pt
kerning: 400
*all the text is below the gradient layer, but above the scribble
step twelve:
You're done! But please, do not copy word for word the tutorial. It is meant as a guide as to how I made the icon. Now didn't your mother tell you that it's not nice to be a copycat. Shame on you... >DD
*dies*