TUTORIAL #2
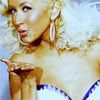
I was boring, so I made a new tutorial. It's the same that I've used on the Ashley icons. Enjoy and show me your result :)
From 
To
01. Open your image and resize it. Drag it into 100x100 Then make a new layer and add the color #3E2000 and set it at Exclusion 100%
02. Go to Layer/New adjustement layer > COLOR BALANCE: SHADOWS: -14, -6, -16 MIDTONES: +20, -11, -24 HIGHLIGHTS: -19, -7, +15 (Preserve Luminosity on)
03. Again, go to Layer/New adjustement layer > COLOR BALANCE: SHADOWS: -15, -7, +15 MIDTONES: +13, +11, +13 HIGHLIGHTS: +4, +6, +17 (Preserve Luminosity on)
02. Go to Layer/New adjustement layer > CHANNEL MIXER: Output Channel RED: RED: 112 GREEN: -8 BLUE: -8 CONSTANT: 2 Output Channel GREEN: RED: 10 GREEN: 102 BLUE: -2 CONSTANT: 6 Output Channel BLUE: RED: 10 GREEN: -8 BLUE: 108 CONSTANT: 2 (Set this layer at Soft Light 100%)
04. Go to Layer/New adjustement layer > HUE/SATURATION: SATURATION: +20 (Set this layer at Soft Light 41%)
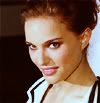
Here other icons made with this technique:


To

01. Open your image and resize it. Drag it into 100x100 Then make a new layer and add the color #3E2000 and set it at Exclusion 100%

02. Go to Layer/New adjustement layer > COLOR BALANCE: SHADOWS: -14, -6, -16 MIDTONES: +20, -11, -24 HIGHLIGHTS: -19, -7, +15 (Preserve Luminosity on)

03. Again, go to Layer/New adjustement layer > COLOR BALANCE: SHADOWS: -15, -7, +15 MIDTONES: +13, +11, +13 HIGHLIGHTS: +4, +6, +17 (Preserve Luminosity on)

02. Go to Layer/New adjustement layer > CHANNEL MIXER: Output Channel RED: RED: 112 GREEN: -8 BLUE: -8 CONSTANT: 2 Output Channel GREEN: RED: 10 GREEN: 102 BLUE: -2 CONSTANT: 6 Output Channel BLUE: RED: 10 GREEN: -8 BLUE: 108 CONSTANT: 2 (Set this layer at Soft Light 100%)

04. Go to Layer/New adjustement layer > HUE/SATURATION: SATURATION: +20 (Set this layer at Soft Light 41%)

Here other icons made with this technique:


