#17: Icon Tutorial #2
Icon Tutorial #2
Coloring Dark/Screencaps Images
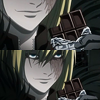
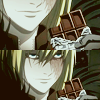
by airockz69
Program: CS3 (should works in every version)
Translatable: no
Difficulty: Medium
PSD: Yes
I'm not going to explain all the steps in detail and please excuse my horrible explaining and bad english.
Step 1
Prepare a base. I'll be using mello screencap from Death Note.
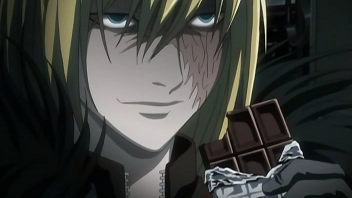
you see I'd prefer to works with icon sized at 100x100 so firstly I cropped some of the image's part, merged it into one full image and resized it. This is entirely up to you so do whatever to your base/screencap. My base turned out like this:

Step 2
Next step is giving adjustment to your bases so we'll be using curves adjustment.
Layer > New Adjustment Layer > Curves.
Channel: RGB
Input: 90
Output: 153
It's quiet tricky so pay attention to your base. Play around with the input-output to see what fits yours best.

Step 3
The next step is adding brightness/contrast value to the base.
Layer > New Adjustment Layer > Brightness/Contrast.
Brightness: +10
Contrast: +10
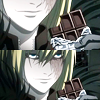
Now that we have a lovely and bright base so the next steps ahead is giving it a coloring touch :)
Step 4
This next step is giving a tone up the the colors of the base. It'd bring out the color elements to look more stand out.
Layer > New Adjustment Layer > Selective Color.
Reds: -51; +7; +19; +8
Yellows: -14; +7; +24; +3
Greens: +23; +44; +4; +19
Cyans: +37; +16; +30; +36
Whites: -20; 0; +9; 0
Neutrals: -13; -1; +2; +5
Blacks: 0; 0; 0; +2
It'd be turned out like this:

Looks even better, doesn't it?
Step 5
Layer > New Adjustment Layer > Color Balance.
Shadows: +9; 0; 0
Midtones: -4; +2; -10
Highlights: -3; +1; -1
Preserves Luminosity is checked.

This gives the image a yellowy color. Nothing extravagant.
Step 6
We're almost there. This next step is adding some touch to the color of the image so we're going to play around with a few color layers.
Layer > New Fill Color > Solid Color
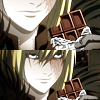
1) #DF9E41. set it to soft light at 20% - 25% Opacity.
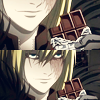
2) #000F3E. set it to exclusion with 50% Opacity and 80% at Fill.
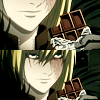
3) #D7E7D7. set it to color burn with fully 100% opacity and fill.
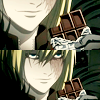
4) #C3DAf4. set it to soft light at 35% opacity.
5) #2D1301. set it to exclusion at 70% opacity.

VOILA! we're done! :D
Please note that this tutorial will add more yellowish/greenish to your image so a base which too greeny/yellowy isn't recommended. Also, this coloring won't work on every image/screencap, so just play around until you find a coloring you like. If you have any questions, please don't hesitate to ask. :)
Hope you enjoyed the tut!
Other samples:



download the psd HERE
Coloring Dark/Screencaps Images


by airockz69
Program: CS3 (should works in every version)
Translatable: no
Difficulty: Medium
PSD: Yes
I'm not going to explain all the steps in detail and please excuse my horrible explaining and bad english.
Step 1
Prepare a base. I'll be using mello screencap from Death Note.

you see I'd prefer to works with icon sized at 100x100 so firstly I cropped some of the image's part, merged it into one full image and resized it. This is entirely up to you so do whatever to your base/screencap. My base turned out like this:

Step 2
Next step is giving adjustment to your bases so we'll be using curves adjustment.
Layer > New Adjustment Layer > Curves.
Channel: RGB
Input: 90
Output: 153
It's quiet tricky so pay attention to your base. Play around with the input-output to see what fits yours best.

Step 3
The next step is adding brightness/contrast value to the base.
Layer > New Adjustment Layer > Brightness/Contrast.
Brightness: +10
Contrast: +10

Now that we have a lovely and bright base so the next steps ahead is giving it a coloring touch :)
Step 4
This next step is giving a tone up the the colors of the base. It'd bring out the color elements to look more stand out.
Layer > New Adjustment Layer > Selective Color.
Reds: -51; +7; +19; +8
Yellows: -14; +7; +24; +3
Greens: +23; +44; +4; +19
Cyans: +37; +16; +30; +36
Whites: -20; 0; +9; 0
Neutrals: -13; -1; +2; +5
Blacks: 0; 0; 0; +2
It'd be turned out like this:

Looks even better, doesn't it?
Step 5
Layer > New Adjustment Layer > Color Balance.
Shadows: +9; 0; 0
Midtones: -4; +2; -10
Highlights: -3; +1; -1
Preserves Luminosity is checked.

This gives the image a yellowy color. Nothing extravagant.
Step 6
We're almost there. This next step is adding some touch to the color of the image so we're going to play around with a few color layers.
Layer > New Fill Color > Solid Color
1) #DF9E41. set it to soft light at 20% - 25% Opacity.

2) #000F3E. set it to exclusion with 50% Opacity and 80% at Fill.

3) #D7E7D7. set it to color burn with fully 100% opacity and fill.

4) #C3DAf4. set it to soft light at 35% opacity.

5) #2D1301. set it to exclusion at 70% opacity.

VOILA! we're done! :D
Please note that this tutorial will add more yellowish/greenish to your image so a base which too greeny/yellowy isn't recommended. Also, this coloring won't work on every image/screencap, so just play around until you find a coloring you like. If you have any questions, please don't hesitate to ask. :)
Hope you enjoyed the tut!
Other samples:


download the psd HERE