Karkaroff tutorial for Photoshop 7
Hey everyone. This is a tutorial requested by amortentia_gal regarding my latest batch of icons
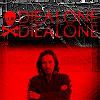
Make this:

Made in Photoshop 7, but can be made with other programs, too. (not sure how to translate, though. Since I only have PS)
First off, you're going to need two things. The base, a texture by inxsomniax, and your subject. It's better that your subject is a person rather than an object or whatever else.
So, without further ado...
STEP ONE: THE BASE <--Make sure you save the texture I linked for step one. This is your base. It's already rotated.
STEP TWO: Find an image that you would like to have as your 'point of interest', in this case, my beloved Karkaroff!. :) Btw, the more clear the subject is, the better the icon will turn out.
STEP THREE: Use your polygonal lasso tool to select the object. It doens't matter if your selection isn't perfect. SEE HERE.
STEP FOUR: Copy your selection (if it's big don't worry, we'll resize after we paste onto the base) and paste onto your base. This will be in the bottom grey section of the base texture.
STEP FIVE: Either go to Edit - Free Transform, or press ctrl+T. MAKE SURE you hold down the shift key while resizing, or else your layer will resize odd. Resize and move it until it fits the bottom half of the texture. the grey area. the section where it's supposed to go. Now, press enter TWICE. You would probably wanna sharpen and fade sharpen (ctrl+shift+f) and this point.
STEP SIX: Desaturate this layer. So it doesn't look odd when we add the color layer. Press ctrl+shift+u. or do it which ever way you like.
STEP SEVEN: Make a new layer and fill it with whatever color you like. Or a gradient if you wish. I chose red. Set it on MULTIPLY. If the person, or point of interest, is too dark, use curves (or brighten/contrast) to brighten that layer up, or use a lighter color.
STEP EIGHT: If you wish, erase the top half of the color layer, so that there is only color on the bottom half. If you want to. Doesn't matter.
STEP NINE: You are pretty much done at this point. Add text or a brush to complete the ensemble :D I chose a random brush set to the same color I chose for the color layer. The color doesn't have to be the same.
And that's it! If you have any questions, I'll try my best to answer them. :D
*please don't hotlink to any images. and don't copy exactly. use your imagination!*
PSD FILE
Make this:

Made in Photoshop 7, but can be made with other programs, too. (not sure how to translate, though. Since I only have PS)
First off, you're going to need two things. The base, a texture by inxsomniax, and your subject. It's better that your subject is a person rather than an object or whatever else.
So, without further ado...
STEP ONE: THE BASE <--Make sure you save the texture I linked for step one. This is your base. It's already rotated.
STEP TWO: Find an image that you would like to have as your 'point of interest', in this case, my beloved Karkaroff!. :) Btw, the more clear the subject is, the better the icon will turn out.
STEP THREE: Use your polygonal lasso tool to select the object. It doens't matter if your selection isn't perfect. SEE HERE.
STEP FOUR: Copy your selection (if it's big don't worry, we'll resize after we paste onto the base) and paste onto your base. This will be in the bottom grey section of the base texture.
STEP FIVE: Either go to Edit - Free Transform, or press ctrl+T. MAKE SURE you hold down the shift key while resizing, or else your layer will resize odd. Resize and move it until it fits the bottom half of the texture. the grey area. the section where it's supposed to go. Now, press enter TWICE. You would probably wanna sharpen and fade sharpen (ctrl+shift+f) and this point.
STEP SIX: Desaturate this layer. So it doesn't look odd when we add the color layer. Press ctrl+shift+u. or do it which ever way you like.
STEP SEVEN: Make a new layer and fill it with whatever color you like. Or a gradient if you wish. I chose red. Set it on MULTIPLY. If the person, or point of interest, is too dark, use curves (or brighten/contrast) to brighten that layer up, or use a lighter color.
STEP EIGHT: If you wish, erase the top half of the color layer, so that there is only color on the bottom half. If you want to. Doesn't matter.
STEP NINE: You are pretty much done at this point. Add text or a brush to complete the ensemble :D I chose a random brush set to the same color I chose for the color layer. The color doesn't have to be the same.
And that's it! If you have any questions, I'll try my best to answer them. :D
*please don't hotlink to any images. and don't copy exactly. use your imagination!*
PSD FILE