Back in black
Done on Photoshop CS3. As usual, you can use icons and textures but credit who did them!!
Icons done with similar settings :
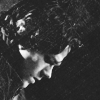
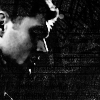

Basically, the beginning is the same than in my others tutorials. Keep in mind that if the settings worked with this pic, it might not work with other pics, just play around with the settings or add/delete a layer to make it work.
I use the 3rd icon here because I've kept the .PSD of this one *blushing* but it's the same for all the others, only textures and few settings (like light or contrasts) change. The picture I used is HERE
Part 1 : Preparing the base
1. Resize (image -> image size) and rotate the pic ( select your pic and click on "move tool" (the forst tool, with the black arrow, on the left side on the PS window) and then click on "show transform controls" (on the navigation bar)
2. Do this curves layer (layer -> adjustement layer)
3. Add a selective color layer (layer -> new adjustement"). In reds, decrease the cyan (here 20% less), increase yellows (+2) and lower black (-1). In yellows, decrease yellow (-3) and increase black (+3). In whites, increase cyan (+11) and yellow (+9) and black (+24). In neutral, increase magenta (+2) and yellow (+8). In blacks, increase black 100%
4. Do another selective color layer. In reds : cyan -68, magenta +26, yellow +76, black -12. In yellows, cyan +100%, magenta +17, yellow -51, black -20. In whites : cyan +100, yellow -23, black -10. In neutrals, cyan +9, magenta _10, yellow -6, black +6
5. Do another selective color layer In whites : cyan -70, yellow +6
6. Do a channel mixer layer (layer -> new adjustement layer). Red channel : red +112, green -12, blue -12. Green channel : green +100. Blue channel : green -12, blue +124
7. Add a color balance layer. Midtones :cyan +22, magenta -6, yellow -19. Shadows : cyan -11, yellow +13. Highlights : cyan -1, yellow -22
8. Go to Layer -> New adjustement Layer and add a brightness / contrast layer. Brightness +9, Contrast : -39.
Part 2 : Black and White
9. Duplicate your base and set it to soft light 100%
10. Go to Layer -> New Adjustement Layer -> Gradient Map and choose the black and white one
11. Add this texture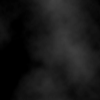
made by violateraindrop and set it to screen (opacity 63%)
12. Add this texture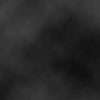
made by violateraindrop and set it to screen
13. Do another brightness/contrast layer. Increase the brightness up to 36.
14. Add this texture :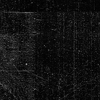
made by rhcp_csi @ peak77 Set it to overlay (opacity 56%)
15. Add this texture :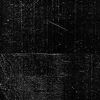
made by rhcp_csi @ peak77 Erase the part that is covering Dean's face. Set it to screen (opacity 73%)
16. Add a layer. Use the brush and choose a grey color. I use here a tiny text brush made by sanami276 @ ownthesunshine
And you're done!!
You can ask all questions that cross your mind ;)
Icons done with similar settings :


Basically, the beginning is the same than in my others tutorials. Keep in mind that if the settings worked with this pic, it might not work with other pics, just play around with the settings or add/delete a layer to make it work.
I use the 3rd icon here because I've kept the .PSD of this one *blushing* but it's the same for all the others, only textures and few settings (like light or contrasts) change. The picture I used is HERE
Part 1 : Preparing the base
1. Resize (image -> image size) and rotate the pic ( select your pic and click on "move tool" (the forst tool, with the black arrow, on the left side on the PS window) and then click on "show transform controls" (on the navigation bar)
2. Do this curves layer (layer -> adjustement layer)
3. Add a selective color layer (layer -> new adjustement"). In reds, decrease the cyan (here 20% less), increase yellows (+2) and lower black (-1). In yellows, decrease yellow (-3) and increase black (+3). In whites, increase cyan (+11) and yellow (+9) and black (+24). In neutral, increase magenta (+2) and yellow (+8). In blacks, increase black 100%
4. Do another selective color layer. In reds : cyan -68, magenta +26, yellow +76, black -12. In yellows, cyan +100%, magenta +17, yellow -51, black -20. In whites : cyan +100, yellow -23, black -10. In neutrals, cyan +9, magenta _10, yellow -6, black +6
5. Do another selective color layer In whites : cyan -70, yellow +6
6. Do a channel mixer layer (layer -> new adjustement layer). Red channel : red +112, green -12, blue -12. Green channel : green +100. Blue channel : green -12, blue +124
7. Add a color balance layer. Midtones :cyan +22, magenta -6, yellow -19. Shadows : cyan -11, yellow +13. Highlights : cyan -1, yellow -22
8. Go to Layer -> New adjustement Layer and add a brightness / contrast layer. Brightness +9, Contrast : -39.
Part 2 : Black and White
9. Duplicate your base and set it to soft light 100%
10. Go to Layer -> New Adjustement Layer -> Gradient Map and choose the black and white one
11. Add this texture

made by violateraindrop and set it to screen (opacity 63%)
12. Add this texture

made by violateraindrop and set it to screen
13. Do another brightness/contrast layer. Increase the brightness up to 36.
14. Add this texture :

made by rhcp_csi @ peak77 Set it to overlay (opacity 56%)
15. Add this texture :

made by rhcp_csi @ peak77 Erase the part that is covering Dean's face. Set it to screen (opacity 73%)
16. Add a layer. Use the brush and choose a grey color. I use here a tiny text brush made by sanami276 @ ownthesunshine
And you're done!!
You can ask all questions that cross your mind ;)