Tutorial: Woman with flower
Going from 
to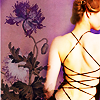
, using Photoshop CS2. Should be translateable, I think, and relatively simple - no selective colouring, no curves or levels, etc. Just some layer masks.
1. Crop your base image. This is from a stock photo that already had quite good contrast and colour, so I didn't have to fiddle with it to get a nice base, but your base image may need some adjustments.

2. Duplicate your base and lower the saturation (Image > Adjustments > Hue/Saturation) - not all the way to b&W, but fairly low.

3. Set that layer to Soft Light. This will deepen the shadows and increase the contrast of the image.

4. Add the following texture by tragic_icons and set it to Screen.
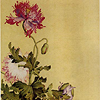
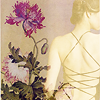
>
5. Duplicate the texture and adjust its Hue and Lightness (Image > Adjustments > Hue/Saturation) - I lowered the Hue to about -100 and increased the Lightness to about +33 or so, because I wanted a light purplish tone.
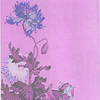
6. Set that layer to Multiply, and use a light layer mask on the area where your subject is.
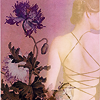
7. The subject is way too light, so I need to fix that. The rest of the steps use layer masks so that they only affect the subject, not the textured part of the icon. First, duplicate the base and set it to Overlay.
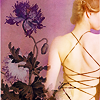
8. Duplicate the base again and set it to Hard Light 60%.

9. Duplicate the base a final time and set it to Overlay again, and that's it!

Other icons made with similar techniques:


I hope you found this useful. If you have any questions or if anything is confusing, please ask me! And if you'd like to request tutorials for any of my other icons, I'd be happy to make more :)
Credit policy | Friend this journal | Make a request

to

, using Photoshop CS2. Should be translateable, I think, and relatively simple - no selective colouring, no curves or levels, etc. Just some layer masks.
1. Crop your base image. This is from a stock photo that already had quite good contrast and colour, so I didn't have to fiddle with it to get a nice base, but your base image may need some adjustments.

2. Duplicate your base and lower the saturation (Image > Adjustments > Hue/Saturation) - not all the way to b&W, but fairly low.

3. Set that layer to Soft Light. This will deepen the shadows and increase the contrast of the image.

4. Add the following texture by tragic_icons and set it to Screen.
>

5. Duplicate the texture and adjust its Hue and Lightness (Image > Adjustments > Hue/Saturation) - I lowered the Hue to about -100 and increased the Lightness to about +33 or so, because I wanted a light purplish tone.

6. Set that layer to Multiply, and use a light layer mask on the area where your subject is.

7. The subject is way too light, so I need to fix that. The rest of the steps use layer masks so that they only affect the subject, not the textured part of the icon. First, duplicate the base and set it to Overlay.

8. Duplicate the base again and set it to Hard Light 60%.

9. Duplicate the base a final time and set it to Overlay again, and that's it!

Other icons made with similar techniques:


I hope you found this useful. If you have any questions or if anything is confusing, please ask me! And if you'd like to request tutorials for any of my other icons, I'd be happy to make more :)
Credit policy | Friend this journal | Make a request