Lookit me I'm trendy!
I'm not normally good for tutorials. My general iconing style consists of trying different things out without having the foggiest clue what it's going to look like in advance and if I like the effect I keep it. If not, I just delete (ctrl + z) and try something different. I rarely do two icons the same way and I never know what I'm going to end up with. I stole the table shamelessly from colortone because I think it lays things out nicely. I steal a lot from her I've noticed. In fact, don't click the cut, just go give her some love 'cause she is infinitely more talented than I.
Still here? Well I suppose...
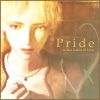
Alright, at the end of making this tutorial I came up with this icon, so that's what we'll be making now!
Disclaimer: I've never taken a graphics class in my life. I probably couldn't tell you 90% of the technical jargon that goes into Photoshop and I'm probably doing a lot of this wrong, but you know what? I don't care. If I like how something looks, I keep it. So, this is how I do things, not necessarily the right way of doing things, kay?
First things first, we start with this image:
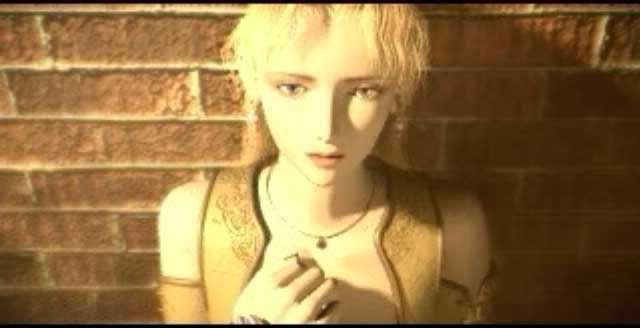
Not the best screencap on earth, but it'll do. We're not trying to be Di Vinci here.

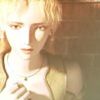
Alright, first things first, crop it down and resize it to 100x100. Now we've got a base to work from. Note: I always duplicate the base image and work from the copy. That way I have something to go back to just in case I screw up royally. The history only goes back so far you know, and I try lots of different things before I find something I like.

It's still a little fuzzy and not too nice looking so go to Image -> Adjustments -> Auto Levels. Now we have something nicer to work from. Sometimes at this stage I mess around with the brightness and contrast, but in this case I think it's okay as it stands now.

Then I duplicated the base and set the top layer to Multiply at 50% opacity.

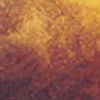
Next we take this gradient by colortone and set it to Linear Dodge with a 65% opacity.
Annnd we end up with this.
Texture time! I love textures. I got this one from firaga, put it under my gradient layer and set it to Overlay.

And now we've got this!

Now it's time for the brushes. I took this brush by amavel_bel in white (#FFFFFF) and stamped it in a new layer on top of all the other layers. I had to flip it horizontally so the little squiggle wasn't covering Celes' face. I then set it to Overlay with an opacity of 50% and ended up with...

This! Almost done now...
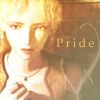
For text I used one of my favorite fonts ever: Palatino Linotype, 12 pt., in a yellow-ish color: FEE48B and with a kerning of 200. I set the text layer to Overlay at 90% opacity. It looks like this now!

The tiny text below is also Palatino Linotype in the same color. This time the size is 3 pt. and this layer is also set to Overlay, though the opacity remains 100%. Most of the time my tiny text is a lot of "blah blah blah boobs blah blah blah" because it's for decoration purposes only. This one actually says "In the name of love," because I ♥ U2. :-P

Lastly, I cannot abide an icon without some kind of border. They just don't look finished to me. Since I'm lazy, I made myself this brush for basic 1px borders. I made a new layer on top of all the others and stamped it in a medium brown color (8D6D4A) and set the opacity to about 88% so it wasn't too overwhelming.
The final product should look something like this. See? That wasn't hard!
And lastly! Here's a random tip that's probably common sense: When picking out colors for text and brushes to use on the icon I usually use the dropper tool to yoink color directly from the base image itself. It sometimes takes me a couple tries to get a color I like, but doing that makes matching the text color to the icon a lot easier.
Still here? Well I suppose...
Alright, at the end of making this tutorial I came up with this icon, so that's what we'll be making now!
Disclaimer: I've never taken a graphics class in my life. I probably couldn't tell you 90% of the technical jargon that goes into Photoshop and I'm probably doing a lot of this wrong, but you know what? I don't care. If I like how something looks, I keep it. So, this is how I do things, not necessarily the right way of doing things, kay?
First things first, we start with this image:
Not the best screencap on earth, but it'll do. We're not trying to be Di Vinci here.
Alright, first things first, crop it down and resize it to 100x100. Now we've got a base to work from. Note: I always duplicate the base image and work from the copy. That way I have something to go back to just in case I screw up royally. The history only goes back so far you know, and I try lots of different things before I find something I like.
It's still a little fuzzy and not too nice looking so go to Image -> Adjustments -> Auto Levels. Now we have something nicer to work from. Sometimes at this stage I mess around with the brightness and contrast, but in this case I think it's okay as it stands now.
Then I duplicated the base and set the top layer to Multiply at 50% opacity.
Next we take this gradient by colortone and set it to Linear Dodge with a 65% opacity.
Annnd we end up with this.
Texture time! I love textures. I got this one from firaga, put it under my gradient layer and set it to Overlay.
And now we've got this!
Now it's time for the brushes. I took this brush by amavel_bel in white (#FFFFFF) and stamped it in a new layer on top of all the other layers. I had to flip it horizontally so the little squiggle wasn't covering Celes' face. I then set it to Overlay with an opacity of 50% and ended up with...
This! Almost done now...
For text I used one of my favorite fonts ever: Palatino Linotype, 12 pt., in a yellow-ish color: FEE48B and with a kerning of 200. I set the text layer to Overlay at 90% opacity. It looks like this now!
The tiny text below is also Palatino Linotype in the same color. This time the size is 3 pt. and this layer is also set to Overlay, though the opacity remains 100%. Most of the time my tiny text is a lot of "blah blah blah boobs blah blah blah" because it's for decoration purposes only. This one actually says "In the name of love," because I ♥ U2. :-P
Lastly, I cannot abide an icon without some kind of border. They just don't look finished to me. Since I'm lazy, I made myself this brush for basic 1px borders. I made a new layer on top of all the others and stamped it in a medium brown color (8D6D4A) and set the opacity to about 88% so it wasn't too overwhelming.
The final product should look something like this. See? That wasn't hard!
And lastly! Here's a random tip that's probably common sense: When picking out colors for text and brushes to use on the icon I usually use the dropper tool to yoink color directly from the base image itself. It sometimes takes me a couple tries to get a color I like, but doing that makes matching the text color to the icon a lot easier.