Tutorial: Zonkos (PSP 9)
If all goes well, we are going to go from:
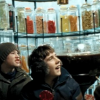
to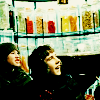
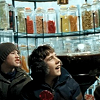
We'll start off with this image from Veritaserum. Nice and colorful always makes for good icons. :)
Crop your image to 100x100.

Duplicate your layer and sharpen it. I used to sharpen all of my layers, but I've noticed that you get a much nicer effect if you don't sharpen your background layer. Anyway. Set your sharpened layer to Screen. Leave it at 100%.
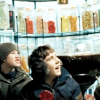
Create a new layer, and flood fill it with #0A1830 (but really, any dark blue will work). Set the layer to Exclusion, at 100%.
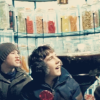
Duplicate your sharpened layer (unless you think the image is sharp enough, in which case you can duplicate the background layer), and set it to Soft Light this time, at 100%.

Next, merge all of your layers together (Layers > Merge > Merge All). Select your entire icon (Selections > Select All) and copy it (Ctrl + C). Then undo (Ctrl +Z) twice. Next, paste what you copied (Ctrl + L) and put it on top of everything. Then set it to Soft Light, 100%.
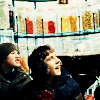
Make a new layer and flood filled it with #D5F1FD (any light blue is fine, really) and set it to Burn at 100%.
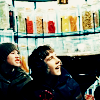
Make a new layer and flood filled it with #FDEDD5(any tan or peachy color usually works) and set it to Burn at 100%.
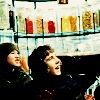
Normally, I end with that step, but I wanted to bring out the green in the candy. So I made a new layer and flood filled it with #d5fde2 and set it to Burn at 100%.

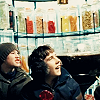
In case you want to know what your layers should look like, here they are (from top to bottom, and all set on Normal, so of course they don't look exactly like this):





If you try it out, leave whatever you end up with in the comments. I want to see if that was helpful to anyone. :)

to

We'll start off with this image from Veritaserum. Nice and colorful always makes for good icons. :)
Crop your image to 100x100.

Duplicate your layer and sharpen it. I used to sharpen all of my layers, but I've noticed that you get a much nicer effect if you don't sharpen your background layer. Anyway. Set your sharpened layer to Screen. Leave it at 100%.

Create a new layer, and flood fill it with #0A1830 (but really, any dark blue will work). Set the layer to Exclusion, at 100%.

Duplicate your sharpened layer (unless you think the image is sharp enough, in which case you can duplicate the background layer), and set it to Soft Light this time, at 100%.

Next, merge all of your layers together (Layers > Merge > Merge All). Select your entire icon (Selections > Select All) and copy it (Ctrl + C). Then undo (Ctrl +Z) twice. Next, paste what you copied (Ctrl + L) and put it on top of everything. Then set it to Soft Light, 100%.

Make a new layer and flood filled it with #D5F1FD (any light blue is fine, really) and set it to Burn at 100%.

Make a new layer and flood filled it with #FDEDD5(any tan or peachy color usually works) and set it to Burn at 100%.

Normally, I end with that step, but I wanted to bring out the green in the candy. So I made a new layer and flood filled it with #d5fde2 and set it to Burn at 100%.

In case you want to know what your layers should look like, here they are (from top to bottom, and all set on Normal, so of course they don't look exactly like this):


If you try it out, leave whatever you end up with in the comments. I want to see if that was helpful to anyone. :)