Stock Tutorial
Requested by senbonzakura77.
How to go from
to
Created in Photoshop 7, uses selective coloring.
Original picture from Veer.com.
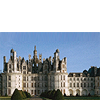
First, you crop your image.

There's not enough room at the top, as you can see. So I extended the sky to fill the space. There are a number of ways to do this (clone stamp, rectangular marquee, smudging).

To make the image easier to work with, I sharpened a little bit and then duplicated the layer and set it to Screen, opacity 50%.

It still looks dull and washed out, so we do some selective coloring. Create a new selective coloring layer:
Yellows:
Cyan -100
Magenta +35
Yellow +31
Black 0
Cyans:
Cyan +100
Magenta -73
Yellow -74
Black +100
Neutrals:
Cyan +12
Magenta -10
Yellow -10
Black +7

Now it looks a little bit brighter. I want a little more contrast, so I duplicate the base and set it to Soft Light, opacity 50%.

I wanted the sky to be a brighter blue, so I did another layer of selective coloring:
Reds:
Cyan -100
Magenta +24
Yellow +28
Black 0
Yellows:
Cyan -100
Magenta +22
Yellow +22
Black 0
Cyans:
Cyan +100
Magenta -60
Yellow -62
Black +23
Neutrals:
Cyan +12
Magenta -13
Yellow -12
Black +6

Merge all (Ctrl+Shift+E).
I liked the bright blue, but now the sky looked too flat, so I duplicated my merged layer and, using a fuzzy white brush (mine had a diameter of 27), I drew a line above the castle. I used a lower opacity and drew lines above and below it to make it look kind of blended.

I set the layer to Screen, opacity 50%.

Then I pasted this texture and set it to Screen, opacity 100%.


Next, I pasted this texture and set it to Multiply, opacity 50%.


Then I pasted this tiny text on Screen, opacity 100%.


Finally, I pasted this brush, set it to Multiply, opacity 100%, and re-positioned it.


Original icon can be found here. You can request tutorials here.
Please feel free to join/watch this community.
♣ enchantedteacup
How to go from

to

Created in Photoshop 7, uses selective coloring.
Original picture from Veer.com.
First, you crop your image.

There's not enough room at the top, as you can see. So I extended the sky to fill the space. There are a number of ways to do this (clone stamp, rectangular marquee, smudging).

To make the image easier to work with, I sharpened a little bit and then duplicated the layer and set it to Screen, opacity 50%.

It still looks dull and washed out, so we do some selective coloring. Create a new selective coloring layer:
Yellows:
Cyan -100
Magenta +35
Yellow +31
Black 0
Cyans:
Cyan +100
Magenta -73
Yellow -74
Black +100
Neutrals:
Cyan +12
Magenta -10
Yellow -10
Black +7

Now it looks a little bit brighter. I want a little more contrast, so I duplicate the base and set it to Soft Light, opacity 50%.

I wanted the sky to be a brighter blue, so I did another layer of selective coloring:
Reds:
Cyan -100
Magenta +24
Yellow +28
Black 0
Yellows:
Cyan -100
Magenta +22
Yellow +22
Black 0
Cyans:
Cyan +100
Magenta -60
Yellow -62
Black +23
Neutrals:
Cyan +12
Magenta -13
Yellow -12
Black +6

Merge all (Ctrl+Shift+E).
I liked the bright blue, but now the sky looked too flat, so I duplicated my merged layer and, using a fuzzy white brush (mine had a diameter of 27), I drew a line above the castle. I used a lower opacity and drew lines above and below it to make it look kind of blended.

I set the layer to Screen, opacity 50%.

Then I pasted this texture and set it to Screen, opacity 100%.


Next, I pasted this texture and set it to Multiply, opacity 50%.


Then I pasted this tiny text on Screen, opacity 100%.


Finally, I pasted this brush, set it to Multiply, opacity 100%, and re-positioned it.


Original icon can be found here. You can request tutorials here.
Please feel free to join/watch this community.
♣ enchantedteacup