Tutorial 001: David Ortiz
from 
to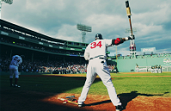
to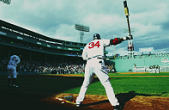
Made in Photoshop, but the first part only involves flood layers so it can be done with any program. The second part invovles selective colour so it can only be done in Photoshop. It's nine steps total.
:: PART ONE ::
[ 1 ] Select your base, sharpen and whatever else your heart desires. I used this picture from the Boston Globe site and cropped it so the top of the picture would start at the head of the bat.
[ 2 ] Duplicate the base twice. Set the first duplicate (the one closes to the base) to Screen at 100%. Set the second duplicate to Soft Light at 53%.
[ 3 ] Create a new fill layer and fill it with #021B19. Set it to Exclusion at 50%.
[ 4 ] Create a new fill layer and fill it with #AD9F6E. Set it to Multiply at 21%.
[ 5 ] Create a new fill layer and fill it with #F5C6ED. Set it to Soft Light at 15%.
[ 6 ] Create a new fill layer and fill it with #6AAC9C. Set it to Colour Burn at 40%.
[ 7 ] Create a new fill layer and fill it with #80A5B8. Set it to Soft Light at 100%.

:: PART TWO ::
[ 8 ] Now while the colouring is rather nice, I wanted to take it a little further and made a Selective Colouring Layer between the the duplicate of the base I set to Soft Light and the Exclusion layer. Set the layer to the following on Relative:
Reds
Cyan: +100
Magenta: +13
Yellow: +100
Black: +53
Yellows
Cyan: +94
Magenta: -27
Yellow: +100
Black: +20
Greens
Cyan: +100
Magenta: -100
Yellow: +100
Black: +100
Cyans
Cyan: +100
Magenta: +100
Yellow: -100
Black: -37
Blues
Cyan: +44
Magenta: -100
Yellow: -100
Black: -100
Magentas
Cyan: -100
Magenta: +100
Yellow: +100
Black: +37
Whites
Cyan: +100
Magenta: -100
Yellow: -100
Black: -56
Blacks
Cyan: 0
Magenta: 0
Yellow: +10
Black: -10
[ 9 ] You can even stop here but after doing that layer I thought 'The Monster' and the grass were a little too bright so I created a New Adjustment Layer set to Hue/ Saturation. Set the layer to the following:
Master
Hue: 0
Saturation: -9
Lightness: 0
Green
Hue: +14
Saturation: +12
Lightness: -35
[ 10 ] Merge and add your border/ text/ brush/ whatever because at this point you are pretty much done.
My final of product of Papi in all his glory:

Just in case you need it here is the list of layers and the Selective Colouring layer to load on to your computer.
And there you have it! Remember not to follow this exactly and just have fun with it.

to

to

Made in Photoshop, but the first part only involves flood layers so it can be done with any program. The second part invovles selective colour so it can only be done in Photoshop. It's nine steps total.
:: PART ONE ::
[ 1 ] Select your base, sharpen and whatever else your heart desires. I used this picture from the Boston Globe site and cropped it so the top of the picture would start at the head of the bat.
[ 2 ] Duplicate the base twice. Set the first duplicate (the one closes to the base) to Screen at 100%. Set the second duplicate to Soft Light at 53%.
[ 3 ] Create a new fill layer and fill it with #021B19. Set it to Exclusion at 50%.
[ 4 ] Create a new fill layer and fill it with #AD9F6E. Set it to Multiply at 21%.
[ 5 ] Create a new fill layer and fill it with #F5C6ED. Set it to Soft Light at 15%.
[ 6 ] Create a new fill layer and fill it with #6AAC9C. Set it to Colour Burn at 40%.
[ 7 ] Create a new fill layer and fill it with #80A5B8. Set it to Soft Light at 100%.

:: PART TWO ::
[ 8 ] Now while the colouring is rather nice, I wanted to take it a little further and made a Selective Colouring Layer between the the duplicate of the base I set to Soft Light and the Exclusion layer. Set the layer to the following on Relative:
Reds
Cyan: +100
Magenta: +13
Yellow: +100
Black: +53
Yellows
Cyan: +94
Magenta: -27
Yellow: +100
Black: +20
Greens
Cyan: +100
Magenta: -100
Yellow: +100
Black: +100
Cyans
Cyan: +100
Magenta: +100
Yellow: -100
Black: -37
Blues
Cyan: +44
Magenta: -100
Yellow: -100
Black: -100
Magentas
Cyan: -100
Magenta: +100
Yellow: +100
Black: +37
Whites
Cyan: +100
Magenta: -100
Yellow: -100
Black: -56
Blacks
Cyan: 0
Magenta: 0
Yellow: +10
Black: -10
[ 9 ] You can even stop here but after doing that layer I thought 'The Monster' and the grass were a little too bright so I created a New Adjustment Layer set to Hue/ Saturation. Set the layer to the following:
Master
Hue: 0
Saturation: -9
Lightness: 0
Green
Hue: +14
Saturation: +12
Lightness: -35
[ 10 ] Merge and add your border/ text/ brush/ whatever because at this point you are pretty much done.
My final of product of Papi in all his glory:
Just in case you need it here is the list of layers and the Selective Colouring layer to load on to your computer.
And there you have it! Remember not to follow this exactly and just have fun with it.