(no subject)
Go from 
to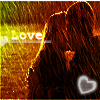
In this tutorial we are using PSP X, but I'm pretty sure you easily can translate it into other programs.
1. You should now sharpen the image a few times. After you have done it, crop it down to 100x100.
You should now have a base, that looks like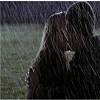
2. Duplicate your base twice. Set the top layer to Screen 100%. The middle Layer you should desaturate and then set it to Luminance 100%.
3. It should now look like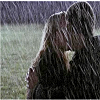
4. Add
and set it too Lighten 73%.
5. Add
and set it too Color Legacy 100%
6. Add
and set it too Screen 65%
7. Add
and set it too Color Legacy 100 %
8. This
is how your base should look like at this point.
9. Add
it is a dark green (#0c140c) and set it too Overlay 100%
10.Add
and set it too Dodge 100%
11.Add
and set it too Soft Light 100%
12.Add
and set it too Burn 100%
13 This
is how your base should look like now, and we are almost finished.
14.Go back to your base picture, and duplicate it. Drag it to the top and set it too Luminance 100%
15. Add the text and brushes you would like, and you are done.
Here it is finished
If anyone could tell me who made the gradients I used, I would be happy to add their names up there.
I hope you guys liked the tutorial, and I would love to see how your pictures turned out :)

to

In this tutorial we are using PSP X, but I'm pretty sure you easily can translate it into other programs.
1. You should now sharpen the image a few times. After you have done it, crop it down to 100x100.
You should now have a base, that looks like

2. Duplicate your base twice. Set the top layer to Screen 100%. The middle Layer you should desaturate and then set it to Luminance 100%.
3. It should now look like

4. Add

and set it too Lighten 73%.
5. Add

and set it too Color Legacy 100%
6. Add

and set it too Screen 65%
7. Add

and set it too Color Legacy 100 %
8. This

is how your base should look like at this point.
9. Add

it is a dark green (#0c140c) and set it too Overlay 100%
10.Add

and set it too Dodge 100%
11.Add

and set it too Soft Light 100%
12.Add

and set it too Burn 100%
13 This

is how your base should look like now, and we are almost finished.
14.Go back to your base picture, and duplicate it. Drag it to the top and set it too Luminance 100%
15. Add the text and brushes you would like, and you are done.
Here it is finished

If anyone could tell me who made the gradients I used, I would be happy to add their names up there.
I hope you guys liked the tutorial, and I would love to see how your pictures turned out :)