my second tutorial!
today we're going from 
to this
We're going to use the lovely Caleigh Peters today.
I used Photoshop for this tutorial but I'm sure it's easy to translate.
Start off with this image and crop it to LJ standards (100 x 100)


The image isn't sharp enough
Filter >> Sharpen >> Sharpen
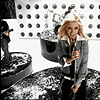
Then we're going to add a new layer
Layer >> New >> Layer
We're going to take our square brush and add a box like figure to the left side of the icon.
I used the color #D1C97D but you can use whatever suits you. As long as it's light.

Now we're going to take this image

and resize it to about 24 x 30
You're going to treat this kinda like an icon.
So take this gradient and copy onto your small picture (I know it's bigger than the picture but it doesn't really matter)

Set it to Multiply at 20%

Now we need to flatten the image.
Layer >> Flatten Image
Now copy and paste that image onto your icon.
Now take this gradient and paste into onto your image and set it to Darken at 70%

to get this:

Take this gradient and set it to lighten at 40%

to get this:

Flatten the image
Layer >> Flatten Image
Now take the image and rotate it
Image >> Rotate Canvas >> 90 CW
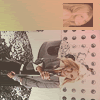
Now we're going to add the text. I chose a line from her song "Reach". You can do whatever pleases you.
I also add a star brush :]

Now you're going to rotate your image back
Image >> Rotate Canvas >> 90 CCW

And there you go!
to this
We're going to use the lovely Caleigh Peters today.
I used Photoshop for this tutorial but I'm sure it's easy to translate.
Start off with this image and crop it to LJ standards (100 x 100)
The image isn't sharp enough
Filter >> Sharpen >> Sharpen
Then we're going to add a new layer
Layer >> New >> Layer
We're going to take our square brush and add a box like figure to the left side of the icon.
I used the color #D1C97D but you can use whatever suits you. As long as it's light.
Now we're going to take this image
and resize it to about 24 x 30
You're going to treat this kinda like an icon.
So take this gradient and copy onto your small picture (I know it's bigger than the picture but it doesn't really matter)
Set it to Multiply at 20%
Now we need to flatten the image.
Layer >> Flatten Image
Now copy and paste that image onto your icon.
Now take this gradient and paste into onto your image and set it to Darken at 70%
to get this:
Take this gradient and set it to lighten at 40%
to get this:
Flatten the image
Layer >> Flatten Image
Now take the image and rotate it
Image >> Rotate Canvas >> 90 CW
Now we're going to add the text. I chose a line from her song "Reach". You can do whatever pleases you.
I also add a star brush :]
Now you're going to rotate your image back
Image >> Rotate Canvas >> 90 CCW
And there you go!