Sin City Style Icon Tutorial
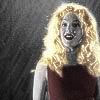
I didn't see that there was one like this, and this is my first tutorial, so here it is. The goal is to make an icon similar to the image of Goldie on the cover of the Sin City DVD.
go from this to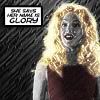
in pS7
Image Heavy!!!
(Screencap from i_heart_joss, I only ask that you do this icon exactly for practice purposes, but please don't claim as your own, also no hotlinking, and don't forget to comment/credit.)
1. Crop image and set to grayscale.
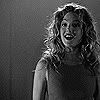
2. Duplicate layer and reset to RGB color.
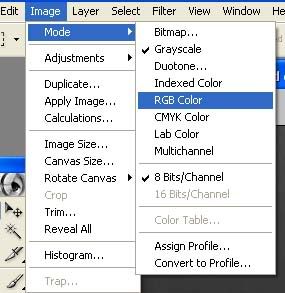
3. Sharpen 2X (Filter>Sharpen>Sharpen), adjust brightness and contrast (B-15, C-30). Duplicate layer, set to Screen.

4. Duplicate layer, and Filter>Blur>Gaussian Blur set at 1.0 pt. Set to Lighten 85%. This will make the out side of her hair glow slightly. Merge layers, and now you have your base.
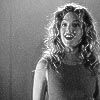
5. Add new layer. Using DC1A1E, brush Lips and Dress.
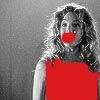
Set to Multiply 75% and erase any excess.
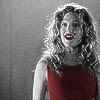
6. Add new layer. Using C57B26, brush the darker areas of hair and erase excess, set to overlay 90%.
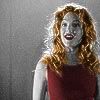
7. Add new layer. Using FFEE9C, brush the lighter areas of hair and erase excess, set to multiply 90% (on this layer, when erasing excess, it's okay to erase a little of the outside straggling hairs on the edge, it won't be noticible.)
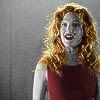
8. Add new layer. Using FEFDCF, brush entire area of hair and erase excess, set to overlay 100%.
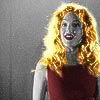
9. Add new layer. Using F6CA9D, brush entire area of hair again, erase excess and fade eraser 50%, set to overlay 50%.
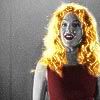
10. Dupicate layer in step 8 (the lighter color) and bring to top. Add Filter>Blur>Gaussian Blur set at 15 pt. Set to Luminosity 50%. Duplicate base layer and bring to top, set to Saturation 50%.
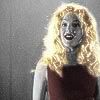
Merge Visible.
11. Add new layer, fill with 000000 (black). Add Filter>Noise>Add Noise set at 5%.

Add Filter>Stylize>Wind. Set to Method: Blast, Direction: from left. Sharpen once. Go to Edit>Free Transform to spin "rain" to not quite a 45 degree angle, enlarge to spread over entire image.
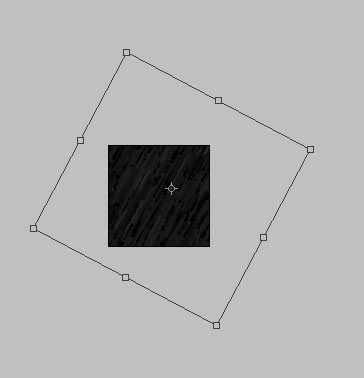
Set to Overlay 50% and erase area over girl in pic.
12. Add a new layer. Fill with black again, and add noise once more, this time setting to 8%. Add Wind once again, setting to Method:blast, but Direction:from the right this time. Free Transform and this time spin to a 45 degree angle, and enlarge to spread over entire image. Adjust brightness and contrast: B-20, C-50. Sharpen 2X. Duplicate layer 2x and set both to Overlay.
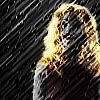
On the lower layer, Erase over girl and set opacity to 80%. On the upper layer, erase the background and set opacity to 25%. This is to leave the illusion of rain droplets around her face and dress.
13. Add a new layer and fill with white (FFFFFF). Free Transform this layer into a small rectangle.
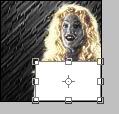
Add text to box. I typed "She says her name is Glory" using font SF Toontime Italic(which can be found at dafont.com), enlarging the word Glory for emphasis. Merge down once. In the Blending Options menu, I used the stroke option set at 2 xp in black to outline the box and I added a drop shadow, but you can play around with this if you want.
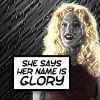
Resize and move box and here's the finished product:

I can't wait to see what you come up with!
go from this to
in pS7
Image Heavy!!!
(Screencap from i_heart_joss, I only ask that you do this icon exactly for practice purposes, but please don't claim as your own, also no hotlinking, and don't forget to comment/credit.)
1. Crop image and set to grayscale.
2. Duplicate layer and reset to RGB color.
3. Sharpen 2X (Filter>Sharpen>Sharpen), adjust brightness and contrast (B-15, C-30). Duplicate layer, set to Screen.
4. Duplicate layer, and Filter>Blur>Gaussian Blur set at 1.0 pt. Set to Lighten 85%. This will make the out side of her hair glow slightly. Merge layers, and now you have your base.
5. Add new layer. Using DC1A1E, brush Lips and Dress.
Set to Multiply 75% and erase any excess.
6. Add new layer. Using C57B26, brush the darker areas of hair and erase excess, set to overlay 90%.
7. Add new layer. Using FFEE9C, brush the lighter areas of hair and erase excess, set to multiply 90% (on this layer, when erasing excess, it's okay to erase a little of the outside straggling hairs on the edge, it won't be noticible.)
8. Add new layer. Using FEFDCF, brush entire area of hair and erase excess, set to overlay 100%.
9. Add new layer. Using F6CA9D, brush entire area of hair again, erase excess and fade eraser 50%, set to overlay 50%.
10. Dupicate layer in step 8 (the lighter color) and bring to top. Add Filter>Blur>Gaussian Blur set at 15 pt. Set to Luminosity 50%. Duplicate base layer and bring to top, set to Saturation 50%.
Merge Visible.
11. Add new layer, fill with 000000 (black). Add Filter>Noise>Add Noise set at 5%.
Add Filter>Stylize>Wind. Set to Method: Blast, Direction: from left. Sharpen once. Go to Edit>Free Transform to spin "rain" to not quite a 45 degree angle, enlarge to spread over entire image.
Set to Overlay 50% and erase area over girl in pic.
12. Add a new layer. Fill with black again, and add noise once more, this time setting to 8%. Add Wind once again, setting to Method:blast, but Direction:from the right this time. Free Transform and this time spin to a 45 degree angle, and enlarge to spread over entire image. Adjust brightness and contrast: B-20, C-50. Sharpen 2X. Duplicate layer 2x and set both to Overlay.
On the lower layer, Erase over girl and set opacity to 80%. On the upper layer, erase the background and set opacity to 25%. This is to leave the illusion of rain droplets around her face and dress.
13. Add a new layer and fill with white (FFFFFF). Free Transform this layer into a small rectangle.
Add text to box. I typed "She says her name is Glory" using font SF Toontime Italic(which can be found at dafont.com), enlarging the word Glory for emphasis. Merge down once. In the Blending Options menu, I used the stroke option set at 2 xp in black to outline the box and I added a drop shadow, but you can play around with this if you want.
Resize and move box and here's the finished product:
I can't wait to see what you come up with!