Brushes and Blendmodes - PS tutorial
My first ever Icon tutorial... It is made for a PS program, but can also be used for psp with some minor changes
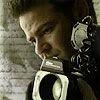
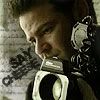
This is a very quick tutorial I made on how to make an icon like this:

1. The Base was taken from a screenshot of CSI: Miami

2. This is way to dark to be usefull so take the following step:
Duplicate this layer and set it to screen than merge the layers (ctrl+e) and sharpen it.. and the result will be this

3. Than make a new layer and put in the following color with the paintbucket tool and set the layer to color and to an opacity of 45%
# 494A0B

4. Than over to the brushes which I got from the wonderfull site of annikavonhold
Sadly I can't remember which brushset these came from so any comments would be appreciated.. But i belive it is from the "evil flowers"set
I made a new layer and over the other images I used the brush with the color white and than I erased the parts of the brush that were on top of the character.. I left the opacity at 100% (of you use a brush fiddle around with the opacity as different colors and different brushes give different results).

5. Than I made yet again another layer and used again an brush from annikavonhold and used a text brush with the color black than erased everything that was on top of the character.. And than set the opacity to 60% of that layer

6. Than I used the font Base 2 which can be downloaded from DA FONTS and madeone layer with "Say" and than another with "Cheese" and made the opacity for the first 80% and for the last one 70%

7.After that I used the move tool to set it an diagonal way like this (make sure you have the bounding box option selected, which can be found in the Upper bar).
Just fiddle a bit with the positions and see what works best for your icon.

8. And last but not least I do find a border always a bit of a finishing touch so make another layer press ctrl + A and go to Edit -> Stroke and use the color Black and put the size to 1. And voila a border. And it is done..

Feedback and comments are much appreciated.
This is a very quick tutorial I made on how to make an icon like this:

1. The Base was taken from a screenshot of CSI: Miami

2. This is way to dark to be usefull so take the following step:
Duplicate this layer and set it to screen than merge the layers (ctrl+e) and sharpen it.. and the result will be this

3. Than make a new layer and put in the following color with the paintbucket tool and set the layer to color and to an opacity of 45%
# 494A0B


4. Than over to the brushes which I got from the wonderfull site of annikavonhold
Sadly I can't remember which brushset these came from so any comments would be appreciated.. But i belive it is from the "evil flowers"set
I made a new layer and over the other images I used the brush with the color white and than I erased the parts of the brush that were on top of the character.. I left the opacity at 100% (of you use a brush fiddle around with the opacity as different colors and different brushes give different results).

5. Than I made yet again another layer and used again an brush from annikavonhold and used a text brush with the color black than erased everything that was on top of the character.. And than set the opacity to 60% of that layer

6. Than I used the font Base 2 which can be downloaded from DA FONTS and madeone layer with "Say" and than another with "Cheese" and made the opacity for the first 80% and for the last one 70%

7.After that I used the move tool to set it an diagonal way like this (make sure you have the bounding box option selected, which can be found in the Upper bar).
Just fiddle a bit with the positions and see what works best for your icon.

8. And last but not least I do find a border always a bit of a finishing touch so make another layer press ctrl + A and go to Edit -> Stroke and use the color Black and put the size to 1. And voila a border. And it is done..

Feedback and comments are much appreciated.