Addams Family Icon Tutorial
Program: Paint Shop Pro X2 Ultimate
Difficulty: Intermediate
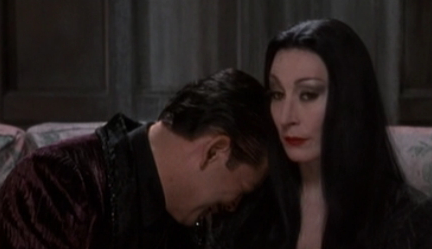
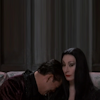
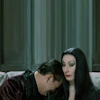
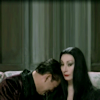
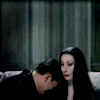
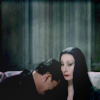
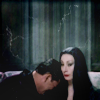
from this:
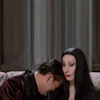
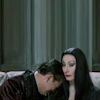
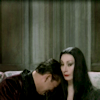
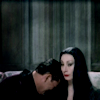
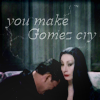
to this:
1. Evaluate your base. Decide what you want to do and how you want to do it. Sounds like I'm stating the obvious, I know, but if you don't give some thought to composition on icons like this, you won't get anywhere.
This particular image (a screencap I took myself) was just begging me to put up a caption ("You make Gomez cry"). The question was: where to put the text on the icon, and where to put Gomez and Morticia? I decided the easiest route to take would be to employ negative space, so that a small image of Gomez and Morticia would take up the lower section of the icon, leaving a generous section of negative space open for me to play around with the text.
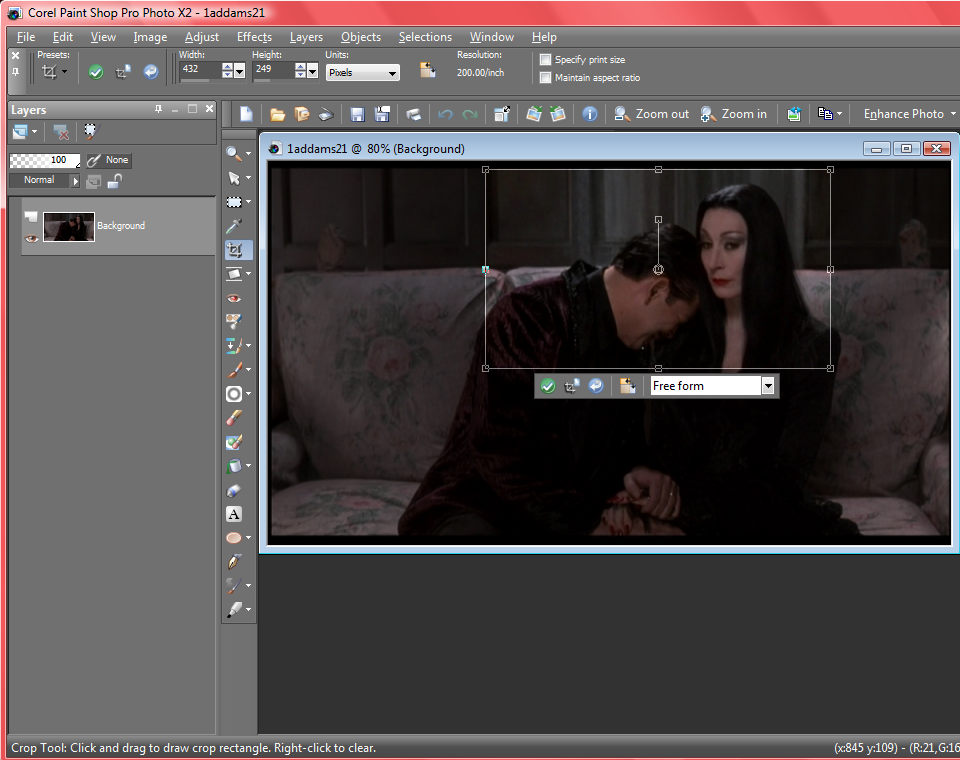
2. Crop, resize, stretch, and resize again.
I wanted to keep just the shoulders of the darling couple inside the picture, with their heads placed near the lower left of the icon, so I cropped the screencap just at their shoulders, 432 by 249 pixels.
I grabbed the Selection Tool (a black and white striped line) and dragged it across the image until I had all the pixels in a bar just above Morticia's head selected. (This took multiple tries. Only wizards can select EXACTLY what they want with this tricky tool on the first try.)
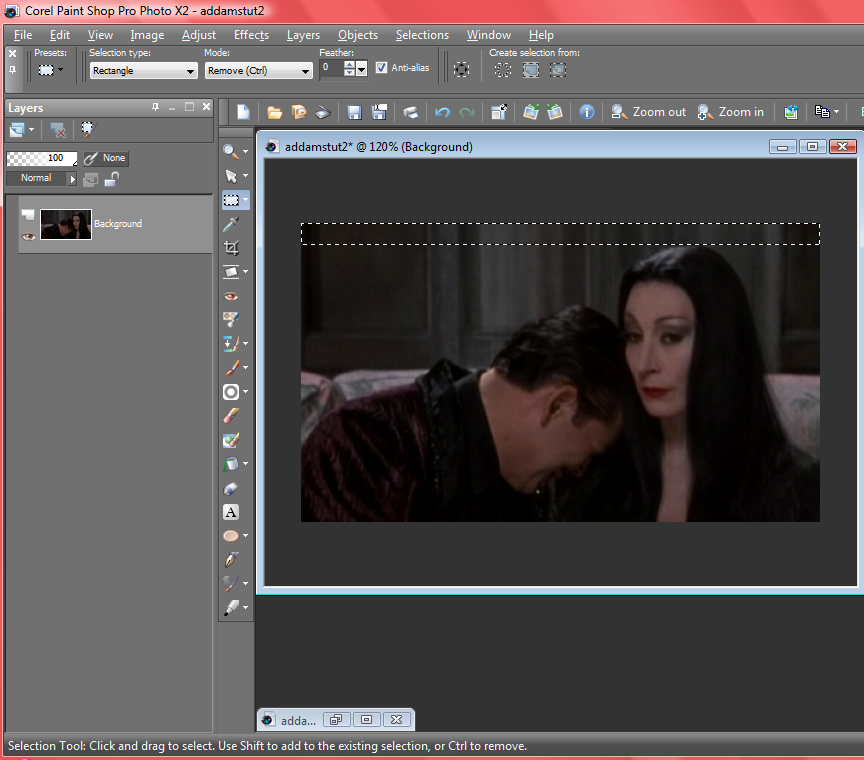
I hit copy (Ctrl+C) and then paste (Ctrl+V), so my selected section now sat on top of the original image in new layer.
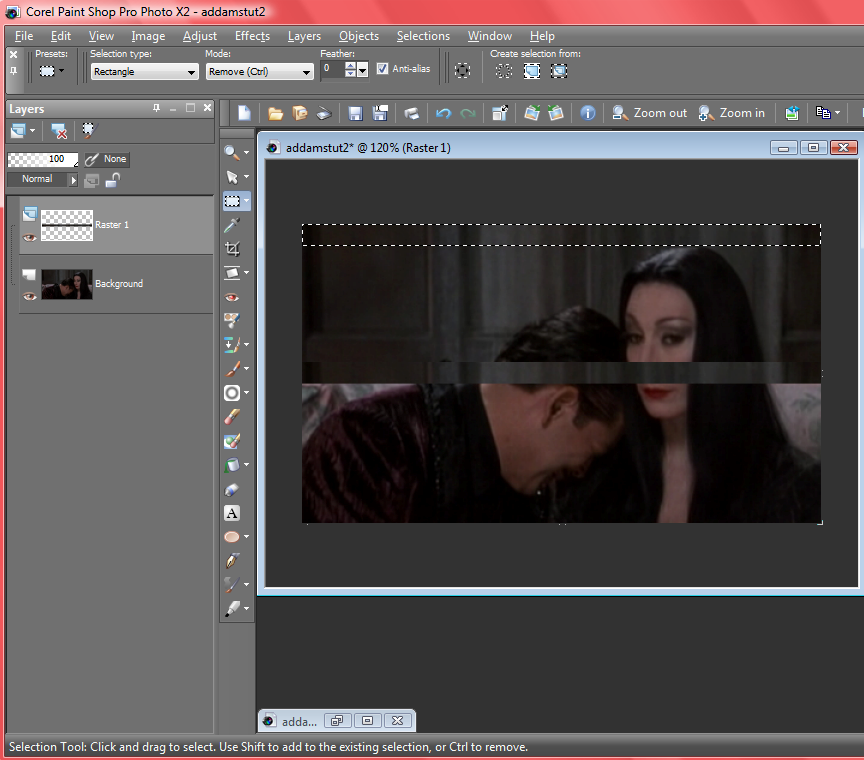
Next I promoted my background layer to a raster layer (by left-clicking the background layer and right-clicking Promote Background Layer), created a new raster layer (Layers>New Raster Layer), and moved it beneath my previous layers in the Layer Palette. (I went to all this trouble in order to have an opaque background later.)
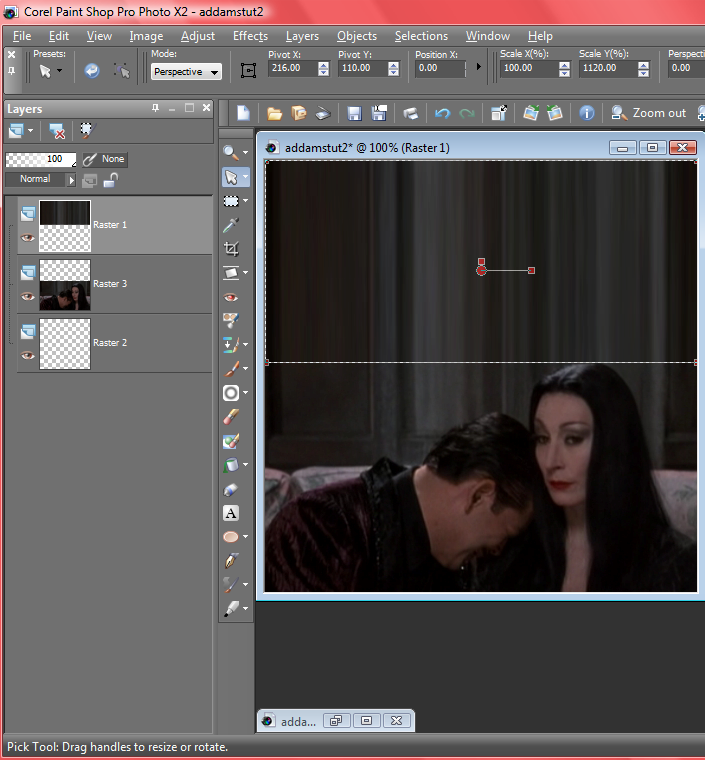
I changed my canvas size to 432 by 432 (Image>Canvas Size, set to Width: 432, Height: 432). Then I moved my image of Gomez and Morticia down to the bottom of the canvas with the Pick Tool.
I went up to the scale field for a layer's height (Scale Y%) and played with it until I got that bar to stretch to fill all the negative space in the upper part of the image, right down to the very crown of Morticia's head, where I'd copied the pixels earlier, so there would be a bit of overlap. In the end, it was Scale Y%: 1120.00.
To finish off the first stage, resize to 100 by 100 and flatten [Layers>Merge>Merge All (Flatten)].
3. Lighten the image. I duplicated my base and set it to Screen 100.
4. Amp up the blues and especially the greens. I created a Color Balance Layer (Layers>New Adjustment Layer>Color Balance) and, making sure that Preserve Luminance was checked, set it to
Midtones
Red: -55
Green: 32
Blue: 12
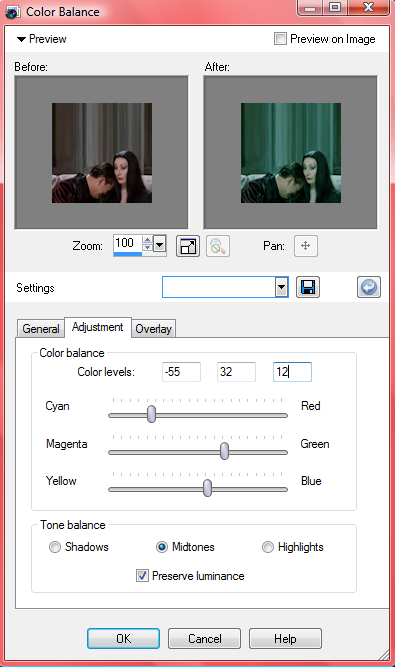
Then I set that Color Balance layer to Normal 50, so I'd get a nice blue/green change without going overboard (at least, for my taste).
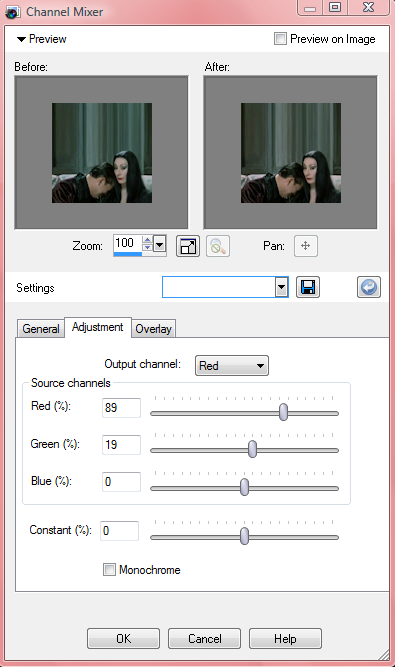
5. Add just a dash of red/pink. While I loved the greens in the background, the skin tones were a little too green for me, so I created a Channel Mixer layer (Layers>New Adjustment Layer>Channel Mixer), unchecked the Monochrome box, and set the fields to
Red
Red: 89
Green: 19
Blue: 0
Blue
Red: 6
Green: 0
Blue: 100
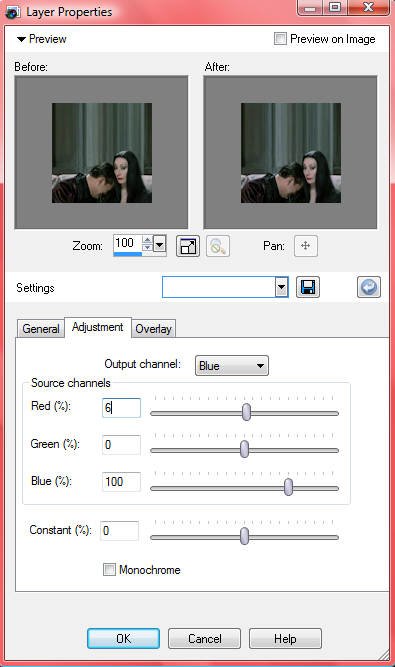
Then I set the layer to Normal 75.
6. Add brown. Initially, I'd wanted green to be my dominant color, with a little blue, especially in the shadows--and then I changed my mind. I wanted more brown! That's the funny thing about making icons--you can change your mind a hundred times in the process, and go absolutely crazy all over the place, and you often do. (And then you wonder why the heck you're trying to explain how you just goof around and watch what pops up . . .)
Anyway, I created another Color Balance layer, still with Preserve Luminance checked, and set it to
Midtones
Red: 29
Green: 0
Blue: -14
I left the layer set at Normal 100.
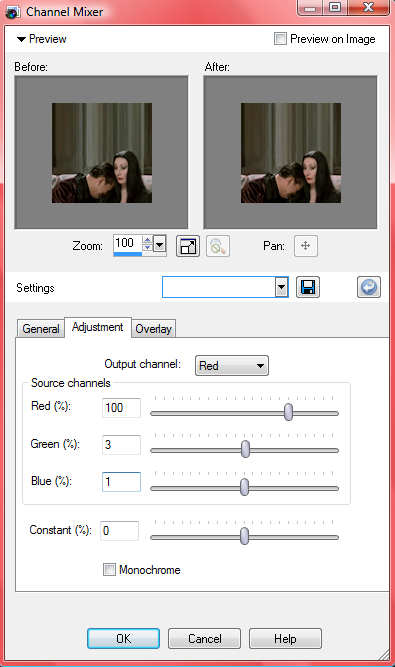
7. Brighten with more . . . blue/green. I just can't seem to escape that those two colors--I'm always finding room for more! This time, it's another Channel Mixer layer, set to
Red
Red: 100
Green: 3
Blue: 1
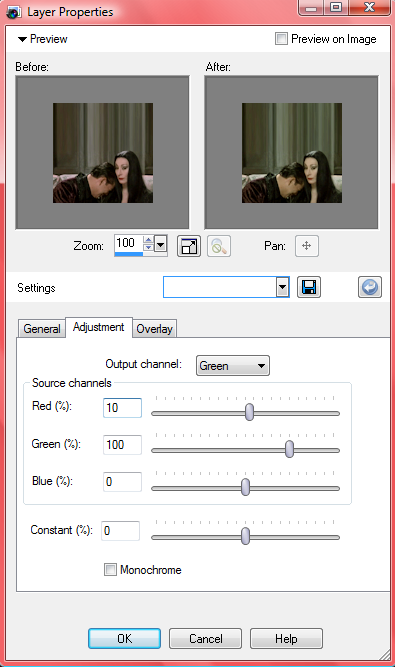
Green:
Red: 10
Green: 100
Blue: 0
Blue
Red: 12
Green: 0
Blue: 100
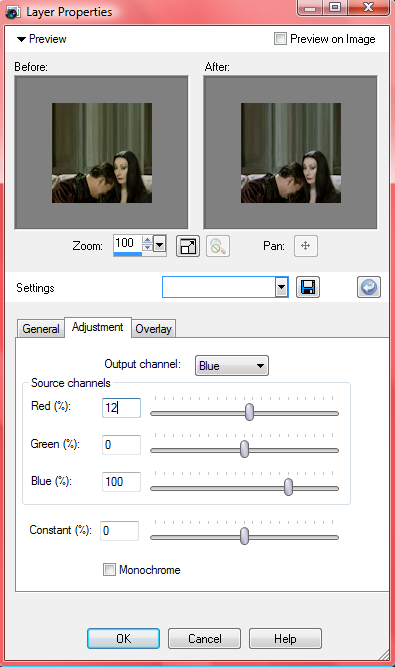
Then I set it to Normal 65, to mute the effect just a bit.
8. Add a green/blue darkening edge. I created a new fill layer (Layers>New Raster Layer) and filled it #3cfcbd, a nice Martha-Stewart-y pale green-blue. Then I set the layer to Burn 8.
9. Texture time! I wanted to start off with something really subtle to break up the vertical lines a bit, so I grabbed this little gem by mysteryofobscurity,
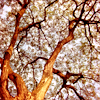
desaturated it (Adjust>Hue Saturation>Hue/Saturation/Lightness>Saturation:0), and set it to Soft Light 7.

10. More texture. I wanted a puffy, cloudy effect, so I took this texture by myriad,
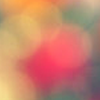
also desaturated it, and set it to Soft Light 100.

11. Add more brown tones. I began feeling the green was too prevalent, so I created another fill layer, filled it with #fb5c47, a rosy orange, and set it to Burn 7. Nice and subtle.
12. Now for more blue. I wanted to accentuate the shadows, till the darker parts of the icon were mostly pitch black, and the lighter parts of the icon were most a pale, soft bluish color, so I created a new fill layer, filled it with #d3dbf5, a very pale blue, and set my layer to Burn 90.
13. More cloudy texture! I took a texture by an unknown maker (do tell me who it is if you know!)
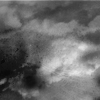
and set it to Soft Light 46.
14. Up the saturation. Using a trick I learned a long time ago from a tutorial I can't find anymore, I created a new fill layer, filled it with #f7f3fb, a super pale purple, and set it to Luminance (Legacy) 100.

I Copy Merged this layer (Edit>Copy Special>Copy Merged), and then hit Ctrl+V twice to paste it as two new layers. I deleted the original layer filled with pale purple (#f7f3fb), and then set the upper pasted layer to Soft Light 15 and the lower pasted layer to Burn 52.

15. Attack of the light blobs! I ended up creating three different layers to brighten points at the upper left corner of the icon, the lower left corner, and the area around and above Morticia's head. Here they are in texture form. (If you don't know how to create your own light blob textures, read step 10 of this other tutorial here.)
I set this one
to Screen 14,
this one
to Screen 46,
and this one
to Screen 11.
16. Now for another light texture. I took this one
by innocent_lexys, converted it to greyscale (Adjust>Hue/Saturation/Lightness>Saturation:0), and then set it to Screen 44. (I also created a Mask Layer and blotted out the part of the texture covering Morticia's face. That part is entirely optional, and varies from icon to icon.)
17. Time to add the text! Making sure the text tool is set to white and Times New Roman at Size: 16, I typed in "you make" and then positioned it near the upper left corner. Next, I typed "Gomez cry" and positioned it to the right just below "you make." I liked this setup because it makes the text look quirky yet symmetrical, while still being easy to read.
18. Finally, sharpen at will. I simply hit Copy Merged, then Ctrl+V to paste a new layer, and then Adjust>Sharpness>Sharpen, and set this last layer to Normal 24.
And . . . done!
Difficulty: Intermediate
from this:

to this:
1. Evaluate your base. Decide what you want to do and how you want to do it. Sounds like I'm stating the obvious, I know, but if you don't give some thought to composition on icons like this, you won't get anywhere.
This particular image (a screencap I took myself) was just begging me to put up a caption ("You make Gomez cry"). The question was: where to put the text on the icon, and where to put Gomez and Morticia? I decided the easiest route to take would be to employ negative space, so that a small image of Gomez and Morticia would take up the lower section of the icon, leaving a generous section of negative space open for me to play around with the text.

2. Crop, resize, stretch, and resize again.
I wanted to keep just the shoulders of the darling couple inside the picture, with their heads placed near the lower left of the icon, so I cropped the screencap just at their shoulders, 432 by 249 pixels.

I grabbed the Selection Tool (a black and white striped line) and dragged it across the image until I had all the pixels in a bar just above Morticia's head selected. (This took multiple tries. Only wizards can select EXACTLY what they want with this tricky tool on the first try.)

I hit copy (Ctrl+C) and then paste (Ctrl+V), so my selected section now sat on top of the original image in new layer.

Next I promoted my background layer to a raster layer (by left-clicking the background layer and right-clicking Promote Background Layer), created a new raster layer (Layers>New Raster Layer), and moved it beneath my previous layers in the Layer Palette. (I went to all this trouble in order to have an opaque background later.)
I changed my canvas size to 432 by 432 (Image>Canvas Size, set to Width: 432, Height: 432). Then I moved my image of Gomez and Morticia down to the bottom of the canvas with the Pick Tool.
I went up to the scale field for a layer's height (Scale Y%) and played with it until I got that bar to stretch to fill all the negative space in the upper part of the image, right down to the very crown of Morticia's head, where I'd copied the pixels earlier, so there would be a bit of overlap. In the end, it was Scale Y%: 1120.00.

To finish off the first stage, resize to 100 by 100 and flatten [Layers>Merge>Merge All (Flatten)].
3. Lighten the image. I duplicated my base and set it to Screen 100.
4. Amp up the blues and especially the greens. I created a Color Balance Layer (Layers>New Adjustment Layer>Color Balance) and, making sure that Preserve Luminance was checked, set it to
Midtones
Red: -55
Green: 32
Blue: 12

Then I set that Color Balance layer to Normal 50, so I'd get a nice blue/green change without going overboard (at least, for my taste).
5. Add just a dash of red/pink. While I loved the greens in the background, the skin tones were a little too green for me, so I created a Channel Mixer layer (Layers>New Adjustment Layer>Channel Mixer), unchecked the Monochrome box, and set the fields to
Red
Red: 89
Green: 19
Blue: 0

Blue
Red: 6
Green: 0
Blue: 100

Then I set the layer to Normal 75.
6. Add brown. Initially, I'd wanted green to be my dominant color, with a little blue, especially in the shadows--and then I changed my mind. I wanted more brown! That's the funny thing about making icons--you can change your mind a hundred times in the process, and go absolutely crazy all over the place, and you often do. (And then you wonder why the heck you're trying to explain how you just goof around and watch what pops up . . .)
Anyway, I created another Color Balance layer, still with Preserve Luminance checked, and set it to
Midtones
Red: 29
Green: 0
Blue: -14
I left the layer set at Normal 100.
7. Brighten with more . . . blue/green. I just can't seem to escape that those two colors--I'm always finding room for more! This time, it's another Channel Mixer layer, set to
Red
Red: 100
Green: 3
Blue: 1

Green:
Red: 10
Green: 100
Blue: 0

Blue
Red: 12
Green: 0
Blue: 100

Then I set it to Normal 65, to mute the effect just a bit.
8. Add a green/blue darkening edge. I created a new fill layer (Layers>New Raster Layer) and filled it #3cfcbd, a nice Martha-Stewart-y pale green-blue. Then I set the layer to Burn 8.
9. Texture time! I wanted to start off with something really subtle to break up the vertical lines a bit, so I grabbed this little gem by mysteryofobscurity,
desaturated it (Adjust>Hue Saturation>Hue/Saturation/Lightness>Saturation:0), and set it to Soft Light 7.
10. More texture. I wanted a puffy, cloudy effect, so I took this texture by myriad,
also desaturated it, and set it to Soft Light 100.
11. Add more brown tones. I began feeling the green was too prevalent, so I created another fill layer, filled it with #fb5c47, a rosy orange, and set it to Burn 7. Nice and subtle.
12. Now for more blue. I wanted to accentuate the shadows, till the darker parts of the icon were mostly pitch black, and the lighter parts of the icon were most a pale, soft bluish color, so I created a new fill layer, filled it with #d3dbf5, a very pale blue, and set my layer to Burn 90.
13. More cloudy texture! I took a texture by an unknown maker (do tell me who it is if you know!)
and set it to Soft Light 46.
14. Up the saturation. Using a trick I learned a long time ago from a tutorial I can't find anymore, I created a new fill layer, filled it with #f7f3fb, a super pale purple, and set it to Luminance (Legacy) 100.
I Copy Merged this layer (Edit>Copy Special>Copy Merged), and then hit Ctrl+V twice to paste it as two new layers. I deleted the original layer filled with pale purple (#f7f3fb), and then set the upper pasted layer to Soft Light 15 and the lower pasted layer to Burn 52.

15. Attack of the light blobs! I ended up creating three different layers to brighten points at the upper left corner of the icon, the lower left corner, and the area around and above Morticia's head. Here they are in texture form. (If you don't know how to create your own light blob textures, read step 10 of this other tutorial here.)
I set this one
to Screen 14,
this one
to Screen 46,
and this one
to Screen 11.
16. Now for another light texture. I took this one
by innocent_lexys, converted it to greyscale (Adjust>Hue/Saturation/Lightness>Saturation:0), and then set it to Screen 44. (I also created a Mask Layer and blotted out the part of the texture covering Morticia's face. That part is entirely optional, and varies from icon to icon.)
17. Time to add the text! Making sure the text tool is set to white and Times New Roman at Size: 16, I typed in "you make" and then positioned it near the upper left corner. Next, I typed "Gomez cry" and positioned it to the right just below "you make." I liked this setup because it makes the text look quirky yet symmetrical, while still being easy to read.
18. Finally, sharpen at will. I simply hit Copy Merged, then Ctrl+V to paste a new layer, and then Adjust>Sharpness>Sharpen, and set this last layer to Normal 24.
And . . . done!