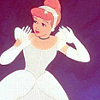
Soft Pink/Blue Coloring
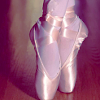
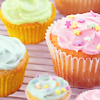
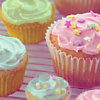
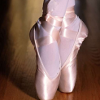
Going from this
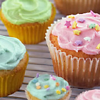
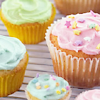
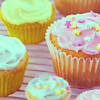
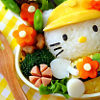
to
Program: Gimp
Steps: 11
Difficulty: Easy to Medium
Translatable: Yep!
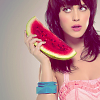
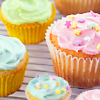
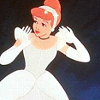
Other Examples
This coloring gives a pretty soft pink and blue effect. It works well with icons that have pink and light colors in it. With bold colors, it doesn't give the same effect, but it does make the icon lighter with a fuzzy kind of look.
1. As always, find your image and crop it to 100x100. The image I selected is a little blurry, so I sharpened it with the Sharpen Tool at 37%.
2. Ok, now that we have our icon base ready, time for coloring! It is best for the icon to be be lighter with pale colors. So, I created two color fill layers with #bbb7b7, and set them both to Soft Light. The bottom layer I left at 100% opacity, but the second fill layer made the icon too light, so I lowered the opacity to 47.7%. Of course depending on the icon you selected, adjust the opacities how you see fit, and maybe you may need only one fill layer or more than one.

>>>>
3. The image is lighter, but the colors and line definition may be a little too dull. If you like the way your icon looks, you can skip this step, but I wanted to add more definition, because of the sprinkles. So create a new layer using: Layer> New From Visible. Then on this layer, go to Hue/Saturation and set it to 30%. Again, feel free to add more or less depending on your icon! But if you add too much, your icon may turn out too red.
>>>>
4. Just like in the last tutorial, we will be creating an exclusion layer. In Gimp, it is just two screen layers and one subtract layer. So male three fill layers, using #820b1f. Set the bottom two layers to screen and the top one to subtract.

5. Ok. Now that we have the three fill layers, it is time to adjust the opacities, because the image turns out too be too blue.
Subtract Layer (top layer) at 50%
>>>>
Screen Layer (middle layer) at 72%
>>>>

Screen Layer (bottom layer) at 37%
>>>>
*Because the icon I picked has pink in it, the first two screen layers look like they don't have much of an influence on the coloring. However, with your icon, make sure you adjust the opacities to get the color you are aiming for. You want the end result to have a blue-ish tint, like the Subtract layer.
6. Ok, for the next step, we will add a Color Balance layer. So, create a new layer using Layer > New From Visible. Next, open up Color Balance and use the following:
Shadows: 8,11,20
Midtones: 21,-11,12
Highlights: 7,11,-8
The Color Balance layer will make the colors stand out more, by adding a little more pink and a grey-ish highlight.
>>>>
7. Create a new layer: Layer>New from visible. On this layer, we will be adding a Levels layer, using the following:
Channel: Value
Input: 27, 1.27, 255
Output: 34, 209
Channel: Red
Input: 59, 1.00, 255
Output: 94, 255
Channel: Green
Input: 0, 1.00, 221
Output: 0,233
Channel: Blue
Input: 0, 1.53, 255
Output: 24,236
>>>>
*I really like this effect. It makes the image a fuzszy greyish-blue. Sometimes, depending on the icon, you can just use this Levels layer and the icon would be finished. It would be good to play around with this kind of layer with other icons. I forget where I got these numbers from, but I am happy to have found them! : )
8. Next, duplicate your base and bring it to the top of the layers. Set this layer to Lighten Only 100%.
Levels Layer Base Layer (set to Lighten Only 100%) Result
>>>>>>>>>>>
>>>>>>>>>>>>>
9. Next, make a fill layer with #f7d9dd, set it to Burn 100%. After this step, if you are happy with the result, you can stop here.

>>>>
10. I want to add a little more blue to mine, so I am going to add another fill layer with #d3f5fb, set it to Burn 40.2%

>>>>
11. I sharpened and I saved the icon. Feel free to add text or whatever to the icon when you are finished!
PS: As always, I would love to see your results! : )
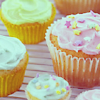
Others
>>>>
>>>>
>>>>
>>>>