(no subject)

>>

8 Steps
Translatable: Yes
Difficulty: Easy

Step 1~ Create a new fill layer (layer>>new fill layer>>solid colour...) . #2b2b2b set to exclusion with its opacity lowered down to 52%.
This was just to dull out the base a little . We're going for a soft look for this icon so depending on your base, my base didn't need any sort of preparing.

Step 2~ Duplicate your base and drag it to the top in our layers palette. Set this layer to softlight.
This was so the icon didn't look so washed out.

Step 3~ Add these next to fill colours, to begin to tone the colouring of the icon.
#ff0000 set to saturation.
#733e3e set to exclusion

Step 4~ Time to put a little contrast with the colouring. The green-ish look wasn't really working for me, so we'll fix that up.
Create a new channel mixer layer (layer>>new adjustment layer>>channel mixer...), and input the following settings:
RED: +76, +24, +14, 0
GREEN: +9, +93, 12, 0
BLUE: +12, 0, +100, 0
set this new layer to softlight.

Step 5~ Create a new colour balance layer (layer>>new adjustment layer>>colour balance...), and input the following settings:
Midtones: +41, -3, +12
Set this new layer to color.
This'll start to get ride of the odd green-ish tone and give us a more redder one.

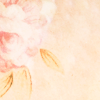
Step 6~ Add these next two textures who both are by infinite_muse .

set to screen 42%
darken 100%
The first texture will lighten specifically the middle of the icon and the flower texture will just be a decoration on the side.

Step 7~ The textures are nice and all ofcourse, but they've seemed to wash out the main focus of our icon. Duplicate your base and drag it all the way to the top. Set this layer to softlight.

Step 8~ This part of the icon may differ depending on you, but this is where I chose to add a border and text.
I added a dotted border in the colour a43728. I can't remember the maker of this border since I found it a while ago, but if you would like it here's the link to it. If you know the maker, please tell :)
I typed 'believe' in the font Jane Austen, and added some tiny text.
And you're basically done :)
I enjoy hearing feedback/comments/or results for any of my tutorials.
Other results:

>>


>>

Please direct all comments here @ the original post please :)