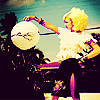
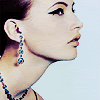
Purple colouring
From 
to
!
Made in Photoshop 7.0, uses selective colouring.
1. Crop, resize & sharpen your base. But, only sharpen if you've resized it!
2. New fill layer (FF6363) @ colour burn 71.
3. Duplicate your base, drag it to the top. and set to soft light. It can be anything between 50 t0 80. I put mine at 80, but choose whatever looks good to you.
4. New fill layer (FFE56A) @ overlay 43.
5. Last step! Selective colour layer.
REDS:
-18, +26, -77, +15
YELLOWS:
-100, +14, +56, 0
BLUES:
+100, -17, -100, 0
WHITES:
+25, 0, 0, 0
NEUTRALS:
+19, 0, -23, 0
Done! Feedback is love :). If you're using a screencap or a particularly dark image, then you'd probably have to duplicate and screen your base as many time it's needed.
Other icons made with the same colouring:


to

!
Made in Photoshop 7.0, uses selective colouring.
1. Crop, resize & sharpen your base. But, only sharpen if you've resized it!
2. New fill layer (FF6363) @ colour burn 71.
3. Duplicate your base, drag it to the top. and set to soft light. It can be anything between 50 t0 80. I put mine at 80, but choose whatever looks good to you.
4. New fill layer (FFE56A) @ overlay 43.
5. Last step! Selective colour layer.
REDS:
-18, +26, -77, +15
YELLOWS:
-100, +14, +56, 0
BLUES:
+100, -17, -100, 0
WHITES:
+25, 0, 0, 0
NEUTRALS:
+19, 0, -23, 0
Done! Feedback is love :). If you're using a screencap or a particularly dark image, then you'd probably have to duplicate and screen your base as many time it's needed.
Other icons made with the same colouring:


