Tutorial #02
Another tut! Requested by
kyliemuffin~ Made for Round 1 challenge 8 in
clamp_lims.
From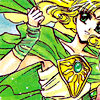
going to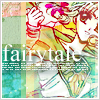
Icon made in: Adobe Photoshop CS

>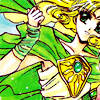
1. Okay! Duplicate your base and set it to SOFT LIGHT 100%. Press Ctrl+A to select the new layer, then go to FILTER > BLUR > GAUSSIAN BLUR and set the radius to 1.0. Play with the radius until you get a result that you like.

>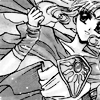
2. Use the black (#000000) layer and set it onto the icon to SATURATION 100%

>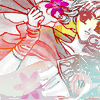
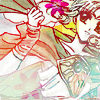
3. Slap that texture by
gender on and set it to PIN LIGHT 100%

>
4. Slap on the base onto the icon and set it to SOFT LIGHT 70%
>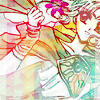
5. Use this texture by
inxsomniax and set it to SOFT LIGHT 75%

>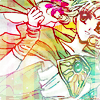
6. Slap the base onto the icon once again and set it to SOFT LIGHT 50%

>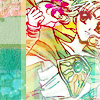
7. Use the texture by
gender (cropped by me) and use the Move Tool to drag it to the left side.
8. Yay~ colouring is done. Time to add some text :3
Type in: "fairytale" in 24pt in Times New Roman, CRISP. And place the text on the left side, just below her hand, like where I placed mine :3
Select the text, then go to LAYER > LAYER STYLE > DROP SHADOW. And play with the opacity until you see the results you want. I set it around 75%-85%.
Add tiny text and a border then you're done!
Final product:
~x~
(Step 2 and 3 are inspired by
anty_!)
How was this tut? Was it helpful? Confusing? I hope it wasn't too confusing :3 Feedback would be lovely!
x Like what you see? JOIN
ichiyohime for more updates on icons, tuts and other graphics!~
x Affiliate plug:
kurabu - an icon journal of the lovely
5254!
kyliemuffin~ Made for Round 1 challenge 8 in
clamp_lims.
From

going to
Icon made in: Adobe Photoshop CS

>

1. Okay! Duplicate your base and set it to SOFT LIGHT 100%. Press Ctrl+A to select the new layer, then go to FILTER > BLUR > GAUSSIAN BLUR and set the radius to 1.0. Play with the radius until you get a result that you like.

>

2. Use the black (#000000) layer and set it onto the icon to SATURATION 100%

>

3. Slap that texture by
gender on and set it to PIN LIGHT 100%

>

4. Slap on the base onto the icon and set it to SOFT LIGHT 70%
>

5. Use this texture by
inxsomniax and set it to SOFT LIGHT 75%

>

6. Slap the base onto the icon once again and set it to SOFT LIGHT 50%

>

7. Use the texture by
gender (cropped by me) and use the Move Tool to drag it to the left side.
8. Yay~ colouring is done. Time to add some text :3
Type in: "fairytale" in 24pt in Times New Roman, CRISP. And place the text on the left side, just below her hand, like where I placed mine :3
Select the text, then go to LAYER > LAYER STYLE > DROP SHADOW. And play with the opacity until you see the results you want. I set it around 75%-85%.
Add tiny text and a border then you're done!
Final product:
~x~
(Step 2 and 3 are inspired by
anty_!)
How was this tut? Was it helpful? Confusing? I hope it wasn't too confusing :3 Feedback would be lovely!
x Like what you see? JOIN
ichiyohime for more updates on icons, tuts and other graphics!~
x Affiliate plug:
kurabu - an icon journal of the lovely
5254!