Mission Trim: COMPLETED
Hooray! :D
All the trim has been added to the garment, including trim on the inside and the outside of the cloak's hood (since you see both the inside when the hood is 'open' and the outside when the hood is 'closed'). How much trim, you ask? Well, there is plenty of twill tape left on my 100 yard spool, but I am going to guess 30-35 yards. I know I went through almost two whole spools of thread at 250 yards a spool.
My fingers...they are Swiss cheese... And they would have been ten times worse if sstormwatch hadn't let me in on the secret of using a running stitch rather than a hem stitch to attach all that trim. Bless you darling!
There is still that *slightly* crazy voice in my head that wants to use some very narrow soutache to make some fancy patterns on this bad-boy. But I think I may save that for the next one (already in the planning phases in my head...).
Next up - tassels and cords and more handbound grommets - Oh My!
Cloak Front

Cloak Back

Hood, Down - Back View: A view of the 'interior' cloak trim

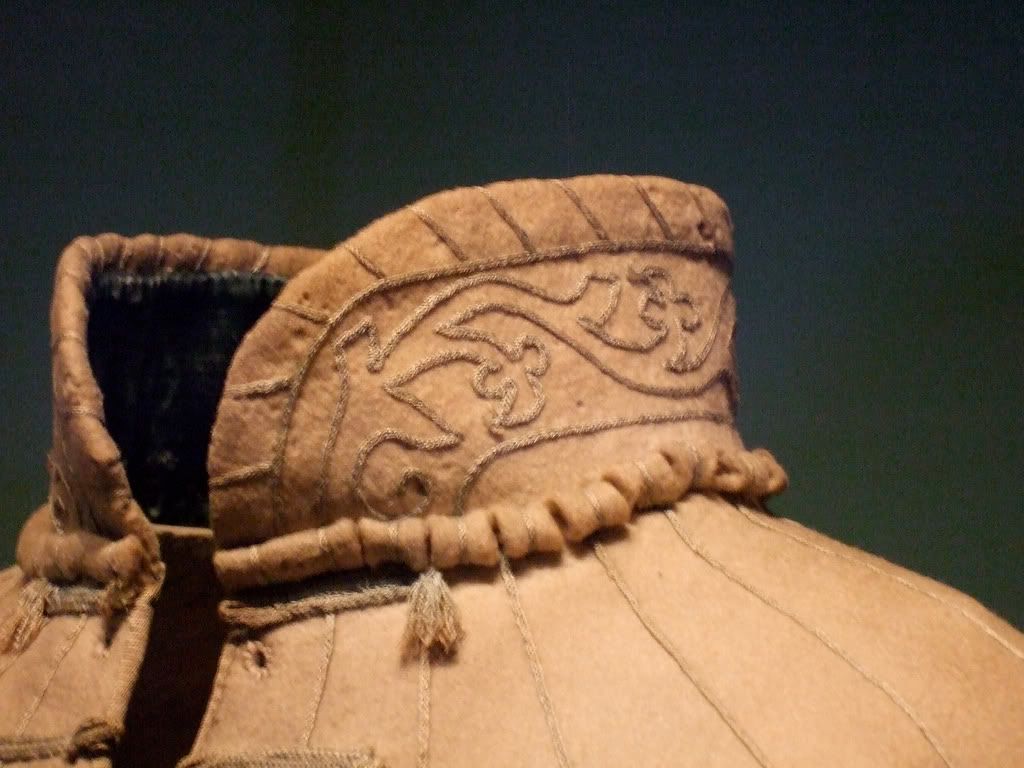
Hood, "Up" - Back View: A view of the 'exterior' cloak trim - different pattern

Cloak & Hood Tails - Front View

Throw a couple of pins in those shoulders and you apparently get a pretty badass little 'Schaube Collar' look out of this garment. ;) This is going to look even cooler when the tassels are attached to the end of those tails, and the collar and tassels have their fingerlooped trim and ties attached.
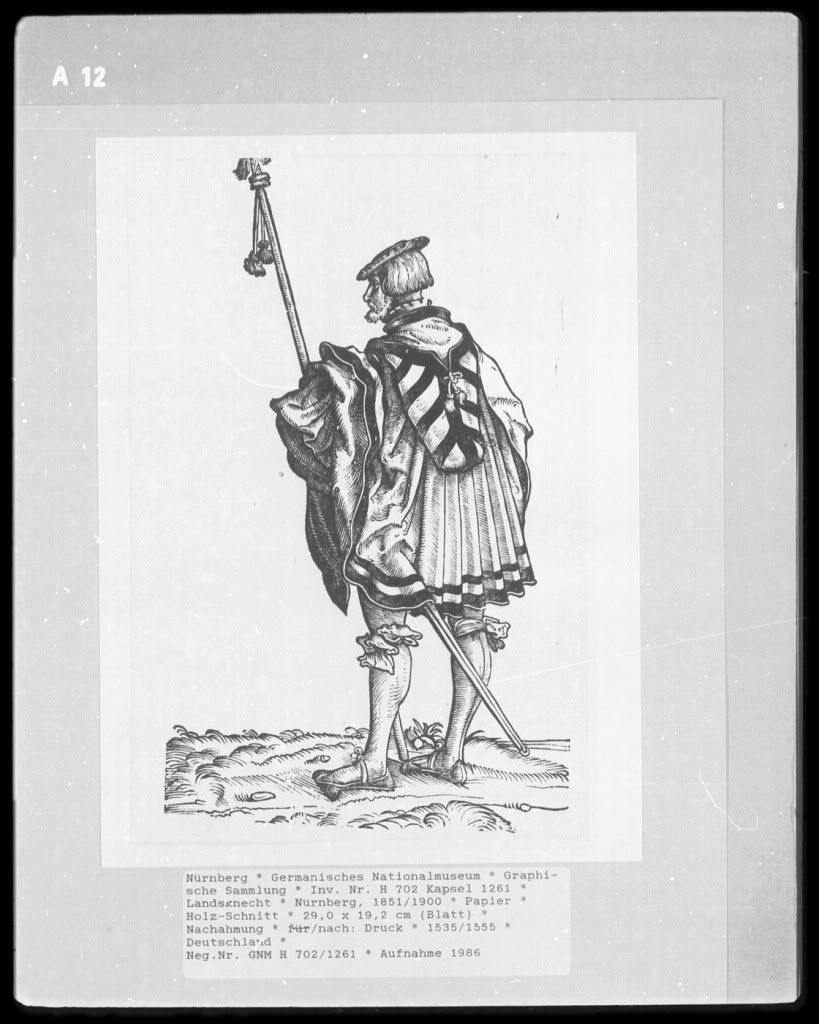
We are going to close the cloak with one tie at the throat, set in the same manner as the grommets on the following extant piece:
Stephan Praun's Pilgrim's Cloak, 1571
All the trim has been added to the garment, including trim on the inside and the outside of the cloak's hood (since you see both the inside when the hood is 'open' and the outside when the hood is 'closed'). How much trim, you ask? Well, there is plenty of twill tape left on my 100 yard spool, but I am going to guess 30-35 yards. I know I went through almost two whole spools of thread at 250 yards a spool.
My fingers...they are Swiss cheese... And they would have been ten times worse if sstormwatch hadn't let me in on the secret of using a running stitch rather than a hem stitch to attach all that trim. Bless you darling!
There is still that *slightly* crazy voice in my head that wants to use some very narrow soutache to make some fancy patterns on this bad-boy. But I think I may save that for the next one (already in the planning phases in my head...).
Next up - tassels and cords and more handbound grommets - Oh My!
Cloak Front
Cloak Back
Hood, Down - Back View: A view of the 'interior' cloak trim
Hood, "Up" - Back View: A view of the 'exterior' cloak trim - different pattern
Cloak & Hood Tails - Front View
Throw a couple of pins in those shoulders and you apparently get a pretty badass little 'Schaube Collar' look out of this garment. ;) This is going to look even cooler when the tassels are attached to the end of those tails, and the collar and tassels have their fingerlooped trim and ties attached.
We are going to close the cloak with one tie at the throat, set in the same manner as the grommets on the following extant piece:
Stephan Praun's Pilgrim's Cloak, 1571