Kiyoharu tutorial
Go from 
to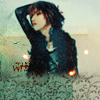
in PS7.
-Involves selective coloring.
1. Take your base, crop it, etc. Duplicate your base, and set it to
Screen, 100%.

2. New Selective Coloring layer. This won't work for every icon, so
it's best to play around with the settings.
Reds
-58, +7, 0
Yellows
+22, -14, -100
Neuterals
+47, +20, -8

3. Flatten your image. Go to the Elliptical Marquee Tool

(the red circle thing >_>)
and select the portion of your image that you don't want blurred.
Right click, and select "Select Inverse"
Go to Filter - Blur - Radial Blur at around 30.
Deselect your Elliptical Marquee tool.

4. New Selective Coloring layer.
Reds:
-21, 0, +55
Yellows:
+92, 0, +17
Neuterals:
+55, -15, -1, -14

Now take this (edited) texture by
loveicon
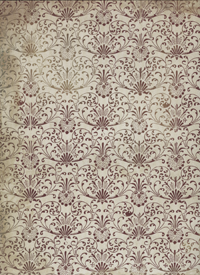
Place it on your icon, and, using a soft round eraser,
erase about 3/4 of the texture.

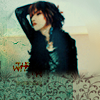
5. Take This Texture by
kaien_kun
and set it to Multiply, 100%.
If there are any bits of the texture blocking the subject, you can erase
parts of it, or rotate the texture (of course ^_^)
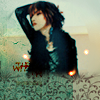
8. Take a light texture

by
graphic_sl and set it to Lighten, 100%. Move it around to your liking.
9. The last step, yay.
Take This Texture by
vert_gazon
Invert it, and set it to Screen, 100%.

and we're done. ^_^
to
in PS7.
-Involves selective coloring.
1. Take your base, crop it, etc. Duplicate your base, and set it to
Screen, 100%.
2. New Selective Coloring layer. This won't work for every icon, so
it's best to play around with the settings.
Reds
-58, +7, 0
Yellows
+22, -14, -100
Neuterals
+47, +20, -8
3. Flatten your image. Go to the Elliptical Marquee Tool
(the red circle thing >_>)
and select the portion of your image that you don't want blurred.
Right click, and select "Select Inverse"
Go to Filter - Blur - Radial Blur at around 30.
Deselect your Elliptical Marquee tool.
4. New Selective Coloring layer.
Reds:
-21, 0, +55
Yellows:
+92, 0, +17
Neuterals:
+55, -15, -1, -14
Now take this (edited) texture by
loveicon
Place it on your icon, and, using a soft round eraser,
erase about 3/4 of the texture.
5. Take This Texture by
kaien_kun
and set it to Multiply, 100%.
If there are any bits of the texture blocking the subject, you can erase
parts of it, or rotate the texture (of course ^_^)
8. Take a light texture
by
graphic_sl and set it to Lighten, 100%. Move it around to your liking.
9. The last step, yay.
Take This Texture by
vert_gazon
Invert it, and set it to Screen, 100%.
and we're done. ^_^