Tutorial #2
How to go from 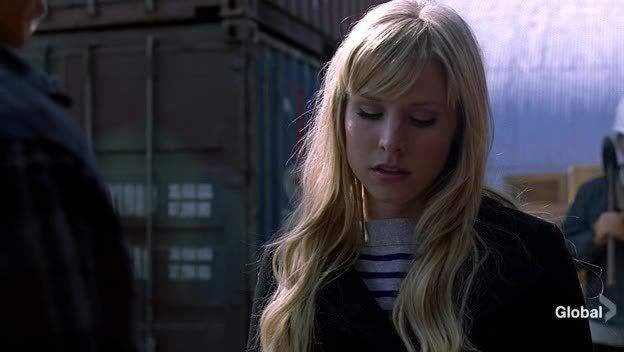
(this) to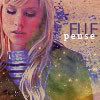
under the cut. Involves Selective Colouring, but you can skip that part if you have PSP.
Welcome, welcome! A tutorial to make this icon
of my new favourite heroeschar! (A) Let's start.
Crop your image, prep your base, blabla. I cropped, resized to 100 x 100. Then I duplicated mine twice and put them on screen, 100%. I cloned away the Global logo. Then I sharpened and blurred Elle's face. Anyway, here's your base:

Your base should be as light as this one. Not exactly of course.
Here I did some selective coloring, but I don't know what it was, because this part wasn't in my .psd anymore.. Anyway, it was a minor change and not so important. :p
I thought the background was kinda ugly, so I selected Elle with the Polygonal Lasso tool, copied the selection into a new layer, and deleted the old one. So, there's Elle with a transparant background! I placed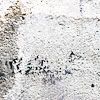
this texture of myself behind it. It looked a bit to hard for me, so I blurred it with a low opacity brush (10%) or whatsoever. Then I put a solid color layer on top of the texture (and still behind Elle). #000c68 on exclusion, 100 %.
Now we have this:
The colors look really dull, so we are going to something about that using selective color.
Important with selective coloring is, that you Just. Mess. Around. Seriously! So, please, don't follow my steps exactly, because you won't learn anything. Just try things, and use what works best for you.
Anyway, I did this:
Reds:
-100, -34, +15, 0
Cyans:
+100, 0, 0, 0
Whites:
-100, 0, +100, -100
Neutrals:
+24, 0, -25, +17
Now we have this.
You don't have to make it this blue or cyan, with a red picture this tutorial will work anyway, but different of course. :p
Put this texture
from
dignityy on top. Darken, 70 %.
Now put this texture
from
sanami276 on top, Lighten, 100%.
And the last texture from
haudvafra.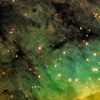
Put it on top, Lighten 75 %.
Now we have this.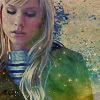
The colors are kinda depressing imho. So, another selective coloring layer.
Reds:
-100, 0, +100, +41
Cyans:
+100, 0, -100, +100
Neutrals:
-34, 0, -15, 0
Now we have this.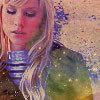
Looks nice, eh? Add brushes/text/whateveryouwant et voila! I added some text, in French of course because if your name is Elle you're just asking for French. Anyway, Elle was in GeosansLight, point 18 and bold. 'pense' was written in Times New Roman point 10 and 'widened'(?) 200.

Icons with similiar effect:

Rules:
[x] Comments are amazing
[x] So is showing your result.
[x] Please do not copy this tutorial.
Bye.

(this) to

under the cut. Involves Selective Colouring, but you can skip that part if you have PSP.
Welcome, welcome! A tutorial to make this icon

of my new favourite heroeschar! (A) Let's start.
Crop your image, prep your base, blabla. I cropped, resized to 100 x 100. Then I duplicated mine twice and put them on screen, 100%. I cloned away the Global logo. Then I sharpened and blurred Elle's face. Anyway, here's your base:

Your base should be as light as this one. Not exactly of course.
Here I did some selective coloring, but I don't know what it was, because this part wasn't in my .psd anymore.. Anyway, it was a minor change and not so important. :p
I thought the background was kinda ugly, so I selected Elle with the Polygonal Lasso tool, copied the selection into a new layer, and deleted the old one. So, there's Elle with a transparant background! I placed

this texture of myself behind it. It looked a bit to hard for me, so I blurred it with a low opacity brush (10%) or whatsoever. Then I put a solid color layer on top of the texture (and still behind Elle). #000c68 on exclusion, 100 %.
Now we have this:

The colors look really dull, so we are going to something about that using selective color.
Important with selective coloring is, that you Just. Mess. Around. Seriously! So, please, don't follow my steps exactly, because you won't learn anything. Just try things, and use what works best for you.
Anyway, I did this:
Reds:
-100, -34, +15, 0
Cyans:
+100, 0, 0, 0
Whites:
-100, 0, +100, -100
Neutrals:
+24, 0, -25, +17
Now we have this.

You don't have to make it this blue or cyan, with a red picture this tutorial will work anyway, but different of course. :p
Put this texture

from
dignityy on top. Darken, 70 %.
Now put this texture

from
sanami276 on top, Lighten, 100%.
And the last texture from
haudvafra.

Put it on top, Lighten 75 %.
Now we have this.

The colors are kinda depressing imho. So, another selective coloring layer.
Reds:
-100, 0, +100, +41
Cyans:
+100, 0, -100, +100
Neutrals:
-34, 0, -15, 0
Now we have this.

Looks nice, eh? Add brushes/text/whateveryouwant et voila! I added some text, in French of course because if your name is Elle you're just asking for French. Anyway, Elle was in GeosansLight, point 18 and bold. 'pense' was written in Times New Roman point 10 and 'widened'(?) 200.

Icons with similiar effect:

Rules:
[x] Comments are amazing
[x] So is showing your result.
[x] Please do not copy this tutorial.
Bye.