#29 - Sora Tutorial.
Going from:

to
Translatable.
I tried to make this tutorial as translatable for Photoshop and Paint Shop Pro users as possible (because I have both, sorry GIMP and whatever else people use these days), so I hope it's not too unorganized to understand.
Go to File>New... and create a new picture/canvas/whatever.
Then, paste on your picture as a new layer and, using the MAGIC ERASER TOOL (or MAGIC WAND), or just plain ERASER tool, whatever, erase everything surrounding your main focus. For my icon, everything is erased around Sora and the white shows through:

Now, duplicate (right click on the layer and click DUPLICATE) the picture layer (we'll just call it the base layer) and go to Edit>Transform>FLIP HORIZONTAL (PSP users: go to Image>MIRROR), and move the picture using the MOVE TOOL so that it's not all showing as much as the other picture (you can put the base layer as invisible for now):

Duplicate this new flipped picture and set the layer to SCREEN:

Duplicate the flipped picture again, DESATURATE it (PS users: Image>Adjustments>DESATURATE, PSP users: Adjust>Hue and Saturation>HUE/SATURATION/LIGHTNESS, put to the SATURATION to -100), and set the layer to COLOR 62%:

Now, take your original base layer and drag it to the top (make it visible...):

Now paste on this texture by 77words and set the layer to MULTIPLY:
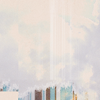
>
Create a new layer filled with #c2d7e3 and set the layer to SOFTLIGHT:

>
Create a new layer filled with #b6d5c9 and set the layer to SOFTLIGHT:

>
Create a new layer filled with #8ba9f6 and set the layer to (COLOR) BURN:

>
Duplicate the main/first base, drag it to the top, and set the layer to SCREEN (77%):

Paste on this texture by cdg and set the layer to MULTIPLY 79%:
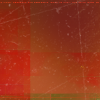
>
Paste on this texture by cdg and set the layer to SOFTLIGHT:

>
Paste on this texture by cdg and set the layer to SOFTLIGHT:

>
Go to Layers>New Adjustment Layer>COLOR BALANCE, enter in:
MIDTONES: -36, -14, 11
SHADOWS: -8, -2, 5
HIGHLIGHTS: 5, 0, -8

Go to Layers>New Adjustment Layer>HUE/SATURATION(/LIGHTNESS), enter 35 in the MASTER SATURATION:

Go to Layers>New Adjustment Layer>CURVES, enter in:
RGB: 1st point: I:123, O:166, 2nd: I:73, O:79

(go to the * steps if you don't want to do curves and instead get something that's basically the same)
---OR---
*Select all (CTRL+A) and copy merged (CTRL+SHIFT+C) and paste that on as a new layer (CTRL+V for PS, CTRL+L for PSP), set the layer to SCREEN 66%:

*Duplicate this merged screen layer and set it to SOFTLIGHT 100%:

Now, duplicate your original base again, drag it to the top, and set the layer to SOFTLIGHT:

Duplicate the original base again, DESATURATE, and set the layer to SOFTLIGHT 65%:

Now, paste on this texture by ewanism and set the layer to SCREEN 75%:
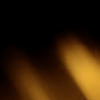
>
Create a new layer and using this brush by ewanism, stamp it on in white (or paste this picture on and set to SCREEN):

>
Using 9pt FranklinGotDemCon font, I wrote "AGAIN" (it was for an icontest, okay?) in black and set the layer to NORMAL 77%:

Then, create a new layer and using this brush by ewanism, stamp it on in white (or paste this picture on and set to SCREEN):
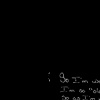
>
And it's done! I hope you found this tutorial useful, and you can leave comments or results or even friend me and stuff. Questions are welcome! Don't be scared!
-Kelsey

to

Translatable.
I tried to make this tutorial as translatable for Photoshop and Paint Shop Pro users as possible (because I have both, sorry GIMP and whatever else people use these days), so I hope it's not too unorganized to understand.
Go to File>New... and create a new picture/canvas/whatever.
Then, paste on your picture as a new layer and, using the MAGIC ERASER TOOL (or MAGIC WAND), or just plain ERASER tool, whatever, erase everything surrounding your main focus. For my icon, everything is erased around Sora and the white shows through:

Now, duplicate (right click on the layer and click DUPLICATE) the picture layer (we'll just call it the base layer) and go to Edit>Transform>FLIP HORIZONTAL (PSP users: go to Image>MIRROR), and move the picture using the MOVE TOOL so that it's not all showing as much as the other picture (you can put the base layer as invisible for now):

Duplicate this new flipped picture and set the layer to SCREEN:

Duplicate the flipped picture again, DESATURATE it (PS users: Image>Adjustments>DESATURATE, PSP users: Adjust>Hue and Saturation>HUE/SATURATION/LIGHTNESS, put to the SATURATION to -100), and set the layer to COLOR 62%:

Now, take your original base layer and drag it to the top (make it visible...):

Now paste on this texture by 77words and set the layer to MULTIPLY:

>

Create a new layer filled with #c2d7e3 and set the layer to SOFTLIGHT:

>

Create a new layer filled with #b6d5c9 and set the layer to SOFTLIGHT:

>

Create a new layer filled with #8ba9f6 and set the layer to (COLOR) BURN:

>

Duplicate the main/first base, drag it to the top, and set the layer to SCREEN (77%):

Paste on this texture by cdg and set the layer to MULTIPLY 79%:

>

Paste on this texture by cdg and set the layer to SOFTLIGHT:

>

Paste on this texture by cdg and set the layer to SOFTLIGHT:

>

Go to Layers>New Adjustment Layer>COLOR BALANCE, enter in:
MIDTONES: -36, -14, 11
SHADOWS: -8, -2, 5
HIGHLIGHTS: 5, 0, -8

Go to Layers>New Adjustment Layer>HUE/SATURATION(/LIGHTNESS), enter 35 in the MASTER SATURATION:

Go to Layers>New Adjustment Layer>CURVES, enter in:
RGB: 1st point: I:123, O:166, 2nd: I:73, O:79

(go to the * steps if you don't want to do curves and instead get something that's basically the same)
---OR---
*Select all (CTRL+A) and copy merged (CTRL+SHIFT+C) and paste that on as a new layer (CTRL+V for PS, CTRL+L for PSP), set the layer to SCREEN 66%:

*Duplicate this merged screen layer and set it to SOFTLIGHT 100%:

Now, duplicate your original base again, drag it to the top, and set the layer to SOFTLIGHT:

Duplicate the original base again, DESATURATE, and set the layer to SOFTLIGHT 65%:

Now, paste on this texture by ewanism and set the layer to SCREEN 75%:

>

Create a new layer and using this brush by ewanism, stamp it on in white (or paste this picture on and set to SCREEN):

>

Using 9pt FranklinGotDemCon font, I wrote "AGAIN" (it was for an icontest, okay?) in black and set the layer to NORMAL 77%:

Then, create a new layer and using this brush by ewanism, stamp it on in white (or paste this picture on and set to SCREEN):

>

And it's done! I hope you found this tutorial useful, and you can leave comments or results or even friend me and stuff. Questions are welcome! Don't be scared!
-Kelsey