#11 - Christian Bale Tutorial
Go from:

to
Translatable!
Begin with 100x100px base:

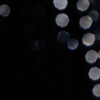
Paste on this texture (colorfilter) and set to DIFFERENCE 100%:
>
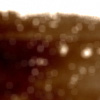
Paste on this texture (colorfilter) and set to SCREEN 100%:
>
Duplicate the base, drag it to the top, and set it to SOFTLIGHT 100%:

Paste on this texture (cdg) and set to OVERLAY 100%:

>
Paste on this texture (cdg) and set to HARDLIGHT 100%:

>
Create a new layer, and using this brush (ewanism), stamp it on in white (#FFFFFF). Or, if you don't feel like doing that, you can paste on the middle picture and set the layer to SCREEN 100%:

>
>
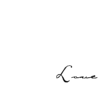
Now, using Carpenter 18pt font, I wrote "Love" (I'm bad at coming up with cool captions) in black (#000000) and set it to SOFTLIGHT 100%. I then duplicated the text layer twice so it would show up (it varies from icon to icon):
>
Now, since his head is halfway cutoff, I dragged the base layer and the duplicated SOFTLIGHT layer to the top and shifted them down a bit (on PSP it might say the background layer needs to be promoted to a raster layer, so just click yes):

>
Then I just moved the layers to the positions they were in before and it's done!

Other examples:


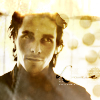
And this icon was black and white:
Open for questions, comments, and results!
-Kelsey
to
Translatable!
Begin with 100x100px base:
Paste on this texture (colorfilter) and set to DIFFERENCE 100%:

>

Paste on this texture (colorfilter) and set to SCREEN 100%:

>

Duplicate the base, drag it to the top, and set it to SOFTLIGHT 100%:

Paste on this texture (cdg) and set to OVERLAY 100%:

>

Paste on this texture (cdg) and set to HARDLIGHT 100%:

>

Create a new layer, and using this brush (ewanism), stamp it on in white (#FFFFFF). Or, if you don't feel like doing that, you can paste on the middle picture and set the layer to SCREEN 100%:

>

>

Now, using Carpenter 18pt font, I wrote "Love" (I'm bad at coming up with cool captions) in black (#000000) and set it to SOFTLIGHT 100%. I then duplicated the text layer twice so it would show up (it varies from icon to icon):

>

Now, since his head is halfway cutoff, I dragged the base layer and the duplicated SOFTLIGHT layer to the top and shifted them down a bit (on PSP it might say the background layer needs to be promoted to a raster layer, so just click yes):

>

Then I just moved the layers to the positions they were in before and it's done!
Other examples:


And this icon was black and white:

Open for questions, comments, and results!
-Kelsey