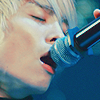
.5 {Tutorial #2-3-4}
Tutorial 2

ONE. Open up photoshop, now select the image/base you want, crop it to 100X100px, duplicate it (CTRL+J) and add some sharpen (sharpen it if necessary), and set to 50% of it's opacity.

TWO: Now, we are going to make a new fill layer remember (LAYER-NEW FILL LAYER-SOLID COLOR) with #280310 and set it to Exclusion.
Or simple save/copy and paste the image.
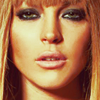
THREE: Let's start with the color. for this go to LAYER-NEW ADJUSTMENT LAYER- SELECTIVE COLOR or simple to see the adjustments palette WINDOW- ADJUSTMENTS. and use these settings.
Reds: -100, +100, +100, 0
Whites: 0, 0, 0, -100
Neutrals: 0, 0, +30, 0
Blacks: 0, 0, +100, 0
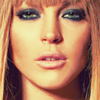
FOUR: Well not the coloring I was wanted.. so let's change it a bit with some curves. LAYER-NEW ADJUSTMENT LAYER- CURVES and set it to the settings provided below.
first number will be OUTPUT the second INPUT
RGB: {69, 53}
Red: {48, 71} {215, 205}
Green: {36, 33} {239, 242}
Blue: {32, 21} {217, 234}
Something like this, must be the final result.
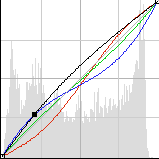
looks like my math homework D:
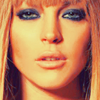
FIVE: Don't you think her eyes needs some color? :/ well, it's time for another round of selective color :B lol, now use the settings below:
Reds: -100, 0, +100, 0
Whites: 0, 0, 0, +100
Neutrals: 0, 0, -14, 0

SIX: Whoa! so orangeish!! D: we need to balance this! Go to LAYER-NEW ADJUSTMENT LAYER- COLOR BALANCE
Okay so chose MIDTONES and set the settings to these:
-50, 0, +30
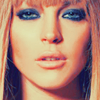
SEVEN: better! I like it, but I dunno it needs to be more i don't know, lets see, mmm, oh! *snap* lets change a bit the colors using HUE / SATURATION
Reds: 0 | +3 | 0
Yellow: 0 | +20 | 0
Green: 0 | -100 | +2
Cyan: 0 | +11 | 0
Blue: 0 | -8 | 0
Magenta: 0 | -13 | 0

EIGHT: Gosh this is taking long time D: well now we are going to add some levels. LAYER - NEW ADJUSTMENT LAYER - LEVELS
Input : 20 | 1.25 | 255


NINE: Almost done! Add this Color fill, or make a new fill layer solid color #070A1A and set it to EXCLUSION.
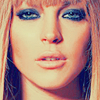
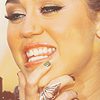
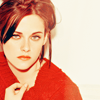
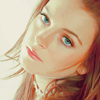
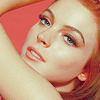
Now our final result, pretty? I hope! :D
I really want you to try this out! so I won't put the .psd but if you want it ask for it and I'll upload it.
Tutorial 3
ONE: Second tutorial, very simple this doesn't need to much "color" just some variations and a pretty texture.
Well remember to crop your image to 100X100px Duplicate the layer and add sharp set the layer to 50% of it's opacity.

TWO: To be honest I've added this texture at the end of the "coloring" but, in the layer order it's the number 3 so yeah.
This is the texture #231 of one of my icon texture packs :] Set it to Screen
THREE: Now go to LAYER-NEW ADJUSTMENT LAYER- SELECTIVE COLOR and use the settings provided below.
Reds: -69, 0, +100, 0
Neutrals: +12, 0, -21, 0

FOUR: The next four steps will be just LAYER-NEW FILL LAYER-SOLID COLOR fill it with #151015 and set it to exclusion.

FIVE: Another fill layer #304E5B and set it to Color Dodge Op. 29%

SIX: It looks pretty good but I want it more natural so add another fill layer with #C78D42 and set it to Soft Light Op.70%

SEVEN: Well now and the last one step add another fill layer or copy and paste the icon, fill it with #FFFAE7 and set it to Color Burn 50%

Download PSD

Tutorial 4
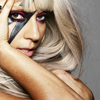
ONE: The last one tutorial of the dayweek it's very simple and short. I hope you like it :]
remember Select your image, crop it to 100X100px but this time we are not going to duplicate the layer, because the coloring, but if you think it's necessary add some sharpen and set the duplicate layer to 50%
TWO Add this texture (#340) and set it to SCREEN.
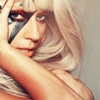
THREE: Select Selective Color and use these settings
Reds: -100 | 0 | +100 | 0
Yellow: -100 | 0 |+100 | 0
Whites: 0 | 0 | +52 | 0
Blacks: +7 | -5 | -12 | 0

FOUR: The color looks good. Now, make a new layer and fill it with #9D497. Set this layer to Overlay.

FIVE: Add another fill layer and fill it with #806870 and set it to VIVID LIGHT Opacity 20%
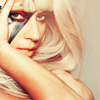
SIX: Now it looks a little bit dark, we need to fix it. Now go to Layer - New Adjustment Layer - Curves and set it to the settings provided below. The first number will be the Output and the second number will be the Input.
RGB: {212, 198}
Blue: {206,217}
Download PSD
Previews~


