Tutorial #4
From 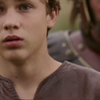
to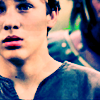
in PS CS 2
Requested by
cowpunchercats
Icon from this post.
Follow these instructions untill the part where you come to New Adjustment Layer >> Curves
Well, you have still got to make some minor changes.
- In this image, If I had Screen 100%, then his face got really bright. So, I erased his cheeks and nose in the screen layer. Although, do this according to your selected base.
- Also, change the orange texture from Overlay 60% to Softlight 81%
Now, going on to the New Adjustment Layer >> Curves
Red
First Point : 128,128
Second Point: 100, 30
Green
First Point : 128, 128
Second Point : 79, 48
Blue
First Point : 128, 128
Second Point : 51, 82
Make a New Adjustment Layer >> Selective Color
Reds
Cyan -54
Magenta +1
Yellow +6
Black -14
Yellows
Cyan -100
Magenta -15
Black -23
Cyans
Cyan +100
Yellow +10
Black +2
Blues
Cyan -32
Yellow +1
Magentas
Cyan -100
Magenta -100
Yellow +28
Neutrals
Cyan +9
Magenta +4
Yellow +15
Black -8
Add a New Adjustment Layer on top of the others >> Hue /Saturation
Master +15
Yellows -37
Greens +63
Magentas -61
Here is the .psd file
MU
x Comment is awsome
x Credit is even more awsome <(^.~)v