Tutorial 5
Well, it's been yet another two months since I've updated, I think I\m gonna get back on the LJ tip soon, so don't worry. This time I got a new icon tutorial. :) I got ADOBE PHOTOSHOP BACK!! I had a 30 day trial before.
Anyways this is what we're looking at:
From:

to:

1.) Crop your image to the desired size.
2.) Duplicate the base layer and set it to soft light at 80% opacity.
3.) Create a new selective colouring layer. Match your settings to mine:
Reds : -30, 0 -20, -60
Cyans : 20, 0, 50, 10
Neutrals : 30, 10, 0, -20
4.) Duplicate base layer again and set it to Overlay at 60% opacity.
5.) Create a new raster layer and flood fill it with the colour fcf3ea. Set this layer to Color Burn at 70% opacity.
And you're done! Rember that this tutorial is more of a guidline, and all images are different so, don't be afraid to change up some of the settings.
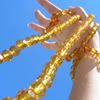
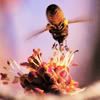
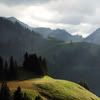
Here are some other icons that used this same technique:


(The second picture was slightly altered; the Overlay layer was replaced for Screen " 70%)
Leave a comment if you found this tutorial useful.