Icon Tutoral 2
Well I finally had time to make a new tutorial. I find this one a lot better than the last one. This one may actually come in handy one day.
Well here's how it works:
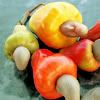
to this:
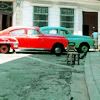
1.) Resize and crop whatever you need for your image.
2.) Duplicate the base layer and set the duplicate to screen at 100% opacity.
3.) Create a new Selective Color layer. Match your settings to mine.
REDS
C: -100
M: 0
Y: 0
B: 50
CYANS
C: 100
M: -50
Y: 20
B: 100
BLUES
C: -100
M: -100
Y: 100
B: -20
NEUTRALS
C: 10
M: -10
Y: 1
B: -20
BLACKS
C: 100
M: 0
Y: 0
B: 100
4.) Create a new raster layer and fill it with e5e5e5 set this layer to Color Burn at 100% opacity.
And you're done!!
If your icon isn't looking too great, change around the settings this tutorial isn't law. You may need to remove the screen layer.
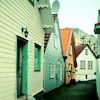
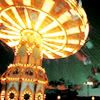
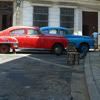
Here are other examples of this technique: