2 tuts
>>2 tutorials from this icon batch.
Photoshop CS; involves selecting colouring.
Tutorial #01
Going from:
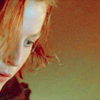
to this:
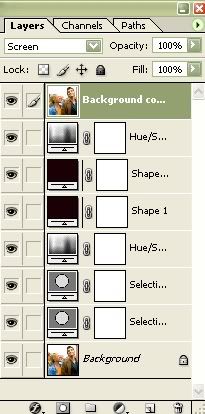
Duplicate the base and set it to screen @ 100%
Create a new selective colouring layer.
Red
C: -15
M: -15
Y: -26
B: +15
Neutrals
C: -20
M -5
Y: +17
B: -17
Next create a new layer and set #D3D5A5 to colour burn @ 30%
Up the saturation by 59%
Create another new layer and set #1B0105 to exclusion @ 100%
>>Download PSD
>>Similar icons made with this technique:
Tutorial #02
Going from: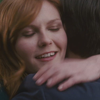
to this:
Or from:
to this:
Duplicate the base and set it to screen @ 100%
Create a new selective colouring layer.
Red
C: -100
M: -7
Y: +76
Yellows
C: -50
Neutrals
C: -27
M -11
Y: +20
B: -18
Create another selective colouring layer:
Red
C: +8
M: +100
Y: +100
B: +42
Yellows
C: +10
M: 0
Y: -75
Neutrals
B: +10
Now up the saturation by +35
Create another new layer and set #1B0105 to exclusion @ 100% Duplicate this layer.
Up the saturation again if you think the icon needs it.
>>To get this icon:
follow the above tutorial except, drag the screened base to the top like so.
>>Download PSD
>>Similar icons made with this technique:


>> Comments are ♥
>> Join / Add
Photoshop CS; involves selecting colouring.
Tutorial #01
Going from:
to this:
Duplicate the base and set it to screen @ 100%
Create a new selective colouring layer.
Red
C: -15
M: -15
Y: -26
B: +15
Neutrals
C: -20
M -5
Y: +17
B: -17
Next create a new layer and set #D3D5A5 to colour burn @ 30%
Up the saturation by 59%
Create another new layer and set #1B0105 to exclusion @ 100%
>>Download PSD
>>Similar icons made with this technique:
Tutorial #02
Going from:
to this:
Or from:
to this:
Duplicate the base and set it to screen @ 100%
Create a new selective colouring layer.
Red
C: -100
M: -7
Y: +76
Yellows
C: -50
Neutrals
C: -27
M -11
Y: +20
B: -18
Create another selective colouring layer:
Red
C: +8
M: +100
Y: +100
B: +42
Yellows
C: +10
M: 0
Y: -75
Neutrals
B: +10
Now up the saturation by +35
Create another new layer and set #1B0105 to exclusion @ 100% Duplicate this layer.
Up the saturation again if you think the icon needs it.
>>To get this icon:
follow the above tutorial except, drag the screened base to the top like so.
>>Download PSD
>>Similar icons made with this technique:
>> Comments are ♥
>> Join / Add