Saving Tutorial w/ Pics
Experienced icon-makers will find nothing new here, this is basically just for those who are just starting out. This is my first tutorial and it's very simple, but it's essential in making your icons look their best. I know that I didn't save my icons correctly until I got my tutor, so I know there are some out there who haven't learned yet either.
Saving Icons
1. After making an icon, go to file>save as. Do not go to just file>save or file>save for web!

2. When the Save As window pops up, find the location you'd like to keep your icon. Then, on the bottom drop-down menu labled Format, select JPEG. Do not chose any of the others when making a static (still) icon!
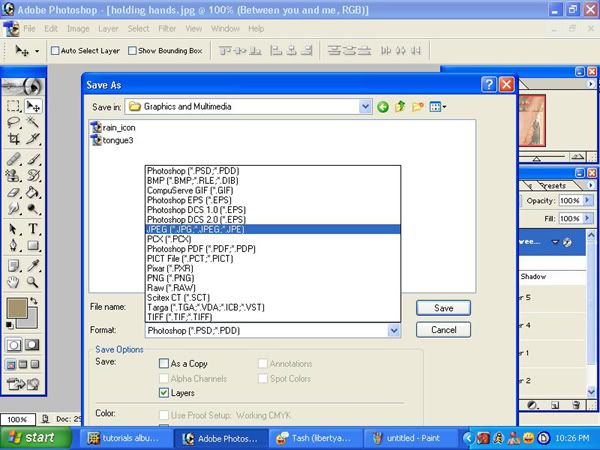
(Notice the two icons I made pre-tutor that were saved as the default format Photoshop PDF. Bad!)
3. Next, chose a name for your icon and press save, just like saving a document...this is common sense.
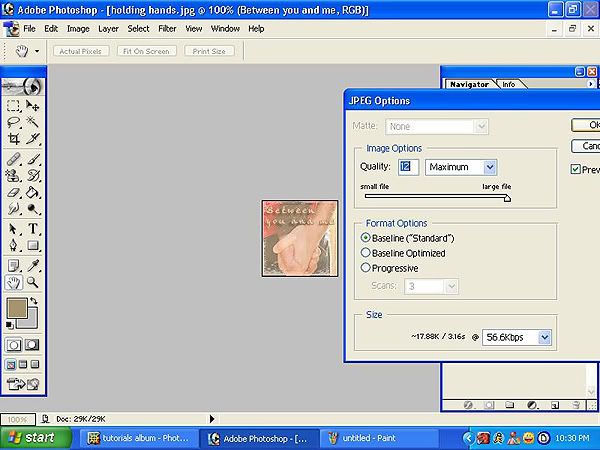
4. Finally, a box will pop up labled JPEG Options will pop up. Make sure it is set on 12 (no less!) and click OK.
If you put the quality on anything less than 12, your icon will most likely come out looking like this:

instead of this:
. See the difference?
The same steps in this tutorial apply for saving anything in Photoshop: wallpaper, banners, fanart...anything!