Gurky - tutorial #3
A tutorial again. Again, super-easy, no curves or anything (good on you guys for not asking me to do a tut on an icon where I use them because I honestly cannot explain how I use them!) Anyway..
We're gonna go from this
to this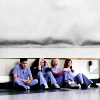
1. First, we start off with this cap from the Grey’s Anatomy season two finale, which I got from Striped Wall
Crop it, like this, so you get a lot of space over their heads.
2. Then you duplicate the base once. Set the duplicated layer to screen. Duplicate it twice more so you get three screen layers. Set the top screen layer to 40 %.
It now looks like this
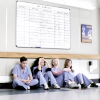
Very light, but not to worry, we’ll fix that.
3. Make a new raster layer and fill it with a light grey colour (I used #e2dede) and place it just above the base. Set it to burn (or ‘color burn’ if you use PS)
Now it looks like this
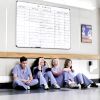
4. We want the colours to get even more vibrant and dark. Especially the blue. So now you duplicate your top screen layer. Set it to soft light and duplicate it once more. Set the top soft light layer to 40 %.
Now you have this
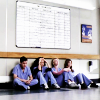
And your colouring is finished. On to the texture..
5. You can use whatever texture you want really, whatever suits your mood and most importantly the icon! I used this which I got from brasaremean over at _sinelinea. I cut a piece from it where I included the bottom… thing, to give it something extra and resized it to 100x100. Then I duplicated it and set that layer to screen, just to lighten it.
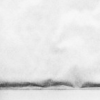
Merge both layers and copy the whole thing.
6. Go back to your original icon and paste the texture on it. It should be on top of all your other layers. Move it so that it covers the wall and ends just above their heads.

And then you are done! See? I told you it was easy! =)
Please don't copy this tut exactly, it's meant for showing you a technique. When you use another cap or picture you may have to tweak it a little, it doesn't work exactly the same way on every cap.
We're gonna go from this

to this
1. First, we start off with this cap from the Grey’s Anatomy season two finale, which I got from Striped Wall
Crop it, like this, so you get a lot of space over their heads.

2. Then you duplicate the base once. Set the duplicated layer to screen. Duplicate it twice more so you get three screen layers. Set the top screen layer to 40 %.
It now looks like this

Very light, but not to worry, we’ll fix that.
3. Make a new raster layer and fill it with a light grey colour (I used #e2dede) and place it just above the base. Set it to burn (or ‘color burn’ if you use PS)
Now it looks like this

4. We want the colours to get even more vibrant and dark. Especially the blue. So now you duplicate your top screen layer. Set it to soft light and duplicate it once more. Set the top soft light layer to 40 %.
Now you have this

And your colouring is finished. On to the texture..
5. You can use whatever texture you want really, whatever suits your mood and most importantly the icon! I used this which I got from brasaremean over at _sinelinea. I cut a piece from it where I included the bottom… thing, to give it something extra and resized it to 100x100. Then I duplicated it and set that layer to screen, just to lighten it.

Merge both layers and copy the whole thing.
6. Go back to your original icon and paste the texture on it. It should be on top of all your other layers. Move it so that it covers the wall and ends just above their heads.
And then you are done! See? I told you it was easy! =)
Please don't copy this tut exactly, it's meant for showing you a technique. When you use another cap or picture you may have to tweak it a little, it doesn't work exactly the same way on every cap.