Requested Tutorial #1
requested by
berrichino using program Adobe Photoshop CS, not sure translatable if whithout use this image or maybe you can change the setting to you own like 8))....

to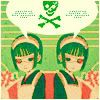
First prepare the image and crop 100x100 as usually

here's mine
Okay, lets begin...
1. Duplicate the base and put on top then set into Soft Light 100%
2. Use this color layer
set to soft light 100%

to
3. Lets do selective colouring
reds:
cyan -100
magenta +7
yellow +21
black +19
yellow:
cyan -100
magenta -8
yellow -8
black +16
green:
cyan +28
magenta -30
yellow +63
black +25
cyan:
cyan +100
magenta -100
yellow -100
black +100
neutral:
cyan -3
magenta -1
yellow +24
black -1

to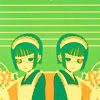
4. Then Hue/Saturation
master:
hue -5
sat +29
red:
hue -12
sat +8
yellow:
hue -27
sat +8
light +17
green:
hue -14
sat -41
cyans:
hue +11
sat +32
light -18

to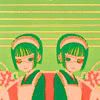
5. Do color balance
midtones -66 -43 -27
highlights +11 -3 +15

to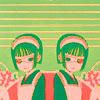
6. Last duplicate the base and drag to the top set overlay fill 60%

to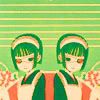
YAY~~~ You're DONE THE MAJOR PART~~~
Lets do the minor part you can deny this if you've get what you want...and do as you want 8))
7. Put
and set to multiply
8. Anything you want like balloon text shape or some decorating brush.
9. Add
and set to exclusion fill 18%
10. Last add
and set to color burn 100%

to
And i'm done~~ very simple isnt it?? Well sorry for the messy tutorial....TAT.... Hehehe comment plz??
berrichino using program Adobe Photoshop CS, not sure translatable if whithout use this image or maybe you can change the setting to you own like 8))....

to

First prepare the image and crop 100x100 as usually

here's mine
Okay, lets begin...
1. Duplicate the base and put on top then set into Soft Light 100%
2. Use this color layer

set to soft light 100%

to

3. Lets do selective colouring
reds:
cyan -100
magenta +7
yellow +21
black +19
yellow:
cyan -100
magenta -8
yellow -8
black +16
green:
cyan +28
magenta -30
yellow +63
black +25
cyan:
cyan +100
magenta -100
yellow -100
black +100
neutral:
cyan -3
magenta -1
yellow +24
black -1

to

4. Then Hue/Saturation
master:
hue -5
sat +29
red:
hue -12
sat +8
yellow:
hue -27
sat +8
light +17
green:
hue -14
sat -41
cyans:
hue +11
sat +32
light -18

to

5. Do color balance
midtones -66 -43 -27
highlights +11 -3 +15

to

6. Last duplicate the base and drag to the top set overlay fill 60%

to

YAY~~~ You're DONE THE MAJOR PART~~~
Lets do the minor part you can deny this if you've get what you want...and do as you want 8))
7. Put

and set to multiply
8. Anything you want like balloon text shape or some decorating brush.
9. Add

and set to exclusion fill 18%
10. Last add

and set to color burn 100%

to

And i'm done~~ very simple isnt it?? Well sorry for the messy tutorial....TAT.... Hehehe comment plz??