Tutorials #001 and #002
Made in PS7. I don't know if this can be translated to PSP. IMAGE HEAVY.
Requirements:
Basic knowledge of PS7 tools. (Magic Wand)
Blend Modes
Selective Color
Levels
Patience, I think.
Difficulty Level: Intermediate? (I presume, but I'm not really sure. Don't be put off because it's long though. ^^;)
Learn how to go from this to this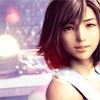
.
1.Start with this base.
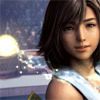
2. Go to Layer >> New Adjustment Layer >> Levels
Under the RGB channel, you will notice the three textareas beside the input levels. The values inside there are 0, 1.00 and 255 respectively. Now, change the (the one in the middle) 1.00 to 1.43 and you will notice that your base image became brighter. (see this image for a screenshot of the levels.)
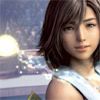
3. Create a new layer and fill it with #06154A or just copy-paste the one I provided below.

Set to Exclusion 100% opacity.
4. Create a new layer and fill it with #DAFFFE or just copy-paste the one I provided below.

Set to Color Burn 100% opacity.
5. Go to Layer >> New Adjustment Layer >> Selective Color and apply the settings below.
REDS
Cyan: -47
Magenta: -26
Yellow: 0
Black: 0
CYANS:
Cyan: -55
Magenta: +21
Yellow: +27
Black: -13
BLUES:
Cyan: -62
Magenta: -5
Yellow: +15
Black: +3
NEUTRALS:
Cyan: -32
Magenta: 0
Yellow: 0
Black: -7
Here is what I got after the selective color: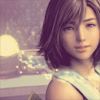
6. Go back to your base. Duplicate it, BRING IT ON TOP OF THE OTHER LAYERS, and set it to screen 100% opacity.
7. Go back to your base again. Duplicate it, BRING IT ON TOP OF THE OTHER LAYERS, and set it to soft light 100% opacity.
8. Use this light texture (by me) and set it to lighten 100% opacity. ERASE THE PARTS OF THE LIGHT TEXTURE WHICH ARE COVERING YUNA.

9. Use this simple light texture and set it to screen 100% opacity. (I moved it a little bit to the left because I think it looks better. ^^)
Merge all layers. CTRL+SHIFT+E
AND TADA!
Here's the product!

PART 2: The second part, probably, is due to the fact that people have been asking me on how to use my polaroid brushes (and others as well).
Learn how to go from this to this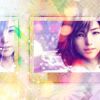
Part 1 is not really necessary for part 2. I just like how the product of part 1 came out after part 2. It's just a matter of preference, believe me. You need not to be as complicated as I am.
1. Create a new document 100x100 and start with the icon we have come up with in Tut Part 1.
2. Use this brush (by me).
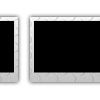
Use the magic wand tool (tolerance: 32) and click on the black boxes of the polaroid, then hit delete. Here is what I got. (HOLD SHIFT WHILE USING THE MAGIC WAND TOOL (a + will appear next to it). It helps you select the black spaces all at once.)
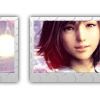
3. Go back to your base. Press CTRL+T and you will see transform handles around your image. A new toolbar will appear and then click this
. You can now start resizing the base image until yuna's face fits in polaroid brush.
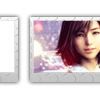
4. Duplicate the resized base image then press CTRL+U. Change the saturation to -30. Move it to the left as shown in the picture below.
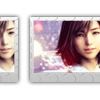
Take this texture by
gender
5. set it to multiply 100% opacity.
6. Go back to the polaroid brush layer. Use the magic wand tool and click on the erased parts of the polaroid. (Remember those white spaces after we deleted the black spaces in step 2? That's what I am talking about.) Without removing the selection go back to the texture in step 5, then hit delete.
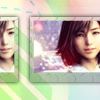
7. Use this texture
by
gender , then repeat steps 5-6.
8. Use this texture
by
_hakanaidreams , then repeat steps 5-6.
9. Use this texture
by
_hakanaidreams , then repeat steps 5-6.
Here is what I now have:
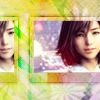
(You can leave it like this if you wish to.)
10. Use this texture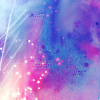
by
immoral .
Press CTRL+L and then adjust the settings as seen in this picture. Set this layer to screen 100% opacity.
11. Use this texture
by
awmpdotnet and set it to hard light 100% opacity.
12. Tada! Here's the finished icon!

(Take a look at my layers palette.)
So, how did you find the tut so far? Was it a bit complicated or was it easy to follow. For me, it was sort of hard to explain things so I need to rely on using simple english. Please don't hesistate if you have questions. I'll be more than willing to answer them.
FRIEND FUYUNO FOR UPDATES.
Requirements:
Basic knowledge of PS7 tools. (Magic Wand)
Blend Modes
Selective Color
Levels
Patience, I think.
Difficulty Level: Intermediate? (I presume, but I'm not really sure. Don't be put off because it's long though. ^^;)
Learn how to go from this to this

.
1.Start with this base.

2. Go to Layer >> New Adjustment Layer >> Levels
Under the RGB channel, you will notice the three textareas beside the input levels. The values inside there are 0, 1.00 and 255 respectively. Now, change the (the one in the middle) 1.00 to 1.43 and you will notice that your base image became brighter. (see this image for a screenshot of the levels.)

3. Create a new layer and fill it with #06154A or just copy-paste the one I provided below.

Set to Exclusion 100% opacity.
4. Create a new layer and fill it with #DAFFFE or just copy-paste the one I provided below.

Set to Color Burn 100% opacity.
5. Go to Layer >> New Adjustment Layer >> Selective Color and apply the settings below.
REDS
Cyan: -47
Magenta: -26
Yellow: 0
Black: 0
CYANS:
Cyan: -55
Magenta: +21
Yellow: +27
Black: -13
BLUES:
Cyan: -62
Magenta: -5
Yellow: +15
Black: +3
NEUTRALS:
Cyan: -32
Magenta: 0
Yellow: 0
Black: -7
Here is what I got after the selective color:

6. Go back to your base. Duplicate it, BRING IT ON TOP OF THE OTHER LAYERS, and set it to screen 100% opacity.
7. Go back to your base again. Duplicate it, BRING IT ON TOP OF THE OTHER LAYERS, and set it to soft light 100% opacity.
8. Use this light texture (by me) and set it to lighten 100% opacity. ERASE THE PARTS OF THE LIGHT TEXTURE WHICH ARE COVERING YUNA.

9. Use this simple light texture and set it to screen 100% opacity. (I moved it a little bit to the left because I think it looks better. ^^)

Merge all layers. CTRL+SHIFT+E
AND TADA!
Here's the product!

PART 2: The second part, probably, is due to the fact that people have been asking me on how to use my polaroid brushes (and others as well).
Learn how to go from this to this

Part 1 is not really necessary for part 2. I just like how the product of part 1 came out after part 2. It's just a matter of preference, believe me. You need not to be as complicated as I am.
1. Create a new document 100x100 and start with the icon we have come up with in Tut Part 1.
2. Use this brush (by me).

Use the magic wand tool (tolerance: 32) and click on the black boxes of the polaroid, then hit delete. Here is what I got. (HOLD SHIFT WHILE USING THE MAGIC WAND TOOL (a + will appear next to it). It helps you select the black spaces all at once.)

3. Go back to your base. Press CTRL+T and you will see transform handles around your image. A new toolbar will appear and then click this

. You can now start resizing the base image until yuna's face fits in polaroid brush.

4. Duplicate the resized base image then press CTRL+U. Change the saturation to -30. Move it to the left as shown in the picture below.

Take this texture by
gender
5. set it to multiply 100% opacity.

6. Go back to the polaroid brush layer. Use the magic wand tool and click on the erased parts of the polaroid. (Remember those white spaces after we deleted the black spaces in step 2? That's what I am talking about.) Without removing the selection go back to the texture in step 5, then hit delete.

7. Use this texture

by
gender , then repeat steps 5-6.
8. Use this texture

by
_hakanaidreams , then repeat steps 5-6.
9. Use this texture

by
_hakanaidreams , then repeat steps 5-6.
Here is what I now have:

(You can leave it like this if you wish to.)
10. Use this texture

by
immoral .
Press CTRL+L and then adjust the settings as seen in this picture. Set this layer to screen 100% opacity.
11. Use this texture

by
awmpdotnet and set it to hard light 100% opacity.
12. Tada! Here's the finished icon!

(Take a look at my layers palette.)
So, how did you find the tut so far? Was it a bit complicated or was it easy to follow. For me, it was sort of hard to explain things so I need to rely on using simple english. Please don't hesistate if you have questions. I'll be more than willing to answer them.
FRIEND FUYUNO FOR UPDATES.