(no subject)
sick of pink and magenta?
i am. kind of. especially on glee caps. so let's get rid of it :-D

this tutorial has been made using photoshop cs3, it includes curves but you can replace those steps with brightness/contrast layer.
1. i'm using a screen cap from glee's pilot. half of will's head is missing but i'm not letting it to bother me, i think it looks fine in the icon.
but if your picture is lacking body parts you can draw them back using brushes. outcome may look great but it may look horrible; that's why i don't do it so often.
resize your picture and drag it to 100x100px canvas (or bigger canvas, it depends on how you like to work with your icons)
2. because i'm too lazy to do masking, i create a new layer and use sharp rounded brush to fill empty space and the space around their heads.
i use #c7c0cf, light violet.
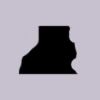
my violet area looks like this:
and with the picture:

of course you can use layer mask and erase the stuff around your picture and create a layer under the pic and fill it with some color or use a texture as a background.
i usually do that.
3. i create a gradient map layer to lighten my icon.
go layer>new adj. layer > gradient map
check "reverse"
click on the gradient under "gradient used for grayscale mapping"
and chance colors of the gardient by clicking "color"
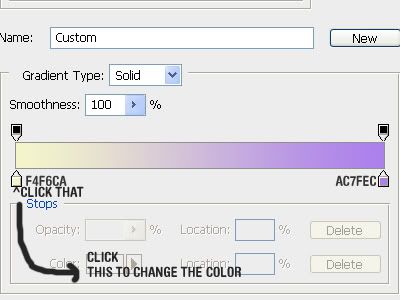
make your gradient look like this
set this layer to soft light 38%
4. i want to lighten my icon more, so i take this texture:
(don't know who made it)
and set it to screen 16%
my icon looks like this:

5. then i create a color balance layer
midtones: -27, 5, 18
now the icon isn't so magentaish

(now two optional steps if you want to brighten your icon more:
a) curves layer
make it look like this
b) drag this texture and set it to screen 34% )

6. then i create curves layer and i make the icon darker :--D
my curves layer looks like this
7. i set this texture to soft light 21%

by drankmywar
8. i create a color fill layer
#161616, set to lighten 100%
9. and the last step
if you use cs3 or newer ps: create a black and white layer, set it to soft ligth 63%
if you use cs2 or older ps: hit alt+control+shift+e and desaturate this layer and set it to soft light 63%
i merge all layers and sharpen the icon.
and now you're finished!

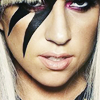
other icons using similar coloring/technique:



download the .psd!
i am. kind of. especially on glee caps. so let's get rid of it :-D

this tutorial has been made using photoshop cs3, it includes curves but you can replace those steps with brightness/contrast layer.
1. i'm using a screen cap from glee's pilot. half of will's head is missing but i'm not letting it to bother me, i think it looks fine in the icon.
but if your picture is lacking body parts you can draw them back using brushes. outcome may look great but it may look horrible; that's why i don't do it so often.
resize your picture and drag it to 100x100px canvas (or bigger canvas, it depends on how you like to work with your icons)
2. because i'm too lazy to do masking, i create a new layer and use sharp rounded brush to fill empty space and the space around their heads.
i use #c7c0cf, light violet.
my violet area looks like this:

and with the picture:

of course you can use layer mask and erase the stuff around your picture and create a layer under the pic and fill it with some color or use a texture as a background.
i usually do that.
3. i create a gradient map layer to lighten my icon.
go layer>new adj. layer > gradient map
check "reverse"
click on the gradient under "gradient used for grayscale mapping"
and chance colors of the gardient by clicking "color"
make your gradient look like this

set this layer to soft light 38%
4. i want to lighten my icon more, so i take this texture:

(don't know who made it)
and set it to screen 16%
my icon looks like this:

5. then i create a color balance layer
midtones: -27, 5, 18
now the icon isn't so magentaish

(now two optional steps if you want to brighten your icon more:
a) curves layer
make it look like this
b) drag this texture and set it to screen 34% )

6. then i create curves layer and i make the icon darker :--D
my curves layer looks like this
7. i set this texture to soft light 21%

by drankmywar
8. i create a color fill layer
#161616, set to lighten 100%
9. and the last step
if you use cs3 or newer ps: create a black and white layer, set it to soft ligth 63%
if you use cs2 or older ps: hit alt+control+shift+e and desaturate this layer and set it to soft light 63%
i merge all layers and sharpen the icon.
and now you're finished!
other icons using similar coloring/technique:
download the .psd!