Another tutorial
From this to this:

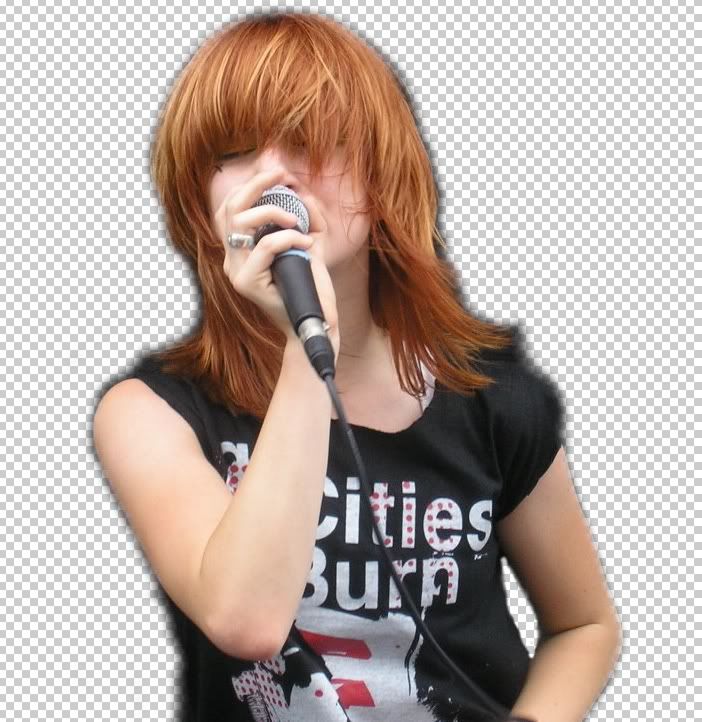
1. Pick your image. I'm using this. Open it in Photoshop on a TRANSPARENT background.
2. Using a soft eraser of about 45 pixels, erase around Hayley. Once you're done that, switch to a 21 pixel soft eraser, and bring it in a little more.

Make sure there's that bit of black/grey around it. That's why we use soft erasers.
3. Crop it to 100x100.

4. Open a new document, 500x500 pixels.
5. Set the foreground and background colours to blue, one light, one dark. Like #091840 and #7EB5FF.
6. Filter > Render > Clouds
7. We made it 500x500 for a reason. Crop to 100x100 where you think it looks best.

8. Copy that cloud thing and stick it behind Hayley.

9. Ew, look at that. How icky. Go back to your soft eraser, around 13 pixels. Erase the darkest parts around her. It's cool if you erase part of her. We'll deal with that.

10. Now make your soft eraser 200 pixels. Go around the outsides, so she's something like this:

11. New layer. Group it with Hayley (Ctrl+G).
12. Fill the layer with the lighter colour from your clouds. (#7EB5FF)
13. Set it to Soft light.

14. Another new layer. Group it.
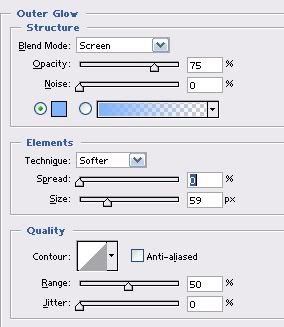
15. Fill it with that light colour.
16. Set it to Multiply. Lower the opacity to about 50%.

17. Outer glow. Go to the Hayley layer, and go to Blending options. The colour of the glow should be the lighter colour from the clouds.
Use these settings:

Turns out like this:

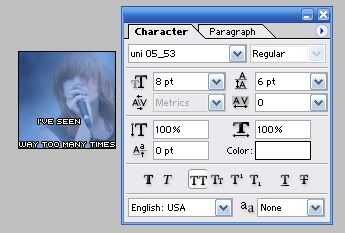
18. Time for text.
I've seen, way too many times:

Blending options - one pixel black stroke
Uni_5x found here
Love die:

(the font size isn't specified, as I used a larger size for the L and a smaller size for the E in Love)
Punk Kid found here
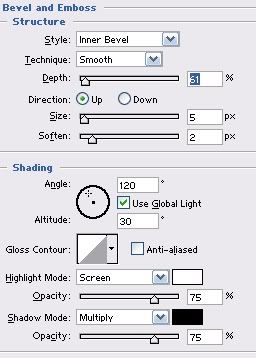
Blending options - one pixel black stroke, drop shadow, bevel and emboss:

And we end up with

Other icons made using this technique:


If anyone uses this, I'd love to see what you come up with.