(no subject)
YES I AM ALIVE amazing isn't it.
This one is for kyliemuffin.
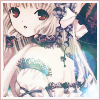
So. Going from
to
in PSPX~
1. Soooo have a base of Chii from Chobits, quite possibly one of the most iconable subjects evar.

[Original image coming is here.]
2. Duplicate your base, and set it to Screen, 50%.

3. Make a new layer and fill it with #052949 [
]. Set it to Exclusion, 100%.

4. Duplicate your base, drag it to top, and go to Adjust -> Hue and Saturation -> Hue/Saturation/Lightness and desaturate it with the settings Saturation -100, Lightness -10. Set that layer to Overlay, 100%.

5. Use these two gradients:

and set them both to Soft Light, 100%.

6. Duplicate your desaturated base, drag it to top and set it to Overlay, 60%.

7. Make a new layer, fill it with #0f3d6b [
] and set it to Lighten, 100%.

8. Make YET ANOTHER layer, fill it with #a29374 [
] and set it to Soft Light, 100%.

9. Once again, duplicate your desaturated base and drag it to top. Set it to Soft Light, 100%.

10. Go to Layers -> New Adjustement Layer -> Curves and play with the settings until the icon looks clear and a bit less pink.
The settings I used:
RGB: Input 86, Output 72
- didn't change Red -
Green: Input 130, Output 142
- didn't change Blue -
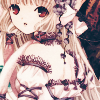
After that, my icon looked like:
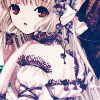
11. On a new layer, use this gradient:
and set it to Soft Light, 100%.
12. Use this texture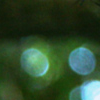
and set it to Screen, 90%.

13. Before we add a border, merge all the layers. [Layers -> Merge -> Merge All (Flatten).]
Now, select all [Selections -> Select All or Ctrl + A] and select the Move tool by pressing M on your keyboard.
Now, you can move the icon. I moved mine three pixels down.
14. Now, when your icon is moved, it's time to add borders.
Select All and go to Selections -> Modify -> Select Selection borders, uncheck the anti-alias box and make a border of your likeness. I made a three-pixel border in #f9f7fb [it's white, just not the #ffffff white... you know >_>;;] and a one-pixel in #d9bbb3 [peachy-pink]. Both colors were selected from the icon.
And voila, icon done!

This one is for kyliemuffin.
So. Going from

to

in PSPX~
1. Soooo have a base of Chii from Chobits, quite possibly one of the most iconable subjects evar.

[Original image coming is here.]
2. Duplicate your base, and set it to Screen, 50%.

3. Make a new layer and fill it with #052949 [

]. Set it to Exclusion, 100%.

4. Duplicate your base, drag it to top, and go to Adjust -> Hue and Saturation -> Hue/Saturation/Lightness and desaturate it with the settings Saturation -100, Lightness -10. Set that layer to Overlay, 100%.

5. Use these two gradients:


and set them both to Soft Light, 100%.

6. Duplicate your desaturated base, drag it to top and set it to Overlay, 60%.

7. Make a new layer, fill it with #0f3d6b [

] and set it to Lighten, 100%.

8. Make YET ANOTHER layer, fill it with #a29374 [

] and set it to Soft Light, 100%.

9. Once again, duplicate your desaturated base and drag it to top. Set it to Soft Light, 100%.

10. Go to Layers -> New Adjustement Layer -> Curves and play with the settings until the icon looks clear and a bit less pink.
The settings I used:
RGB: Input 86, Output 72
- didn't change Red -
Green: Input 130, Output 142
- didn't change Blue -
After that, my icon looked like:

11. On a new layer, use this gradient:

and set it to Soft Light, 100%.

12. Use this texture

and set it to Screen, 90%.

13. Before we add a border, merge all the layers. [Layers -> Merge -> Merge All (Flatten).]
Now, select all [Selections -> Select All or Ctrl + A] and select the Move tool by pressing M on your keyboard.
Now, you can move the icon. I moved mine three pixels down.
14. Now, when your icon is moved, it's time to add borders.
Select All and go to Selections -> Modify -> Select Selection borders, uncheck the anti-alias box and make a border of your likeness. I made a three-pixel border in #f9f7fb [it's white, just not the #ffffff white... you know >_>;;] and a one-pixel in #d9bbb3 [peachy-pink]. Both colors were selected from the icon.
And voila, icon done!
