Lenne Icon Tutorial
How to create this icon ^^

Made in Photoshop 7, most likely translatable. A little knowledge of the program required.
First of all, all my resources are listed here. I'm sorry if I can't remember who exactly did the textures ^^'.
Now, on with the tutorial!!!
1. First of all, let's open a new 100x100 document, 72 pixel resolution (your standard icon format ^^)
2. Let's make a new layer and fill it with the Paint Bucket tool with a white (#FFFFFF) color.
3. Let's take this paper texture (which was given for the contest) and paste it on our document.
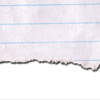
4. We want the white part to be on the top, so we click CTRL+T (Transform), right-click and go "Rotate 180°. Then we put the layer mode on "Linear Burn".
5. Now, we take our Lenne image, that you can find here. We need to resize it to fit the blank space on our icon. To see what you're doing, copy the image on the icon file, put the "Opacity" to around 40% and then Transform the image, keep the height symbol checked so that the transformation is "balanced".
6. Probably, a part of the image will be over the paper border. Take the eraser and erase it, paying attention to what you're doing. ^^
7. Now, we work a little on the Lenne image. This step really depends on the image you have. Personally, I sharpened the image (Filter -> Sharpen), then Faded the effect a little (Edit -> Fade Sharpen). Then since the image was a little to bright, I put down the Brightness a little (Image -> Adjustment -> Brightness/Contrast)
8. Now, let's use the other texture of this icon. This one (done by someone listed on my resource page ^^')
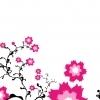
9. First of all, you need to rotate this 90° CW (CTRL+T -> Right-click -> Rotate 90°CW), and then Flip Vertical (CTRL+T -> Right-click -> Flip Vertical). Then, we move it down a little (CTRL+T -> move it with the mouse) so that the flowers are just over the paper but not on Lenne's face. Maybe you need to put down a little the opacity (around 40%) to see what you're doing.
10. Now, let's erase all the part that covers Lenne's image (it doesn't matter if it isn't really exact, it's gonna disappear later anyway). I also wanted to get rid of the smaller flower beside the big one, so I took the Brush tool and painted over it with a soft brush on #FFFFFF color.
11. Now, the color isn't really matching our icon, is it? ^^' so, let's go to Hue/Saturation settings (Image ->Adjustments -> Hue/Saturation). Check the "Colorize" block on the right. Let's make the flowers a violet color (around 254 Hue), and put up a little the Saturation (around +10). Then, let's use Image->Adjustments->Brightness/Contrast : less Brightness, more Contrast (around -10 and + 13). Work with these settings until you're satisfied. Then, go again to the Hue/Saturation settings: desaturate a little more, and generally fix the color (around -34 Saturation, +7 Hue).
12. Put the flower layer to Linear Burn. Fix the Opacity percentage on your liking (mine was around 92/94)
13. Another texture: this one.

14. Put the last texture to Multiply. Then duplicate the multiply layer once (CTRL+J), and put down the opacity to around 50%.
15. Take this gradient/texture

16. Rotate it 180° and set it to Multiply. Adjust opacity if needed.
17. Add this scratchy texture (or a similar one... I don't remember if it was this exactly).
18. Now, let's do something funny!. CTRL+I, invert. Then set to Multiply 50% and erase all the parts that cover Lenne.
19. Finally, the text! Use the Eyedropper tool to pick up the color of the flowers. Create a new text layer. Font: Backstabber Roman, 6pt, anti alias: strong, tracking: 100. Write down your text (in this case, "Worth the fight", since it was a lyrical challenge)
20. Duplicate text layer, out down the opacity around 70%
21. Create another text layer for the tiny text, Times New Roman at 4 pt, and write other random text (I wrote more lyrics from the song).
22. Flatten image and add a black border (Edit -> Stroke // Options: color black, inside, 1pt)
And you're done!!! Hope it was helpful, this is my first tutorial ^^.
Made in Photoshop 7, most likely translatable. A little knowledge of the program required.
First of all, all my resources are listed here. I'm sorry if I can't remember who exactly did the textures ^^'.
Now, on with the tutorial!!!
1. First of all, let's open a new 100x100 document, 72 pixel resolution (your standard icon format ^^)
2. Let's make a new layer and fill it with the Paint Bucket tool with a white (#FFFFFF) color.
3. Let's take this paper texture (which was given for the contest) and paste it on our document.

4. We want the white part to be on the top, so we click CTRL+T (Transform), right-click and go "Rotate 180°. Then we put the layer mode on "Linear Burn".
5. Now, we take our Lenne image, that you can find here. We need to resize it to fit the blank space on our icon. To see what you're doing, copy the image on the icon file, put the "Opacity" to around 40% and then Transform the image, keep the height symbol checked so that the transformation is "balanced".
6. Probably, a part of the image will be over the paper border. Take the eraser and erase it, paying attention to what you're doing. ^^
7. Now, we work a little on the Lenne image. This step really depends on the image you have. Personally, I sharpened the image (Filter -> Sharpen), then Faded the effect a little (Edit -> Fade Sharpen). Then since the image was a little to bright, I put down the Brightness a little (Image -> Adjustment -> Brightness/Contrast)
8. Now, let's use the other texture of this icon. This one (done by someone listed on my resource page ^^')

9. First of all, you need to rotate this 90° CW (CTRL+T -> Right-click -> Rotate 90°CW), and then Flip Vertical (CTRL+T -> Right-click -> Flip Vertical). Then, we move it down a little (CTRL+T -> move it with the mouse) so that the flowers are just over the paper but not on Lenne's face. Maybe you need to put down a little the opacity (around 40%) to see what you're doing.
10. Now, let's erase all the part that covers Lenne's image (it doesn't matter if it isn't really exact, it's gonna disappear later anyway). I also wanted to get rid of the smaller flower beside the big one, so I took the Brush tool and painted over it with a soft brush on #FFFFFF color.
11. Now, the color isn't really matching our icon, is it? ^^' so, let's go to Hue/Saturation settings (Image ->Adjustments -> Hue/Saturation). Check the "Colorize" block on the right. Let's make the flowers a violet color (around 254 Hue), and put up a little the Saturation (around +10). Then, let's use Image->Adjustments->Brightness/Contrast : less Brightness, more Contrast (around -10 and + 13). Work with these settings until you're satisfied. Then, go again to the Hue/Saturation settings: desaturate a little more, and generally fix the color (around -34 Saturation, +7 Hue).
12. Put the flower layer to Linear Burn. Fix the Opacity percentage on your liking (mine was around 92/94)
13. Another texture: this one.

14. Put the last texture to Multiply. Then duplicate the multiply layer once (CTRL+J), and put down the opacity to around 50%.
15. Take this gradient/texture

16. Rotate it 180° and set it to Multiply. Adjust opacity if needed.
17. Add this scratchy texture (or a similar one... I don't remember if it was this exactly).

18. Now, let's do something funny!. CTRL+I, invert. Then set to Multiply 50% and erase all the parts that cover Lenne.
19. Finally, the text! Use the Eyedropper tool to pick up the color of the flowers. Create a new text layer. Font: Backstabber Roman, 6pt, anti alias: strong, tracking: 100. Write down your text (in this case, "Worth the fight", since it was a lyrical challenge)
20. Duplicate text layer, out down the opacity around 70%
21. Create another text layer for the tiny text, Times New Roman at 4 pt, and write other random text (I wrote more lyrics from the song).
22. Flatten image and add a black border (Edit -> Stroke // Options: color black, inside, 1pt)
And you're done!!! Hope it was helpful, this is my first tutorial ^^.