Tutorial #2: Gwen Stefani
This is going to be clean and simple.
1
Take your chosen image, and crop it to 100 x 100 pixels. Sharpen it following these steps:
Adjust> Sharpen> Unsharp Mask> Radius: 1, Strength: 10-30, Clipping: 1
You can also smoothen out the skin of the person on your picture, but only do that if you like the look of it!2
Desaturate your image
SHIFT+H> Heu: 0, Lightness: 0, Saturation: -1003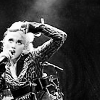
Duplicate your base. Set the first duplicate to screen at 46% and the second duplicate to softlight at 100%.4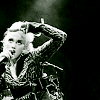
Create a new raster layer and fill it with #2D8C08. Set that layer to burn at 18%. 5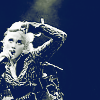
Create another raster layer and fill it with #0B205D. Set that layer to lighten at 76%. 6
Create yet another raster layer and fill it with #F8F2DB. Set that layer to Multiply at 82%. 7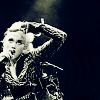
Duplicate your background( the picture right at the bottom). Drag it all the way to the top, and set it to softlight at 100%.
Duplicate the softlight layer and set it to burn at 3-8 %.8
In an new raster layer, using a default round brush set to:
Size: 97, Hardness: 0.
Using the colour #FF0374, dot on the places where you want the colour to be. I put mine in the upper right corner.
Set the layer to exclusion at 100%.9
Take this picture, and place it on top of all the layers in your icon. Erase the corners for a nice rounded look and set the layer to softlight at 100%10
Then, as finishing touch, add some text to you're icon. I chose some lyrics from "Just a Girl" in Arial, 10 pt., #000000. That's it!
I hope you understood this, I didn't exactly take my time writing it. Please comment, especially when you have questions!

1

Take your chosen image, and crop it to 100 x 100 pixels. Sharpen it following these steps:
Adjust> Sharpen> Unsharp Mask> Radius: 1, Strength: 10-30, Clipping: 1
You can also smoothen out the skin of the person on your picture, but only do that if you like the look of it!2

Desaturate your image
SHIFT+H> Heu: 0, Lightness: 0, Saturation: -1003

Duplicate your base. Set the first duplicate to screen at 46% and the second duplicate to softlight at 100%.4

Create a new raster layer and fill it with #2D8C08. Set that layer to burn at 18%. 5

Create another raster layer and fill it with #0B205D. Set that layer to lighten at 76%. 6

Create yet another raster layer and fill it with #F8F2DB. Set that layer to Multiply at 82%. 7

Duplicate your background( the picture right at the bottom). Drag it all the way to the top, and set it to softlight at 100%.
Duplicate the softlight layer and set it to burn at 3-8 %.8

In an new raster layer, using a default round brush set to:
Size: 97, Hardness: 0.
Using the colour #FF0374, dot on the places where you want the colour to be. I put mine in the upper right corner.
Set the layer to exclusion at 100%.9

Take this picture, and place it on top of all the layers in your icon. Erase the corners for a nice rounded look and set the layer to softlight at 100%10

Then, as finishing touch, add some text to you're icon. I chose some lyrics from "Just a Girl" in Arial, 10 pt., #000000. That's it!
I hope you understood this, I didn't exactly take my time writing it. Please comment, especially when you have questions!
