Flyleaf Tutorial
Not really graphics, but meh! xD
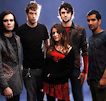
to
Program: PSP Photo X2
Translatable: yes.
01. crop your base and do whatever you do to it.
02. duplicate your base three times. (it may be more or less, depending on the lighting of your picture)
- first duplicate: screen 100%
- second duplicate: screen 100%
- third duplicate: screen 50%
03. create a layer with #83dbf9 (light blue)
- burn 80%
04. create a layer with #e59e77 (light brown)
- multiply 65%
05. create a layer with #170642 (dark blue)
- exclusion 100%
06. duplicate your base and bring it to the top.
- burn 25%
07. create a layer with #f7c3e6 (light pink)
- soft light 100%
08. to make the people stand out more, I erased the light blue layer only over them. this step isn't really necessary, though - it all depends on your picture.
*feel free to change the opacities on anything... it depends on your image.
*I've found this works best on pictures with a mainly single colour background.
Other Icons Made With This: