Tutorial #1 - Emily Browning
I made this icon earlier and I really liked how it came out. I hope you guys will find this useful.
This tutorial is beginner friendly, so anyone should be able to follow this without any problems.
I've included links to images which help show what I'm doing.
Go from:

to
or
Using PSP8 but I'm sure is easily translatable.
First of all, pick an image. I used one of the gorgeous Emily Browning - picture from Emily Browning.Com.
Crop your image to your liking, and resize so it's 100x100.
this is my base.
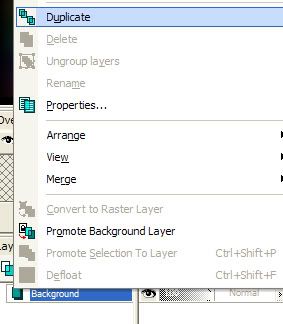
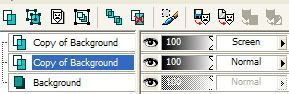
I decided to put a screen layer, so I duplicated the base and set its blend to Screen, opacity 100%.

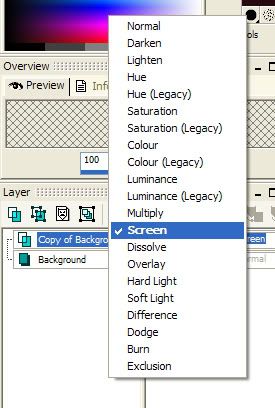
After that I desaturated the Screen layer. Quick-key way in PSP8 is pressing "shift" and "H" together. Lower the Saturation opacity to -100%

The icon was too white and bright, but instead of lowering the opacity I decided to try and darken it.
Click back onto your background layer and duplicate again. Make sure this new duplicate is underneath your Screen layer. Set this layer to Multiply.

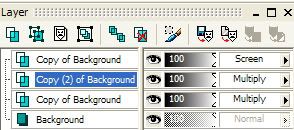
Duplicate your Multiply layer.

[Of course adding Multiply layers depends on the brightness of your image. You may not need to do this, but I'm unsure of the result when making this sort of icon with a darker starting image.]
Your pallette should look like this now.
Now to add the texture.
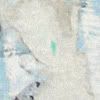
I used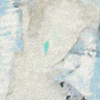
by Sanami276
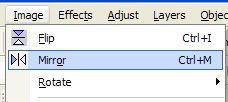
As Emily's face was on the right, I mirrored the texture so the big part wouldn't cover her face, so now the texture looked like this.
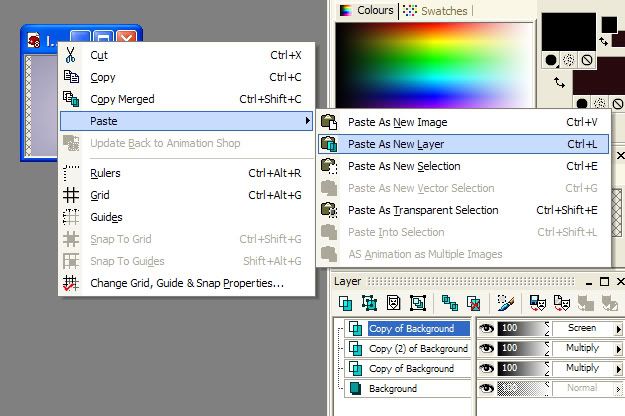
Copy it and paste it into your icon, as a new layer.
Make sure the texture is the top layer. Set the opacity to 50% so you can see Emily, and leave the blend mode at Normal.

Now for the slightly tricky part. There are two ways to achieve this -- one, by using the eraser tool and getting rid of any of the texture on Emily's face, hair and body. Or two, using a mask.
I prefer using a mask because you have more freedom of editing then you do with just the eraser.
Okay, so here's a quick explanation of how I used a mask on this icon.
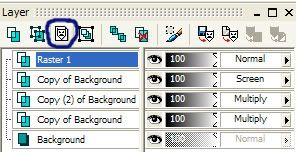
First of all, make sure your texture layer is selected (highlighted blue), then click on this button, which is circled in blue. Once you've done that, this should be your result.
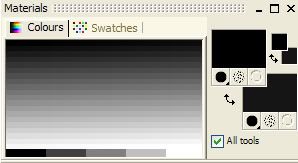
While being on the layer called Mask - Raster 1, select your paintbrush. You'll notice the colour box is in greyscale.
Paint over Emily with the colour black, and the texture will disappear off of her, like it would with the eraser.
If you go a bit too wild and delete some of the texture that you wanted to keep then select the colour white and go over the icon - the texture will re-appear.
This is more convenient than using the eraser brush, because you don't have to rely on the button "undo" if you make a mistake, and you can come back and edit it later on in the icon making process.
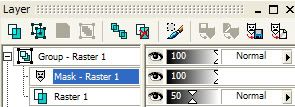
You can see here, what my Mask layer looks like.
Once you've done that, your icon is pretty much done. The raster layer (which is your texture) is underneath the mask layer you've been working on. It should still be on opacity 50%, and that's how I left it.
Of course it's up to you what opacity you want the texture.
Keep the Mask layer at 100%
Additionally, if you wanted your icon to look more like this:
Then just simply set Group - Raster 1 to Multiply.
I would love to see anything made from following this. Please don't replicate the icon used in this tutorial. Thank you!
This tutorial is beginner friendly, so anyone should be able to follow this without any problems.
I've included links to images which help show what I'm doing.
Go from:
to
or
Using PSP8 but I'm sure is easily translatable.
First of all, pick an image. I used one of the gorgeous Emily Browning - picture from Emily Browning.Com.
Crop your image to your liking, and resize so it's 100x100.
this is my base.
I decided to put a screen layer, so I duplicated the base and set its blend to Screen, opacity 100%.
After that I desaturated the Screen layer. Quick-key way in PSP8 is pressing "shift" and "H" together. Lower the Saturation opacity to -100%
The icon was too white and bright, but instead of lowering the opacity I decided to try and darken it.
Click back onto your background layer and duplicate again. Make sure this new duplicate is underneath your Screen layer. Set this layer to Multiply.
Duplicate your Multiply layer.
[Of course adding Multiply layers depends on the brightness of your image. You may not need to do this, but I'm unsure of the result when making this sort of icon with a darker starting image.]
Your pallette should look like this now.
Now to add the texture.
I used
by Sanami276
As Emily's face was on the right, I mirrored the texture so the big part wouldn't cover her face, so now the texture looked like this.
Copy it and paste it into your icon, as a new layer.
Make sure the texture is the top layer. Set the opacity to 50% so you can see Emily, and leave the blend mode at Normal.
Now for the slightly tricky part. There are two ways to achieve this -- one, by using the eraser tool and getting rid of any of the texture on Emily's face, hair and body. Or two, using a mask.
I prefer using a mask because you have more freedom of editing then you do with just the eraser.
Okay, so here's a quick explanation of how I used a mask on this icon.
First of all, make sure your texture layer is selected (highlighted blue), then click on this button, which is circled in blue. Once you've done that, this should be your result.
While being on the layer called Mask - Raster 1, select your paintbrush. You'll notice the colour box is in greyscale.
Paint over Emily with the colour black, and the texture will disappear off of her, like it would with the eraser.
If you go a bit too wild and delete some of the texture that you wanted to keep then select the colour white and go over the icon - the texture will re-appear.
This is more convenient than using the eraser brush, because you don't have to rely on the button "undo" if you make a mistake, and you can come back and edit it later on in the icon making process.
You can see here, what my Mask layer looks like.
Once you've done that, your icon is pretty much done. The raster layer (which is your texture) is underneath the mask layer you've been working on. It should still be on opacity 50%, and that's how I left it.
Of course it's up to you what opacity you want the texture.
Keep the Mask layer at 100%
Additionally, if you wanted your icon to look more like this:
Then just simply set Group - Raster 1 to Multiply.
I would love to see anything made from following this. Please don't replicate the icon used in this tutorial. Thank you!