Smokey eye tutorial
Hello everyone! I made a tutorial for how I do MY smokey eyes. Just to let you know, if you didn't already lol, I like dark smokey eyes. This is a regular old tutorial! I took as many pictures as I could, but it's not like..tons. And I tried to explain it as best I could. :) This is only my second tutorial..and I made my first tutorial 3 years ago! lol.
Here's the look:
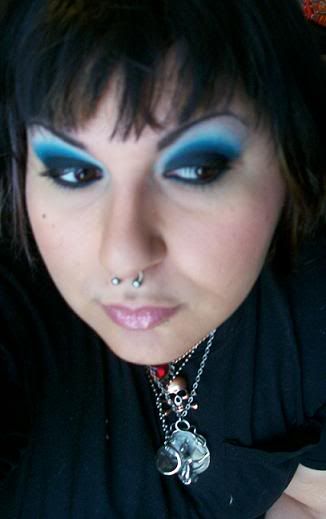
Once again, this is for a DARK, dramatic smokey eye. kthx. :D

Here's what I used.
Primer
Black gel liner (liquid works, too)
Highlight shadow
Black shadow
Loose pigment/shadow (whatever color)
Pressed shadow (same or close to the loose)
Pencil liner
Mascara
The brown shadow has a star because I used it for my eyebrows. :)

Make sure to have some entertainment! I chose The Office. :) Loves it!
Now we're ready! As always, start off with a clean face and pull your hair back. And go ahead and break out, too. That's always great.

1. Start with your primer! I don't put my foundation on before I do a smokey eye because of the insane fallout that'll happen. You CAN but make sure you use a tissue or some loose translucent powder. I just don't because it's easier.

2. Use a brush you won't be using for the rest of the look and gather up some gel liner on the brush.

3. Apply it to your lid up to your crease and blend it up a bit. It doesn't have to be perfect. You can use a liquid liner for this, too. It's just a bit more difficult. Take the liner up to the crease, grab a brush and blend it up before it dries. You can omit this step if you aren't really wanting it to be so dark.

4. Grab a different shadow brush (and make sure it's clean! I forgot to clean mine and look what happened, lol) and apply your highlight color from your eyebrow down to your crease.

5. Get some black eyeshadow and apply it over your lid and blend it up into the highlight. Again, this doesn't have to be perfect. Look at that fallout! lol

6. Apply some of the loose shadow where the black and the highlight blends together. Blend, blend, blend! Don't worry if there is any fallout that sticks to the black. You'll cover that later. This step isn't necessary, really but I like to use it as a base.

7. Now with your eyeshadow, apply it over the same area as before. Bleeeeend, to the max. You'll more than likely need to pick up more of your highlight color AND black. You might even have to get some more liner. Sometimes I have to end up doing that.


8. After you have everything done and blended, wipe your face down with water or makeup remover (if you don't have foundation on), and apply your foundation. Or you can wait until you want. :D

9. I decided that I wanted the blue to be a bit more dramatic, so I added more blue.

10. Line your bottom lashline with gel/liquid liner. Get as close to your lashes as possible. I also lined my top lashline because I saw there were gaps, so I made sure to go over those.

11. I made it a sort of medium line and then went over it with black eyeshadow to make it softer and easier to blend for the next step. Also, line your waterline with a black pencil liner. Again, you don't have to, I know a lot of girls don't like to.

12. Wipe any leftover liner off of the brush and swipe your liner brush into the shadow you're using.

13. ('scuse the redness, I got a cat hair in my eye). Line your bottom lashline with the shadow, I just went over the line, trying not to make it any thicker.

\
14. Hooray!


15. Fill in your eyebrows and put your mascara on! Blush, lipstick/gloss...etc. Take pictures and send 'em my way!!
Of course you don't HAVE to use blue! You can use any color. :)


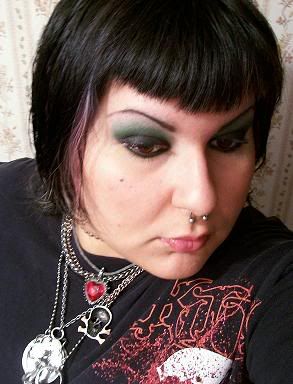
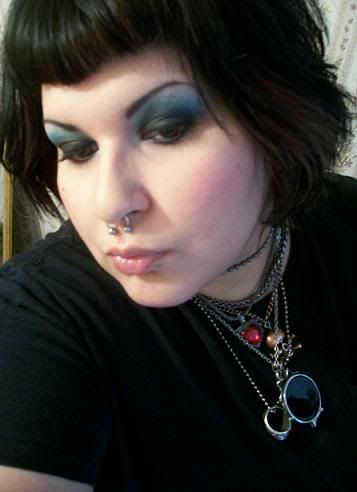
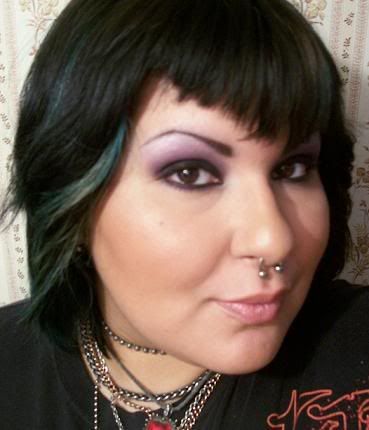
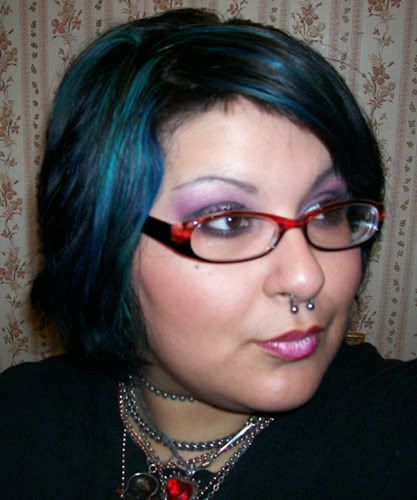
I hope that was a little helpful. :D
Have a fabulous day!
Here's the look:

Once again, this is for a DARK, dramatic smokey eye. kthx. :D

Here's what I used.
Primer
Black gel liner (liquid works, too)
Highlight shadow
Black shadow
Loose pigment/shadow (whatever color)
Pressed shadow (same or close to the loose)
Pencil liner
Mascara
The brown shadow has a star because I used it for my eyebrows. :)

Make sure to have some entertainment! I chose The Office. :) Loves it!
Now we're ready! As always, start off with a clean face and pull your hair back. And go ahead and break out, too. That's always great.

1. Start with your primer! I don't put my foundation on before I do a smokey eye because of the insane fallout that'll happen. You CAN but make sure you use a tissue or some loose translucent powder. I just don't because it's easier.

2. Use a brush you won't be using for the rest of the look and gather up some gel liner on the brush.

3. Apply it to your lid up to your crease and blend it up a bit. It doesn't have to be perfect. You can use a liquid liner for this, too. It's just a bit more difficult. Take the liner up to the crease, grab a brush and blend it up before it dries. You can omit this step if you aren't really wanting it to be so dark.

4. Grab a different shadow brush (and make sure it's clean! I forgot to clean mine and look what happened, lol) and apply your highlight color from your eyebrow down to your crease.

5. Get some black eyeshadow and apply it over your lid and blend it up into the highlight. Again, this doesn't have to be perfect. Look at that fallout! lol

6. Apply some of the loose shadow where the black and the highlight blends together. Blend, blend, blend! Don't worry if there is any fallout that sticks to the black. You'll cover that later. This step isn't necessary, really but I like to use it as a base.

7. Now with your eyeshadow, apply it over the same area as before. Bleeeeend, to the max. You'll more than likely need to pick up more of your highlight color AND black. You might even have to get some more liner. Sometimes I have to end up doing that.


8. After you have everything done and blended, wipe your face down with water or makeup remover (if you don't have foundation on), and apply your foundation. Or you can wait until you want. :D

9. I decided that I wanted the blue to be a bit more dramatic, so I added more blue.

10. Line your bottom lashline with gel/liquid liner. Get as close to your lashes as possible. I also lined my top lashline because I saw there were gaps, so I made sure to go over those.

11. I made it a sort of medium line and then went over it with black eyeshadow to make it softer and easier to blend for the next step. Also, line your waterline with a black pencil liner. Again, you don't have to, I know a lot of girls don't like to.

12. Wipe any leftover liner off of the brush and swipe your liner brush into the shadow you're using.

13. ('scuse the redness, I got a cat hair in my eye). Line your bottom lashline with the shadow, I just went over the line, trying not to make it any thicker.

\
14. Hooray!


15. Fill in your eyebrows and put your mascara on! Blush, lipstick/gloss...etc. Take pictures and send 'em my way!!
Of course you don't HAVE to use blue! You can use any color. :)


I hope that was a little helpful. :D
Have a fabulous day!