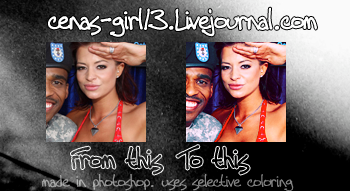
Color tutorial feat. Candice Michelle
Credit isnt neccisary, but appreciated[=

01. Open up you're image, I'm using the one obove of the beautiful Candice Michelle. If needed, sharpen it, and brighten it up a abit first.
02. Duplicate you're base (Ctrl+J) and set it to Screen and adjust the opacity to suit you're image. I set mine at 30%.
03. Make a new fill layer, fill with #CBEBFF. Set to color burn at 100% opacity.
04. New Selective Coloring layer with these settings:
Reds: -71, -24, +17, +73
Cyans: +81, -36, -33, -26
Blues: -51, -35, +26, +8
Neutrals: +19, +17, +13, 0
05. New hue/saturation layer. Set Master Saturation to +10, and click OK.
06. New curves layer. Make you're settings like mine:
RGB: 156, 179. New point: 29, 47.
Red: 157, 167. New point: 61, 38.
Blue: 167, 174. New point: 55, 67.
07. New fill layer, with #E4902E. Set at Softlight - with 100% opacity.
08. New color balance layer. Settings like this:
Midtones: -48, -9, +8
Shadows: -8, -3, +8
Highlights: 0, +15, +36
09. New Selective Coloring layer.
Reds: +100, +16, 0, 0
Neutrals: +5, +1, -5, 0
10. Still with me? Good. =] Almost done! Make a new Channel Mixer layer. (Make sure Monochrome is UN-checked.)
Red: +88, +19, -17, +14
Green: 0, +110, -12, -3
11. Alrighty, last step! Duplicate you're base, and drag it to the top. Set it to Softlight at 30% opacity.
And you're done! Some steps may have to be minorly adjusted to suit different images. Comment and tell me what you think(=
Final product: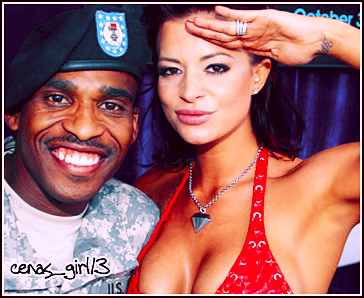
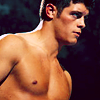
Other results:


01. Open up you're image, I'm using the one obove of the beautiful Candice Michelle. If needed, sharpen it, and brighten it up a abit first.
02. Duplicate you're base (Ctrl+J) and set it to Screen and adjust the opacity to suit you're image. I set mine at 30%.
03. Make a new fill layer, fill with #CBEBFF. Set to color burn at 100% opacity.
04. New Selective Coloring layer with these settings:
Reds: -71, -24, +17, +73
Cyans: +81, -36, -33, -26
Blues: -51, -35, +26, +8
Neutrals: +19, +17, +13, 0
05. New hue/saturation layer. Set Master Saturation to +10, and click OK.
06. New curves layer. Make you're settings like mine:
RGB: 156, 179. New point: 29, 47.
Red: 157, 167. New point: 61, 38.
Blue: 167, 174. New point: 55, 67.
07. New fill layer, with #E4902E. Set at Softlight - with 100% opacity.
08. New color balance layer. Settings like this:
Midtones: -48, -9, +8
Shadows: -8, -3, +8
Highlights: 0, +15, +36
09. New Selective Coloring layer.
Reds: +100, +16, 0, 0
Neutrals: +5, +1, -5, 0
10. Still with me? Good. =] Almost done! Make a new Channel Mixer layer. (Make sure Monochrome is UN-checked.)
Red: +88, +19, -17, +14
Green: 0, +110, -12, -3
11. Alrighty, last step! Duplicate you're base, and drag it to the top. Set it to Softlight at 30% opacity.
And you're done! Some steps may have to be minorly adjusted to suit different images. Comment and tell me what you think(=
Final product:
Other results: