Tutorial (15)
Make 
from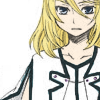
using PSP8. Translatable. Image heavy!
Sharpen base if need be. Set #548AEE to burn 20%.

=
Set #FF8080 to overlay 50%.

=
Set #80FFFF to lighten 24%.

=
Set #80FFFF to burn 24%.

=
Duplicate base and bring to the top. Set to softlight 100%.

=
Go to Layers > New Adjustment Layer > Hue/Saturation/Lightness. Set hue to -7, saturation to 8, and lightness to -2.
=
Set #EBB113 to multiply 30%.

=
Set #151001 to softlight 40%.

=
Set #FF8080 to softlight 100%.

=
Set #80FFFF to overlay 40%.

=
Go to Layers > New Adjustment Layer > Color Balance. Set midtones blue to 40, shadows yellow to -40, highlights red to 8, and highlights yellow to -5.
=
Go to Layers > New Adjustment Layer > Hue/Saturation/Lightness. Set saturation to 41.

=
Paste this texture (by me) and set it to lighten 100%. Move around to your liking.

=
Play around with the opacity if your icon is too dark or too light. Please don't copy exactly. Thanks for reading :)
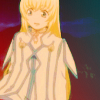
Icons made using this tutorial

Like what you see? Why don't you friend us!

from

using PSP8. Translatable. Image heavy!
Sharpen base if need be. Set #548AEE to burn 20%.

=

Set #FF8080 to overlay 50%.

=

Set #80FFFF to lighten 24%.

=

Set #80FFFF to burn 24%.

=

Duplicate base and bring to the top. Set to softlight 100%.

=

Go to Layers > New Adjustment Layer > Hue/Saturation/Lightness. Set hue to -7, saturation to 8, and lightness to -2.

=

Set #EBB113 to multiply 30%.

=

Set #151001 to softlight 40%.

=

Set #FF8080 to softlight 100%.

=

Set #80FFFF to overlay 40%.

=

Go to Layers > New Adjustment Layer > Color Balance. Set midtones blue to 40, shadows yellow to -40, highlights red to 8, and highlights yellow to -5.

=

Go to Layers > New Adjustment Layer > Hue/Saturation/Lightness. Set saturation to 41.

=

Paste this texture (by me) and set it to lighten 100%. Move around to your liking.

=

Play around with the opacity if your icon is too dark or too light. Please don't copy exactly. Thanks for reading :)
Icons made using this tutorial


Like what you see? Why don't you friend us!