Tutorial (52)
Request by flausch_rara!
Make
from
using PSP8. Translatable. Includes easy Curves and is slightly image heavy!
Sharpen base if need be. Duplicate base and bring to the top. Set to screen 40%.

=
Duplicate base and bring to the top. Set to softlight 100%.

=
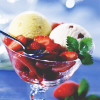
Go to Layers > New Adjustment Layer > Curves. Set RGB input to 51 and output to 51.
=
Duplicate base and bring to the top. Set to softlight 75%.

=
Go to Layers > New Adjustment Layer > Hue/Saturation/Lightness. Set saturation to 40.
=
Go to Layers > New Adjustment Layer > Color Balance. Set midtones cyan to -49, midtones blue to 64, and highlights red to 43.
=
Duplicate base and bring to the top. Set to burn 10%.

=
Play around with the opacity if your icon is too dark or too light. Please don't copy exactly. Thanks for reading :)
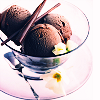
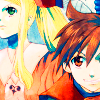
Icons made using this tutorial
Like what you see? Why don't you friend us!
Make

from

using PSP8. Translatable. Includes easy Curves and is slightly image heavy!
Sharpen base if need be. Duplicate base and bring to the top. Set to screen 40%.

=

Duplicate base and bring to the top. Set to softlight 100%.

=

Go to Layers > New Adjustment Layer > Curves. Set RGB input to 51 and output to 51.

=

Duplicate base and bring to the top. Set to softlight 75%.

=

Go to Layers > New Adjustment Layer > Hue/Saturation/Lightness. Set saturation to 40.

=

Go to Layers > New Adjustment Layer > Color Balance. Set midtones cyan to -49, midtones blue to 64, and highlights red to 43.

=

Duplicate base and bring to the top. Set to burn 10%.

=

Play around with the opacity if your icon is too dark or too light. Please don't copy exactly. Thanks for reading :)
Icons made using this tutorial


Like what you see? Why don't you friend us!