As You Like It Gimp 2 Tutorial 2
Now for another easy GIMP tutorial! This time around, we're going from
this:
to this:
1. Crop and scale your base, just as in the last tutorial. Here, I wanted to just brush her lips on the right side of the icon and her hand on the top, with her arm acting almost as a diagonal slicing across the square.

2. Brighten the mood. Duplicate the base twice, setting the lower duplicate to Screen, Opacity 50 and the upper duplicate to Hard Light, Opacity 50.

3. Time for more blues and greens. Creat two New Layers and fill the lower with #aad7f6 set to Burn, Opacity 60 and the upper to #e8fda9 set to Burn, Opacity 30.
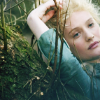
4. Now for some reddish-pink and a tad more green. Create two more layers and fill the lower with #f35f71 set to Burn, Opacity 25 and the upper with #20ffb8 set to Soft Light, Opacity 15.

5. Get things more saturated. Hit Copy Visible and Paste As>New Layer, then set the Saturation to 30.
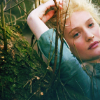
6. Blob time! Create a transparent New Layer, scribble around with a paintbrush in white, and then Glaussian Blur it at 50, just as in the last tutorial.
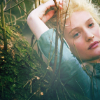
7. Brighten the mood once more, if necessary. Copy Visible and paste two new layers, setting the lower to Screen, Opacity 50 and the upper to Soft Light, Opacity 50.
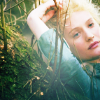
8. Sharpen, sharpen, sharpen. Same method as the last tutorial, Copy Visible, Paste As>New Layer, and run over with the Sharpen Tool, except this time set the Opacity to 55.

DONE! :)
this:

to this:

1. Crop and scale your base, just as in the last tutorial. Here, I wanted to just brush her lips on the right side of the icon and her hand on the top, with her arm acting almost as a diagonal slicing across the square.

2. Brighten the mood. Duplicate the base twice, setting the lower duplicate to Screen, Opacity 50 and the upper duplicate to Hard Light, Opacity 50.

3. Time for more blues and greens. Creat two New Layers and fill the lower with #aad7f6 set to Burn, Opacity 60 and the upper to #e8fda9 set to Burn, Opacity 30.

4. Now for some reddish-pink and a tad more green. Create two more layers and fill the lower with #f35f71 set to Burn, Opacity 25 and the upper with #20ffb8 set to Soft Light, Opacity 15.

5. Get things more saturated. Hit Copy Visible and Paste As>New Layer, then set the Saturation to 30.

6. Blob time! Create a transparent New Layer, scribble around with a paintbrush in white, and then Glaussian Blur it at 50, just as in the last tutorial.

7. Brighten the mood once more, if necessary. Copy Visible and paste two new layers, setting the lower to Screen, Opacity 50 and the upper to Soft Light, Opacity 50.

8. Sharpen, sharpen, sharpen. Same method as the last tutorial, Copy Visible, Paste As>New Layer, and run over with the Sharpen Tool, except this time set the Opacity to 55.

DONE! :)