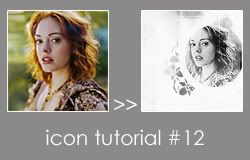
Tutorial 12
Rehearsals are once again at our flat so I'm hiding out in the bedroom. This seems like a good time to do the tutorial I promised
dreamers_dh and then continue reading The Count of Monte Cristo by Alexandre Dumas - fab book.
This is a bit of a funny one. When I created it I ended up moving a lot of layers around to make it work. So if the layers seem a bit random that's why.
I started off with this black and white gradient:

And then I took this light texture:
And set it to lighten to make:
I'm afraid I made this icon a long while ago now and I can't remember where the textures I used are from. If they are yours feel free to claim them! I don't think any are mine.
I then took this texture:
And set it to soft light so it looked like this:

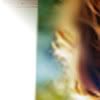
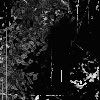
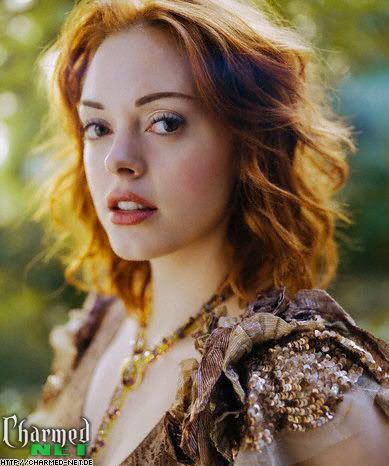
I was going to use this pic of Rose McGowan for the icon and as I remember I couldn't find a texture anywhere which would give me the effect I wanted. But the beauty of texture making is that ANYTHING can be used as a texture, or at least the start of a texture. One of my older textures (number 6 or 7 I think) was actually created using a pic of my ironing board cover! So I took the pic of Rose and abused the poor girl horribly using the medium/round blur and smudge tools to create this:

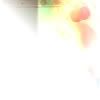
I then tried the new and horribly improved pic of Rose out at different angles and settings until I found one that worked. I ended up turning her upside down and using part of her hair:
And I set her to linear dodge so the my icon now looked like this:
Who knew that mutilating actresses could have such pretty results!
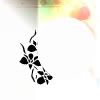
Next I added a small floral brush in black (again, I'm afraid I can't remember who made it):

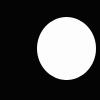
And created a plain white circle (just use your shape tool for this) which partially covered the brush:
>>
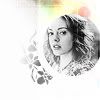
I now used my pic of Rose in the way it was intended. I shrank her down to the size I wanted, sharpened it and desaturated the image. You don't actually have to desaturate the image at this stage as we will be making the whole thing black and white later on, so if you don't want to, don't bother.
To make the pic of Rose circle-shaped I went back a layer and selected the layer with the circle shape as my active layer. I then took my wand select tool and selected the inside of the white circle I had created in the previous step.
I then changed the layer I was working on to the layer with the pic of Rose WITHOUT DE-SELECTING THE CIRCLE (i.e. without clicking anywhere else on the canvas after the circle had been selected or right-clicking and selecting deselect from the menu).
When I had done that I picked the movement tool from the toolbar (the one with the crossed arrows) and used it to move the selected circle around until it encircled the part of the image I wanted to keep in the icon - in this case her face.
I then right-clicked and chose 'select inverse' from the menu. I then hit the delete key and every part of the image that was outside the circle was deleted. Hurrah! Click anywhere on the canvas now and your selected circle will vanish - its purpose has been achieved.
Those last few steps are a bit fiddly and I can't access my computer to take pics to show you exactly what I did (I'm using my boyfriend's and he doesn't have Photoshop). However if you have any problems following my instructions let me know and I'll add pics to make the steps clearer later on in the week.
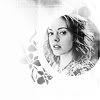
I moved the circular image of Rose's face to where I wanted it on my icon:
I created a new layer and used this brush in white:
So it looked like this:
The brush didn't cover as much as I wanted so I duplicated the brush layer and the icon now looked like this:

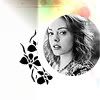
That's made the flowers nice and soft looking but Rose had also gone a bit fuzzy, so I duplicated the circular pic of Rose, dragged it above the brush layers and set it at soft light 60% opacity:
Finally, I added another brush on top in white to give it a more scratchy look:
>>
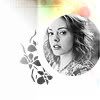
Nearly there! My last step was to create a new layer and fill the entire layer in white or black and then set it to saturation. This made everything under that layer back and white so it looks like this:
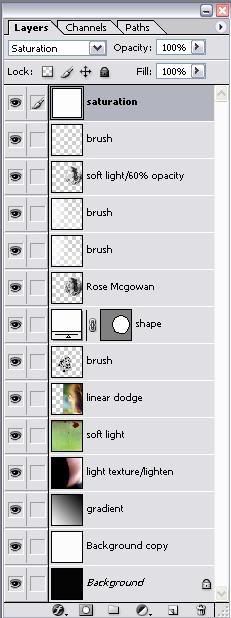
Here are the layers for info:
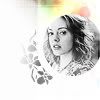
I hope this tutorial has been helpful!
dreamers_dh and then continue reading The Count of Monte Cristo by Alexandre Dumas - fab book.
This is a bit of a funny one. When I created it I ended up moving a lot of layers around to make it work. So if the layers seem a bit random that's why.
I started off with this black and white gradient:
And then I took this light texture:
And set it to lighten to make:
I'm afraid I made this icon a long while ago now and I can't remember where the textures I used are from. If they are yours feel free to claim them! I don't think any are mine.
I then took this texture:
And set it to soft light so it looked like this:
I was going to use this pic of Rose McGowan for the icon and as I remember I couldn't find a texture anywhere which would give me the effect I wanted. But the beauty of texture making is that ANYTHING can be used as a texture, or at least the start of a texture. One of my older textures (number 6 or 7 I think) was actually created using a pic of my ironing board cover! So I took the pic of Rose and abused the poor girl horribly using the medium/round blur and smudge tools to create this:
I then tried the new and horribly improved pic of Rose out at different angles and settings until I found one that worked. I ended up turning her upside down and using part of her hair:
And I set her to linear dodge so the my icon now looked like this:
Who knew that mutilating actresses could have such pretty results!
Next I added a small floral brush in black (again, I'm afraid I can't remember who made it):
And created a plain white circle (just use your shape tool for this) which partially covered the brush:
>>
I now used my pic of Rose in the way it was intended. I shrank her down to the size I wanted, sharpened it and desaturated the image. You don't actually have to desaturate the image at this stage as we will be making the whole thing black and white later on, so if you don't want to, don't bother.
To make the pic of Rose circle-shaped I went back a layer and selected the layer with the circle shape as my active layer. I then took my wand select tool and selected the inside of the white circle I had created in the previous step.
I then changed the layer I was working on to the layer with the pic of Rose WITHOUT DE-SELECTING THE CIRCLE (i.e. without clicking anywhere else on the canvas after the circle had been selected or right-clicking and selecting deselect from the menu).
When I had done that I picked the movement tool from the toolbar (the one with the crossed arrows) and used it to move the selected circle around until it encircled the part of the image I wanted to keep in the icon - in this case her face.
I then right-clicked and chose 'select inverse' from the menu. I then hit the delete key and every part of the image that was outside the circle was deleted. Hurrah! Click anywhere on the canvas now and your selected circle will vanish - its purpose has been achieved.
Those last few steps are a bit fiddly and I can't access my computer to take pics to show you exactly what I did (I'm using my boyfriend's and he doesn't have Photoshop). However if you have any problems following my instructions let me know and I'll add pics to make the steps clearer later on in the week.
I moved the circular image of Rose's face to where I wanted it on my icon:
I created a new layer and used this brush in white:
So it looked like this:
The brush didn't cover as much as I wanted so I duplicated the brush layer and the icon now looked like this:
That's made the flowers nice and soft looking but Rose had also gone a bit fuzzy, so I duplicated the circular pic of Rose, dragged it above the brush layers and set it at soft light 60% opacity:
Finally, I added another brush on top in white to give it a more scratchy look:
>>
Nearly there! My last step was to create a new layer and fill the entire layer in white or black and then set it to saturation. This made everything under that layer back and white so it looks like this:
Here are the layers for info:
I hope this tutorial has been helpful!