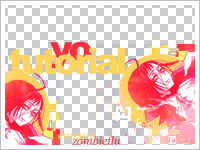
[zombieflu] tutorial! 002 → yo! tutorial
Not much to say about this tutorial, hope it’ll enlighten some of you ♥ Please don’t copy exactly and submit to icontests and such :<
I have no idea why I named the .psd yo… it just happened D:
Step: 01
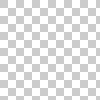
First things first, let’s create the pattern I used as the background of my icon. Or you can easily copy and paste this into an empty 16x16 canvas; go under Edit>Define Pattern, name it and press enter. If you’re interested in learning how to make this patter keep reading, If not go to the next step ♥~ What I did to get this pattern was open a new document, around 350x350 px. Size doesn’t matter as long as it’s big enough to see the squares the size you like. Take a screen shot to do this you need to find a button in your keyboard that says prt sc. It should be near the “F” buttons. Close the previous document, open a new one and paste the screen shot. Zoom on the pattern and with the marquee tool cut four squares like the image provided. Again, close that document and make a new one, paste, Edit>Define Pattern, name it and press enter. You can change the colors and make new patterns now that you have the base.
Step: 02
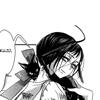
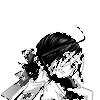
Find yourself an image, a manga scan is preferable. I haven’t tried using any other type of image so I wouldn’t know if it works. I‘ll be using Okino Mayoko from the series Zone-00, and this here is the original image. Clean your scan with level, brightness+contrast and crop it, then extract the lineart. This is done with the channels, go Window>Channels if the window is not anywhere in your workspace. Click on the dotted circle at the bottom, this selects the whites of your image. We want the blacks so reverse the selection by pressing SHIFT+CRTL+I. Create a new layer and fill that with pink and deselect.
→
→
Step: 03
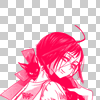
Create a new layer below the extracted image and fill it with your patter. Press SHIFT+F5, change the option to pattern and look for your patter in the custom pattern tab. It looks odd doesn’t it? Fill in the lineart with white, create a new layer below it and use the polygon lasso tool to go around the edges.
→
→
Step: 04
Get your circular marquee tool out (shift+m), on a new layer below the lineart make a wide circle and fill it with the same color of the lineart art. Create another layer, this time below the white layer and make a small circle in the center of the canvas; fill it with a complimentary color.

→
→
Step: 05
Next should be the easy part, the textures~

→
Place this texture below the white layer, and set it to Lighter Color
Texture by xsleeping_swanx; here

→
Place this texture above all the layers, set it to screen
Texture by cielo_gris; here
→
Extract the white of the texture first, pixel lock it and the color it.
Don’t understand? Head over to preparations: step 03
Texture by haudvafra; here

→
Set it on top of everything, again, to screen
Texture by expose42; here

→
Duplicate it so you have two, desaturate the first one and
set it to color then merge and set it to lighten.
Texture by vol4tica; here
→
Set it to screen
Texture by vol4tica; here
and we are done with the textures~
Step: 06
Almost done, what is left is to add the color adjustments.

→
Brightness+Contrast layer
B: -15; C: +11

→
Selective Coloring layer
R: c:+45, y: +25
Y: c: -41, y: +53, b: -12
C: c:+28, y: -25
N: c:+13, y: -18

→
Hue+Saturation layer
+32~
Step: 07
Final step, copy merge. Select your canvas (ctrl+a), ctrl+shift+c to copy merge and paste. Get the blur tool and start smudging places where it’ll look nice

Extra:

To get this, go Edit>Transfor>90*CC
And you’re done~
JOIN★RULES★TAGS★ RESOURCE
any questions? just ask them here.
Next tutorial should be up by next Monday or before.
Coding by leucchu
I have no idea why I named the .psd yo… it just happened D:

Step: 01
First things first, let’s create the pattern I used as the background of my icon. Or you can easily copy and paste this into an empty 16x16 canvas; go under Edit>Define Pattern, name it and press enter. If you’re interested in learning how to make this patter keep reading, If not go to the next step ♥~ What I did to get this pattern was open a new document, around 350x350 px. Size doesn’t matter as long as it’s big enough to see the squares the size you like. Take a screen shot to do this you need to find a button in your keyboard that says prt sc. It should be near the “F” buttons. Close the previous document, open a new one and paste the screen shot. Zoom on the pattern and with the marquee tool cut four squares like the image provided. Again, close that document and make a new one, paste, Edit>Define Pattern, name it and press enter. You can change the colors and make new patterns now that you have the base.
Step: 02
Find yourself an image, a manga scan is preferable. I haven’t tried using any other type of image so I wouldn’t know if it works. I‘ll be using Okino Mayoko from the series Zone-00, and this here is the original image. Clean your scan with level, brightness+contrast and crop it, then extract the lineart. This is done with the channels, go Window>Channels if the window is not anywhere in your workspace. Click on the dotted circle at the bottom, this selects the whites of your image. We want the blacks so reverse the selection by pressing SHIFT+CRTL+I. Create a new layer and fill that with pink and deselect.

→

→

Step: 03
Create a new layer below the extracted image and fill it with your patter. Press SHIFT+F5, change the option to pattern and look for your patter in the custom pattern tab. It looks odd doesn’t it? Fill in the lineart with white, create a new layer below it and use the polygon lasso tool to go around the edges.

→

→

Step: 04
Get your circular marquee tool out (shift+m), on a new layer below the lineart make a wide circle and fill it with the same color of the lineart art. Create another layer, this time below the white layer and make a small circle in the center of the canvas; fill it with a complimentary color.

→

→

Step: 05
Next should be the easy part, the textures~

→

Place this texture below the white layer, and set it to Lighter Color
Texture by xsleeping_swanx; here

→

Place this texture above all the layers, set it to screen
Texture by cielo_gris; here

→

Extract the white of the texture first, pixel lock it and the color it.
Don’t understand? Head over to preparations: step 03
Texture by haudvafra; here

→

Set it on top of everything, again, to screen
Texture by expose42; here

→

Duplicate it so you have two, desaturate the first one and
set it to color then merge and set it to lighten.
Texture by vol4tica; here

→

Set it to screen
Texture by vol4tica; here
and we are done with the textures~
Step: 06
Almost done, what is left is to add the color adjustments.

→

Brightness+Contrast layer
B: -15; C: +11

→

Selective Coloring layer
R: c:+45, y: +25
Y: c: -41, y: +53, b: -12
C: c:+28, y: -25
N: c:+13, y: -18

→

Hue+Saturation layer
+32~
Step: 07
Final step, copy merge. Select your canvas (ctrl+a), ctrl+shift+c to copy merge and paste. Get the blur tool and start smudging places where it’ll look nice

Extra:

To get this, go Edit>Transfor>90*CC
And you’re done~
JOIN★RULES★TAGS★ RESOURCE
any questions? just ask them here.
Next tutorial should be up by next Monday or before.
Coding by leucchu