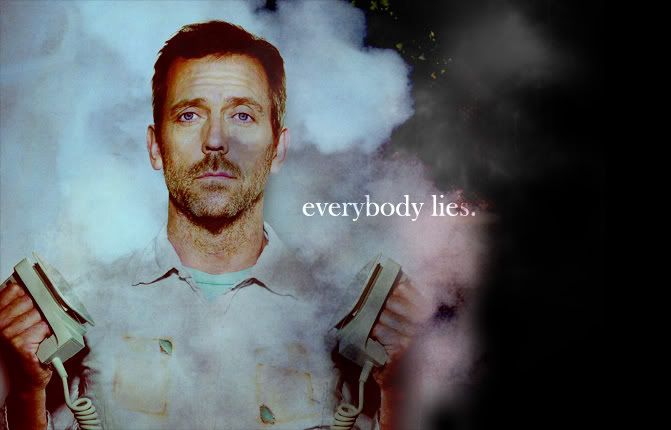
Banner tutorial/psd
I made this banner last year, I don’t think I ever posted it!

But here it is with a tutorial!
001. Crop your picture and get it the size you’d like for your banner. Mine is 671x430
002. Selective colour layer:
Reds: -100, +30, +100, 0
Yellows: -57, +13, +17, 0
Neutrals: +23, 0, 0, 0
003. Another selective colour layer:
Reds: -100, 0, 0, 0
Yellows: -100, +5, -24, 0
Cyans: +35, -100, -100, 0
004. Last selective colour layer:
Reds: +16, 0, 0, 0
Yellows: -61, -41, 0, 0
Cyans: +100, +24, -100, 0
005. Add a colour fill layer with #E2FAF9 and set to colour burn %100.
006. Make another colour fill layer with #260202 and set to exclusion %100. Duplicate this layer and set to %40.
007. Duplicate base, drag to top and set to soft light %100.
HERE is the PSD with the colouring.
008. Flatten your image. (Layer-merge visible or shift-ctrl-E)
009. Make a new document the same size as your banner.
010. Fill the background with black # 000000
011. Put this texture on by tralala_icons set to normal %100. I resized and sharpen this so it could fit my banner correctly; you may or may not have to do this. Then erase the flat part on the bottom right corner with a soft rounded eraser brush. Adjust size of eraser to your liking.
012. Drag your picture on top, and set it to multiply %100
013. Then add this texture by ? (if it is yours let me know!) And set it to screen %100

014. Then you can add text with a font of your choice, I used the font Baskerville Old Face, and set it to overlay %100.
And you’re done!
Here is the PSD!
NOTE: You need to download both psds to complete banner.
Let me know if something makes no sense!
Hope this tutorial was helpful :)