Tutorial [leave this public!]
Program: CS
Translatable: Most likely
**From:

To:

**= I know the way the base is cropped looks dif. from the final. It's because I forgot to save it before I edited it haha. So just ignore that part.
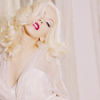
To start off, crop your base to 100x100 pixels.

Once you have your base go to layer >> new adjustment layer >> levels.

Set your input levels levels to 1, 1.25 [see pic below]

Next, go to layers >> adjustment layers >> curves

Okay, for this one it really depends on the pic. If your pic isn't too dark [like the one I'm using for this tut] then set the input & output as follows. However, if your pic is darker then set the output higher [anywhere from 150 - 180]. -BUT- regardless of how dark your image is, leave the input as is.

INPUT; 102
OUTPUT; 140
Next, go to layers >> adjustment layers >> hue/saturation

Set the saturation to +44

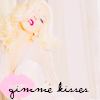
Next, add your brush [i got my lip brushes from deviantart.] Place it where ever you'd like.
Lastly add your text a little bit below the brush. [I used Violation, which you can download here]

Well, there ya go! I know this is a simple tut but the end results are nice anyhow.
Pleeeeaaase comment here with results! Those are fun to see
Also, if you have any questions let me know. If the pics can't be seen let me know & I'll re-upload them.
Like this? Please join for more graphics and tutorials :]