My very first tutorial :)
spg-spn-girls asked me how i made this icon 
We are going to take this cap
and turn it into this
So this is how i make an icon, I open up Photoshop and ImageReady and I go to Imageready, open my cap up and resize it down. I open up a new 100x100 transparent base and drag the cap into it, positioning to my liking. Then i click the Edit in Photoshop button at the bottom of your tools bar and it takes your base right into Photoshop.
Now you have your base. I sharpened the image (filter>sharpen>sharpen). It was to sharp so i went to Edit>Fade Sharpen and lowered the opacity to 50.
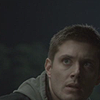
We are going to give it a curves layer (layer>new adjustment layer>curves) and put these numbers in.
Input:117
Output:154
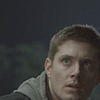
Now duplicate that curves layer and lower the opacity to 60%
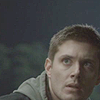
Another curves layer (the last one) and put in these numbers
Input:100
Output:150
Set this layer to Soft Light.
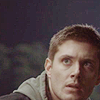
Now for some color. Go to Layer>Adjustment layer>Color Balance and put these numbers in
Midtones: +22, +4, +16
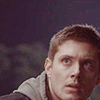
Make another color balance layer and put these numbers in
Midtones: +5, -9, -16
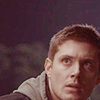
Your going to go back to your base and duplicate it and drag it to the top and set it to Soft Light.
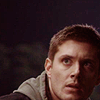
Flatten the image and now we are going to blur the background. I learned how to blur a background from this tutorial
Duplicate your base and go to Filter>Blur>Glaussian Blur and put in 9.0 in the radius. Erase the blur that is over Jensen. On your blurred layer go to filter>blur>glaussian blur again and put in 5.0 in the radius. Duplicate that layer and lower the opacity to 50%. Flatten your image and your all done.

Play around with the opacity to fit your icon and if you use this tut i would love to see your results.

We are going to take this cap

and turn it into this

So this is how i make an icon, I open up Photoshop and ImageReady and I go to Imageready, open my cap up and resize it down. I open up a new 100x100 transparent base and drag the cap into it, positioning to my liking. Then i click the Edit in Photoshop button at the bottom of your tools bar and it takes your base right into Photoshop.
Now you have your base. I sharpened the image (filter>sharpen>sharpen). It was to sharp so i went to Edit>Fade Sharpen and lowered the opacity to 50.

We are going to give it a curves layer (layer>new adjustment layer>curves) and put these numbers in.
Input:117
Output:154

Now duplicate that curves layer and lower the opacity to 60%

Another curves layer (the last one) and put in these numbers
Input:100
Output:150
Set this layer to Soft Light.

Now for some color. Go to Layer>Adjustment layer>Color Balance and put these numbers in
Midtones: +22, +4, +16

Make another color balance layer and put these numbers in
Midtones: +5, -9, -16

Your going to go back to your base and duplicate it and drag it to the top and set it to Soft Light.

Flatten the image and now we are going to blur the background. I learned how to blur a background from this tutorial
Duplicate your base and go to Filter>Blur>Glaussian Blur and put in 9.0 in the radius. Erase the blur that is over Jensen. On your blurred layer go to filter>blur>glaussian blur again and put in 5.0 in the radius. Duplicate that layer and lower the opacity to 50%. Flatten your image and your all done.

Play around with the opacity to fit your icon and if you use this tut i would love to see your results.